Nik’s Greene & Greene Doorbell Cover
Viewer Project
-
By Nik Brown from Canton, OH
Added on May 31, 2012
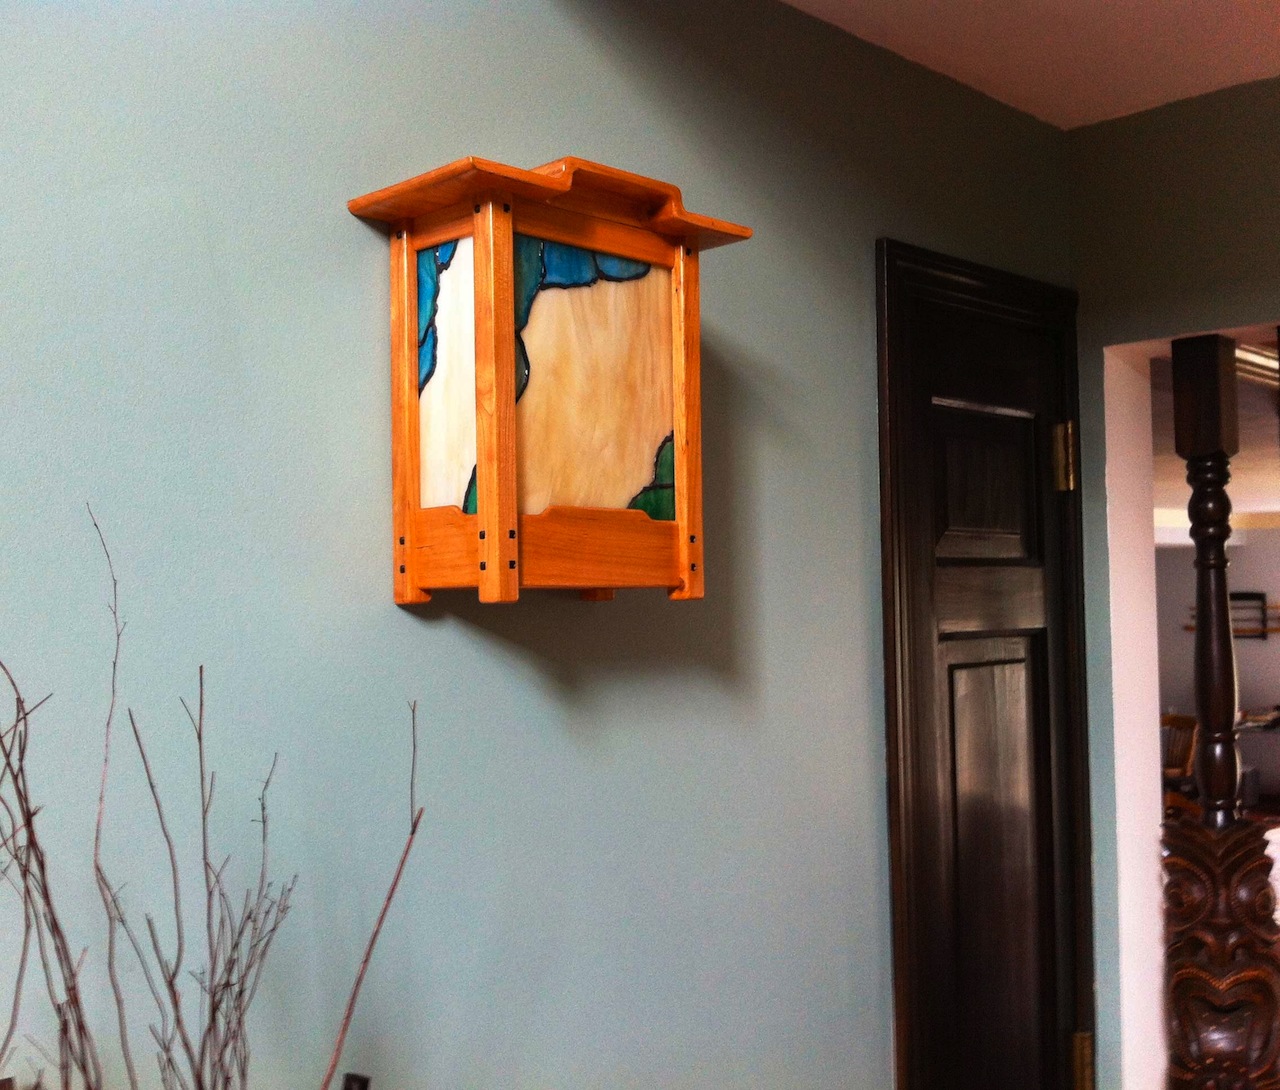
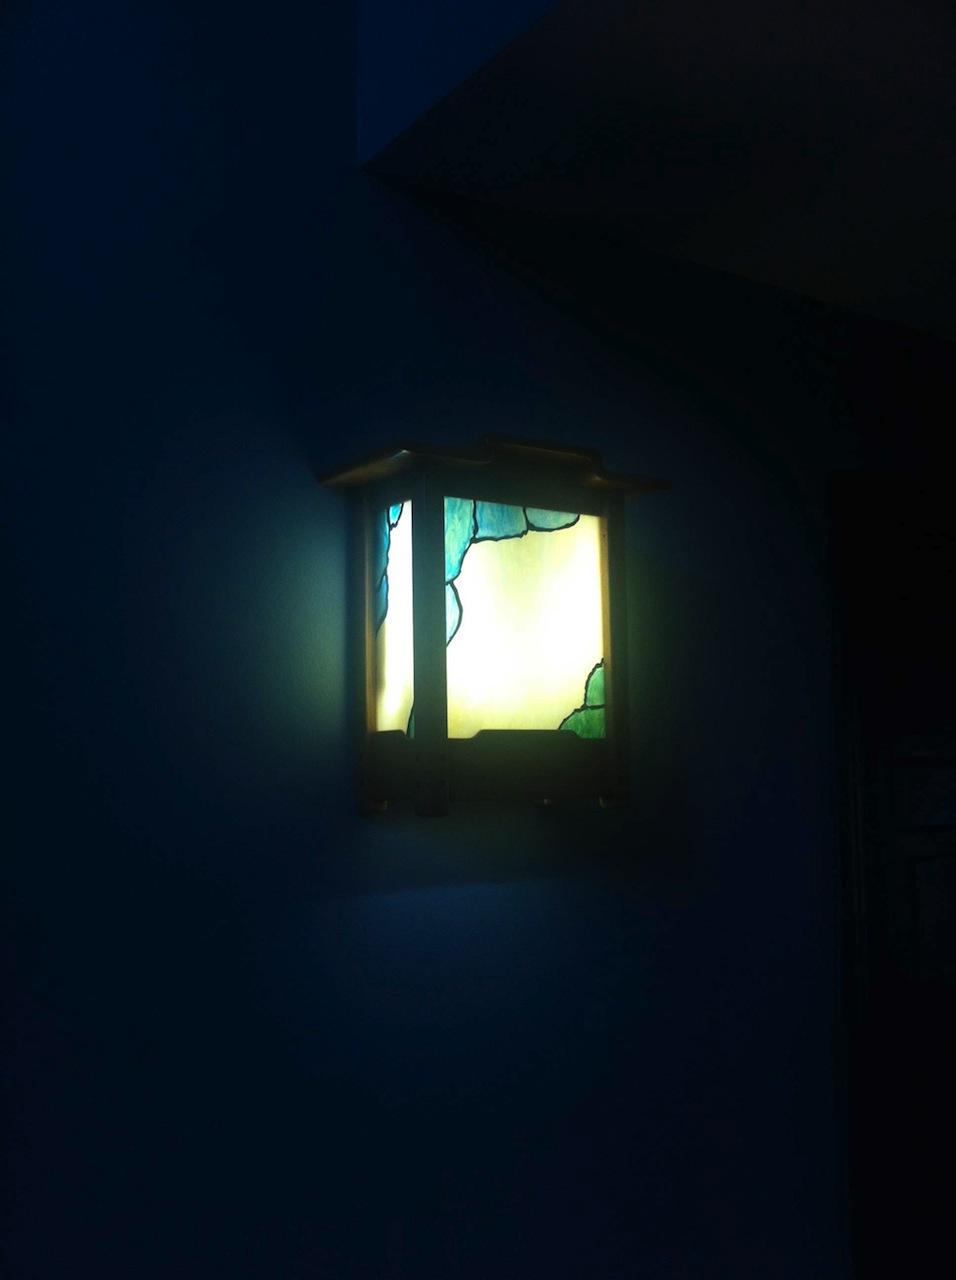
During our recent entrance way renovations, I had a lot of time to develop a hatred of the look of our doorbell. It’s a hunk of plastic covered in gaudy designs.
Having been long inspired by the Greene & Greene wall sconces I decided to embark on making my own as a cover to the doorbell hardware. I’m NOT a stained glass artist and as I looked at what went into making a piece I realized I didn’t have the time to learn (on this project, but I’ll definitely do so in the future).
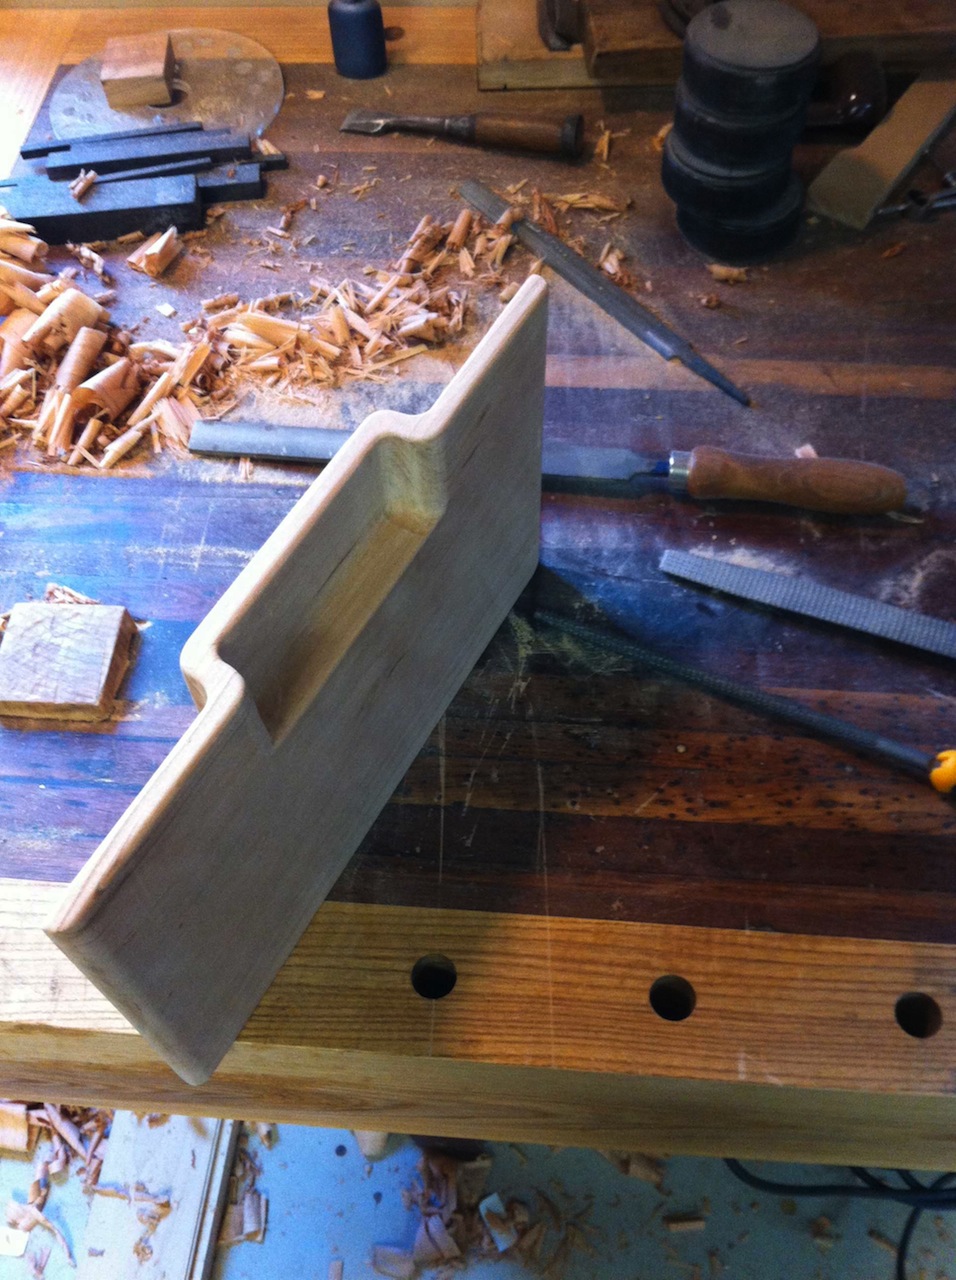
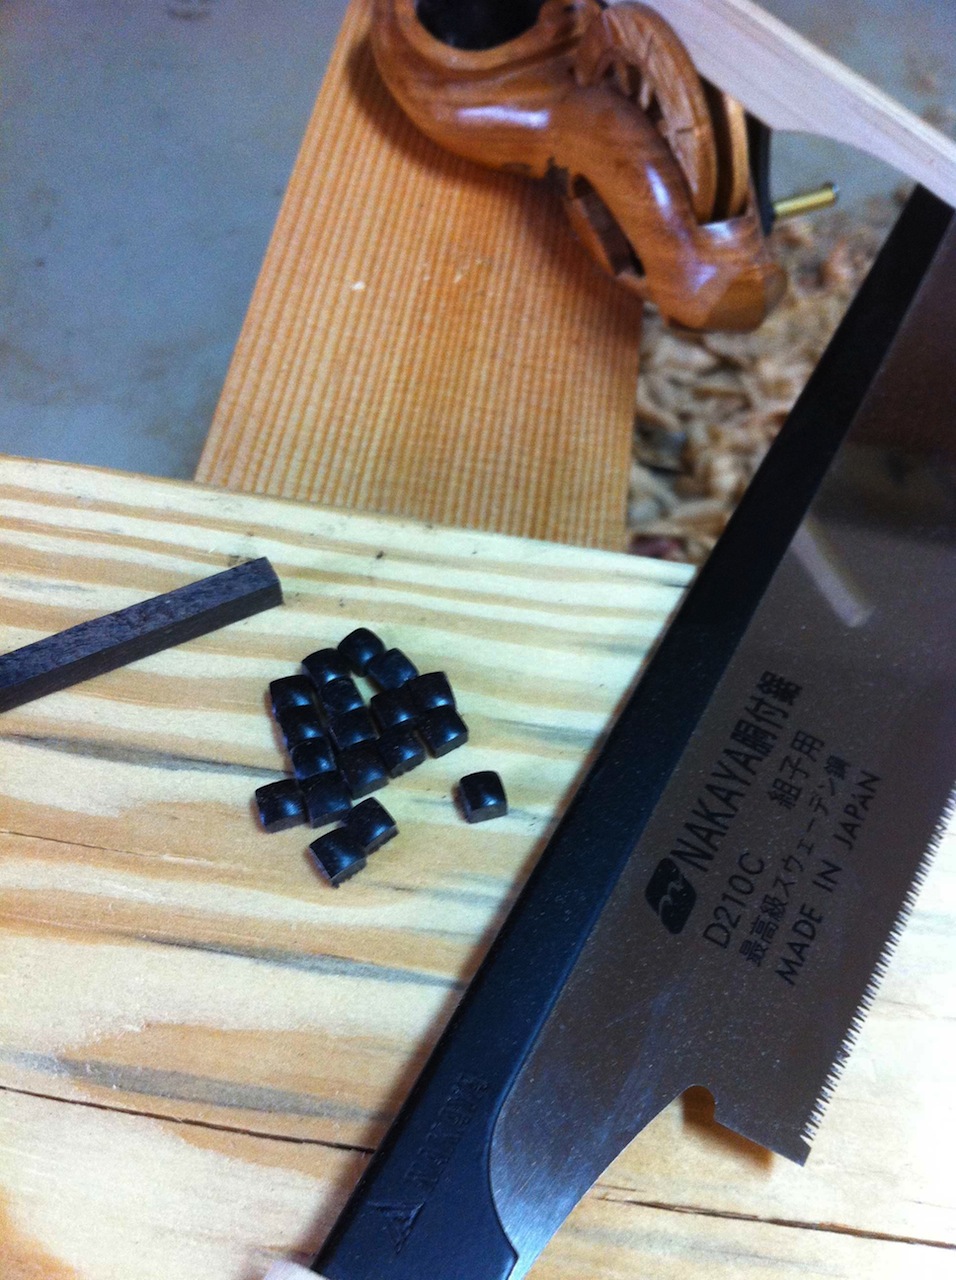
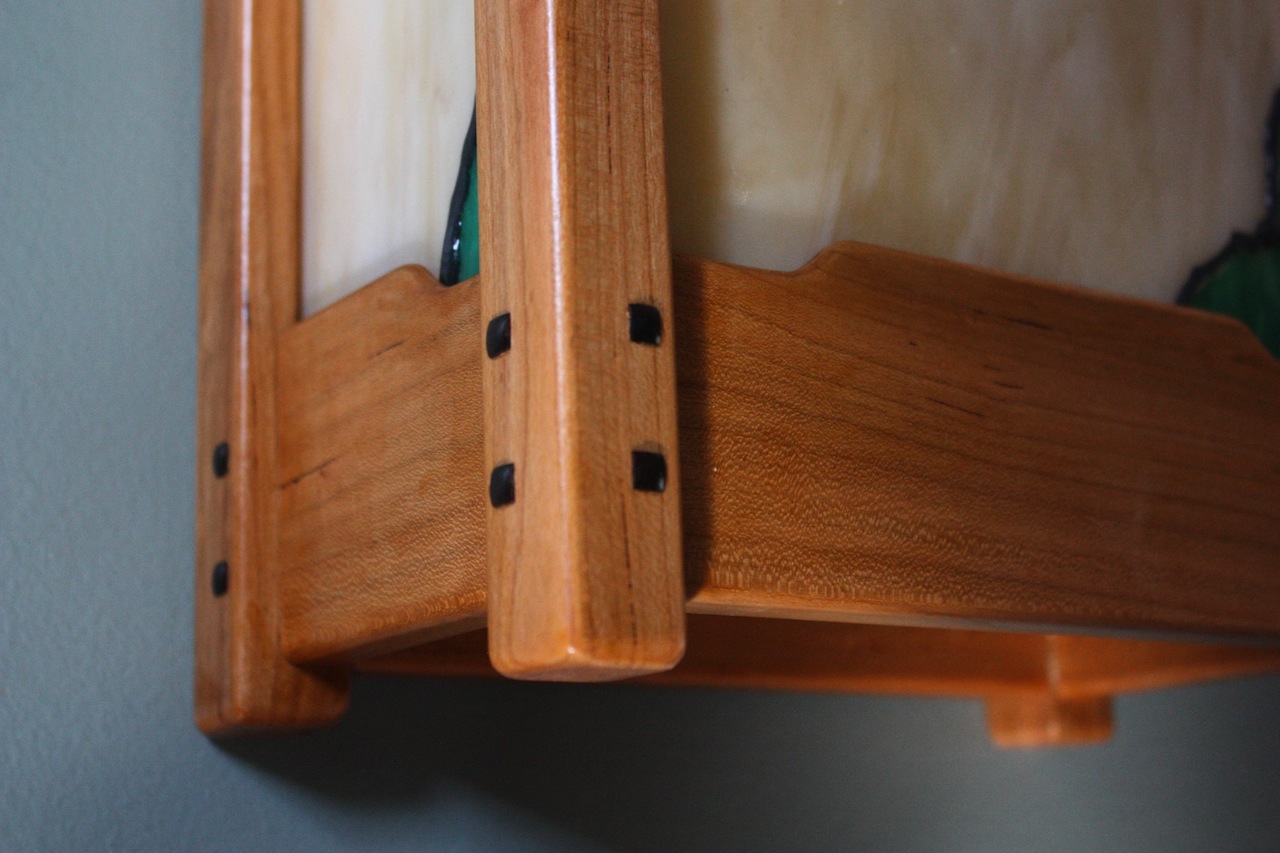
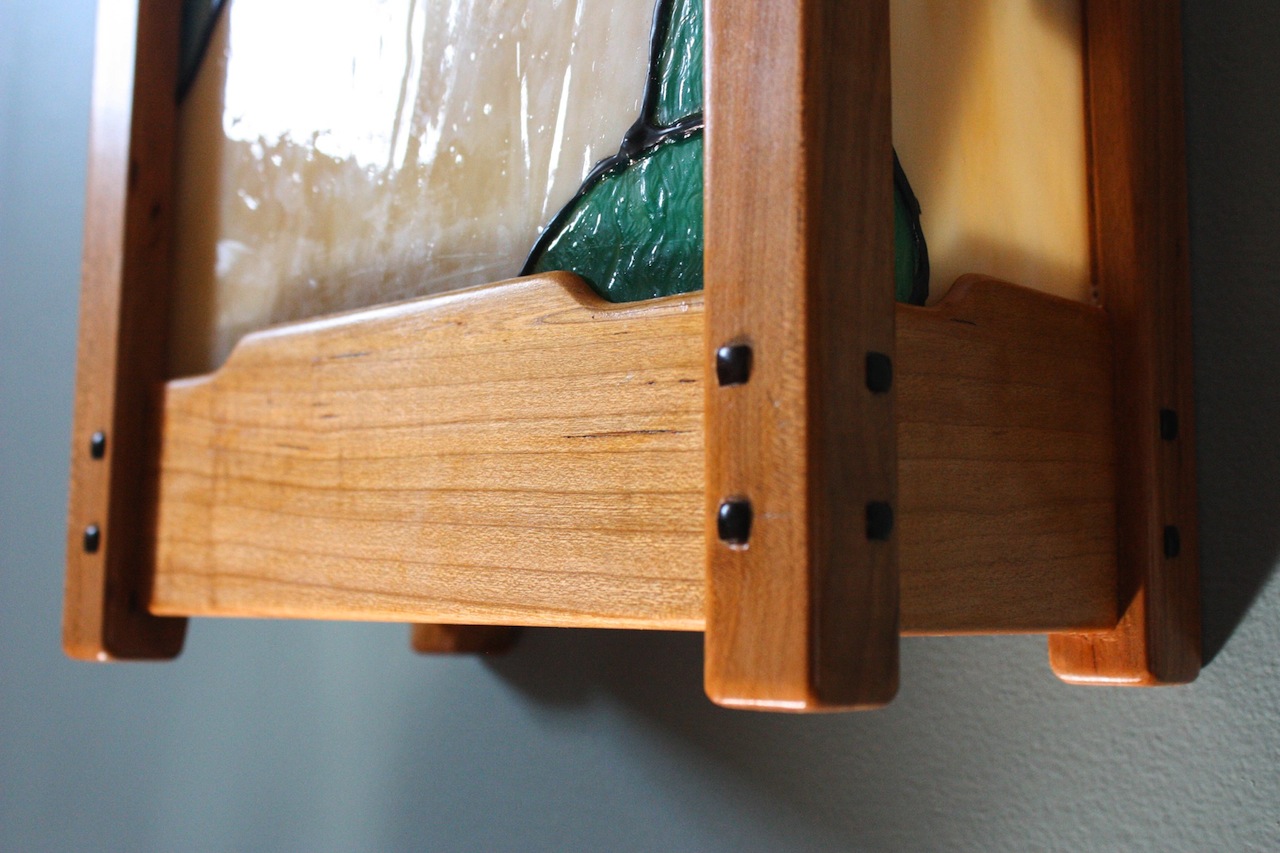
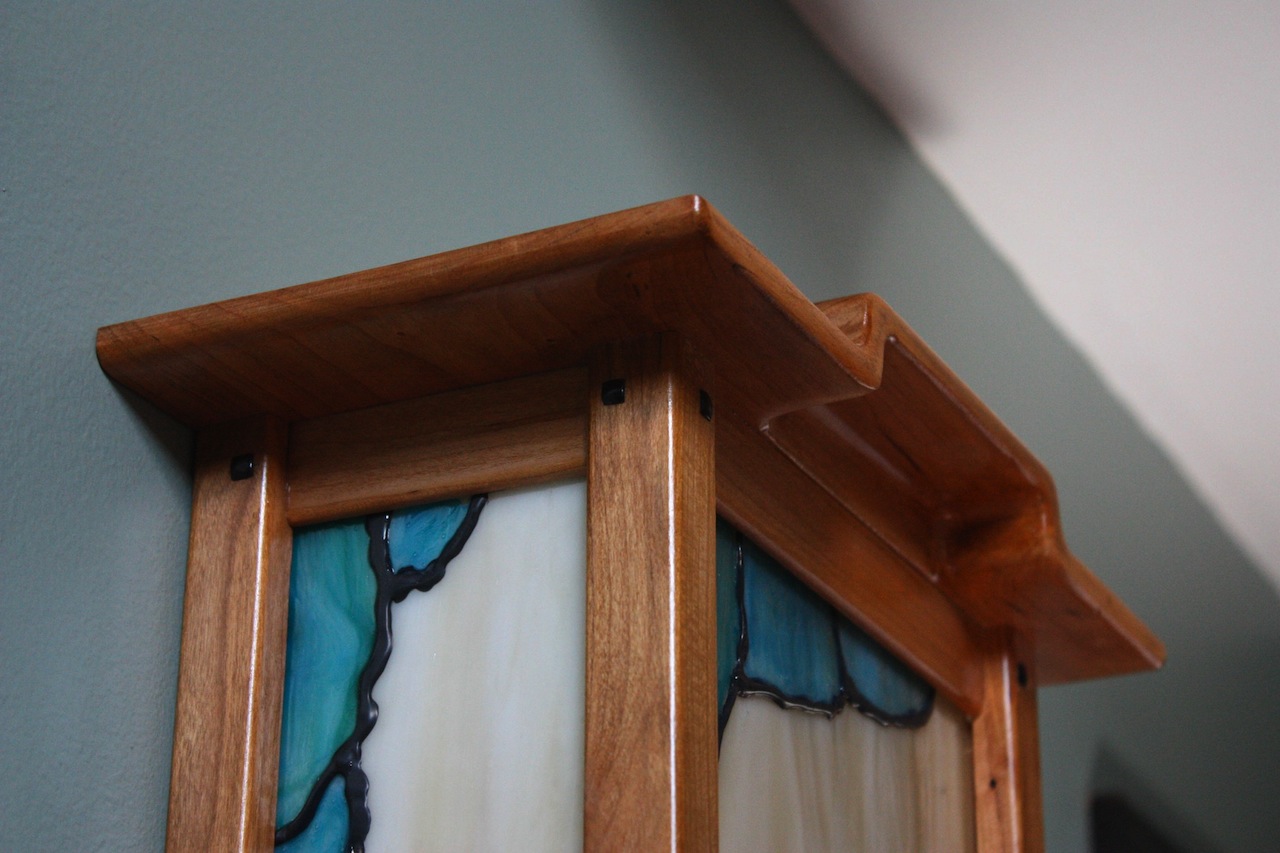
The Wood: The wooden parts of the sconce are your basic Greene & Greene woodworking. It’s all just frame and panel constructions with groves, mortises and tenons. The lighter wood is my standard Cherry with liberal used of ebony plugs. I had to batch out 18 ebony plugs for this project. The video by William Ng is invaluable in speeding up this process!!!). I carved the top out of a solid block of Cherry utilizing a router, rasps and carving chisels.
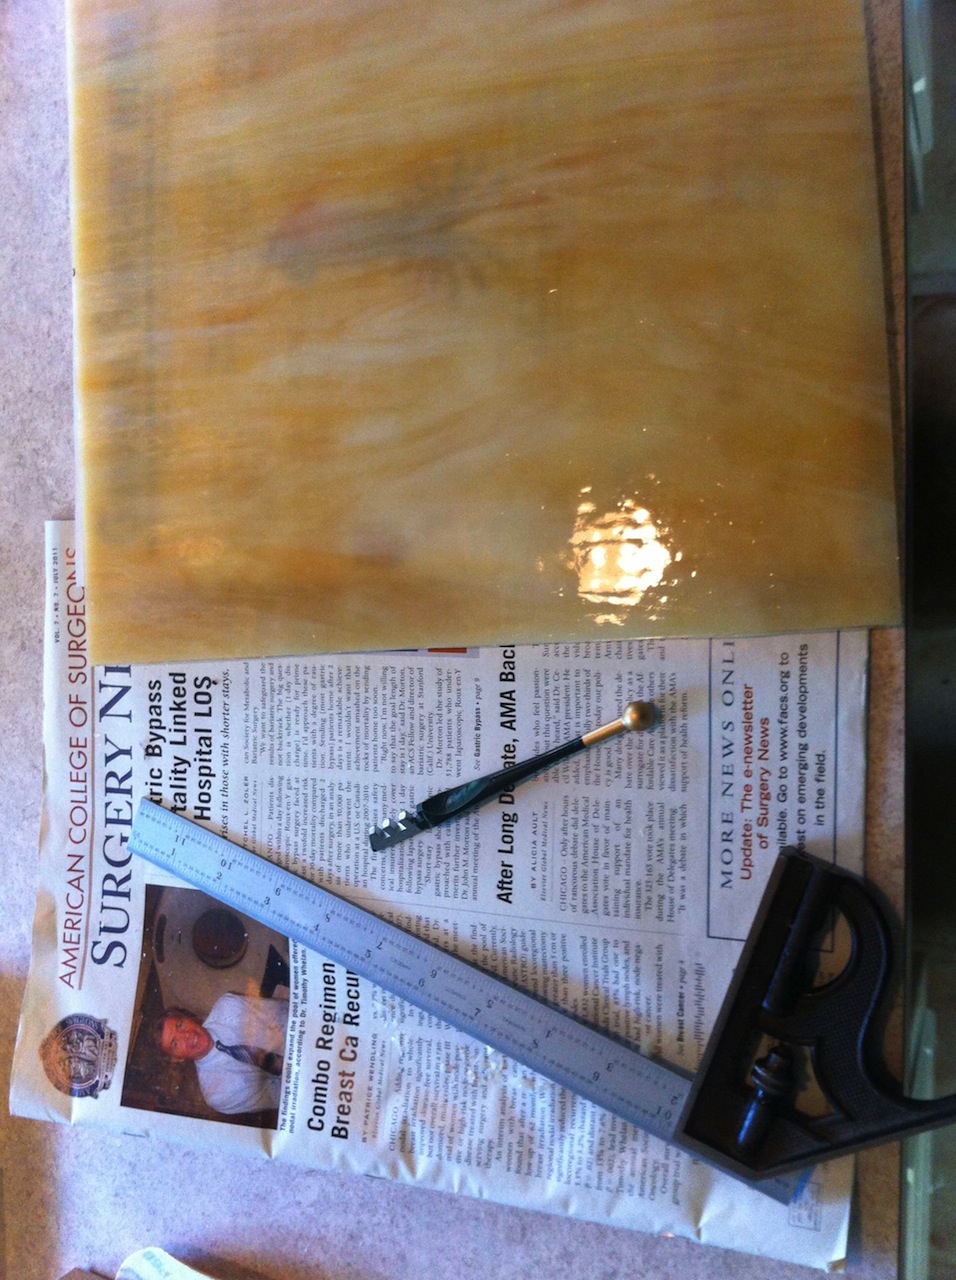
The Glass: In our last house the former owner did some wonderful stained glass looking artwork on a number of windows utilizing a product called Gallery Glass. Would this product fool someone who knows stained glass? Not even close! But it really does come out nice looking, and unless someone looks really close it’s very hard to spot that it’s not the real thing. So I picked up some stained glass for my base piece and used the Gallery Glass as color gels on top of it.
As for lighting…since I’m using this as a doorbell hardware cover I didn’t have room for any kind of traditional bulb. So instead I used a LED Flexible Light Strip and a 30 Watt 12v LED Power Supply Driver. I cut a hole in the wall behind the doorbell hardware and stashed the transformer inside the wall and ran a 110v line to it from a nearby outlet. After that it was just a matter of peel and stick the LEDs to the doorbell hardware and cutting to length.
Advertisers


