Looking for Part 1? Go here. — Support TWW on Patreon!
Download the Plans
- SketchUp Plan
- PDF Plan and Cut List V2
- SketchUp Plan (Metric)
- PDF Plan and Cut List V2 (Metric)
- Purchase a Lumber Kit for this project
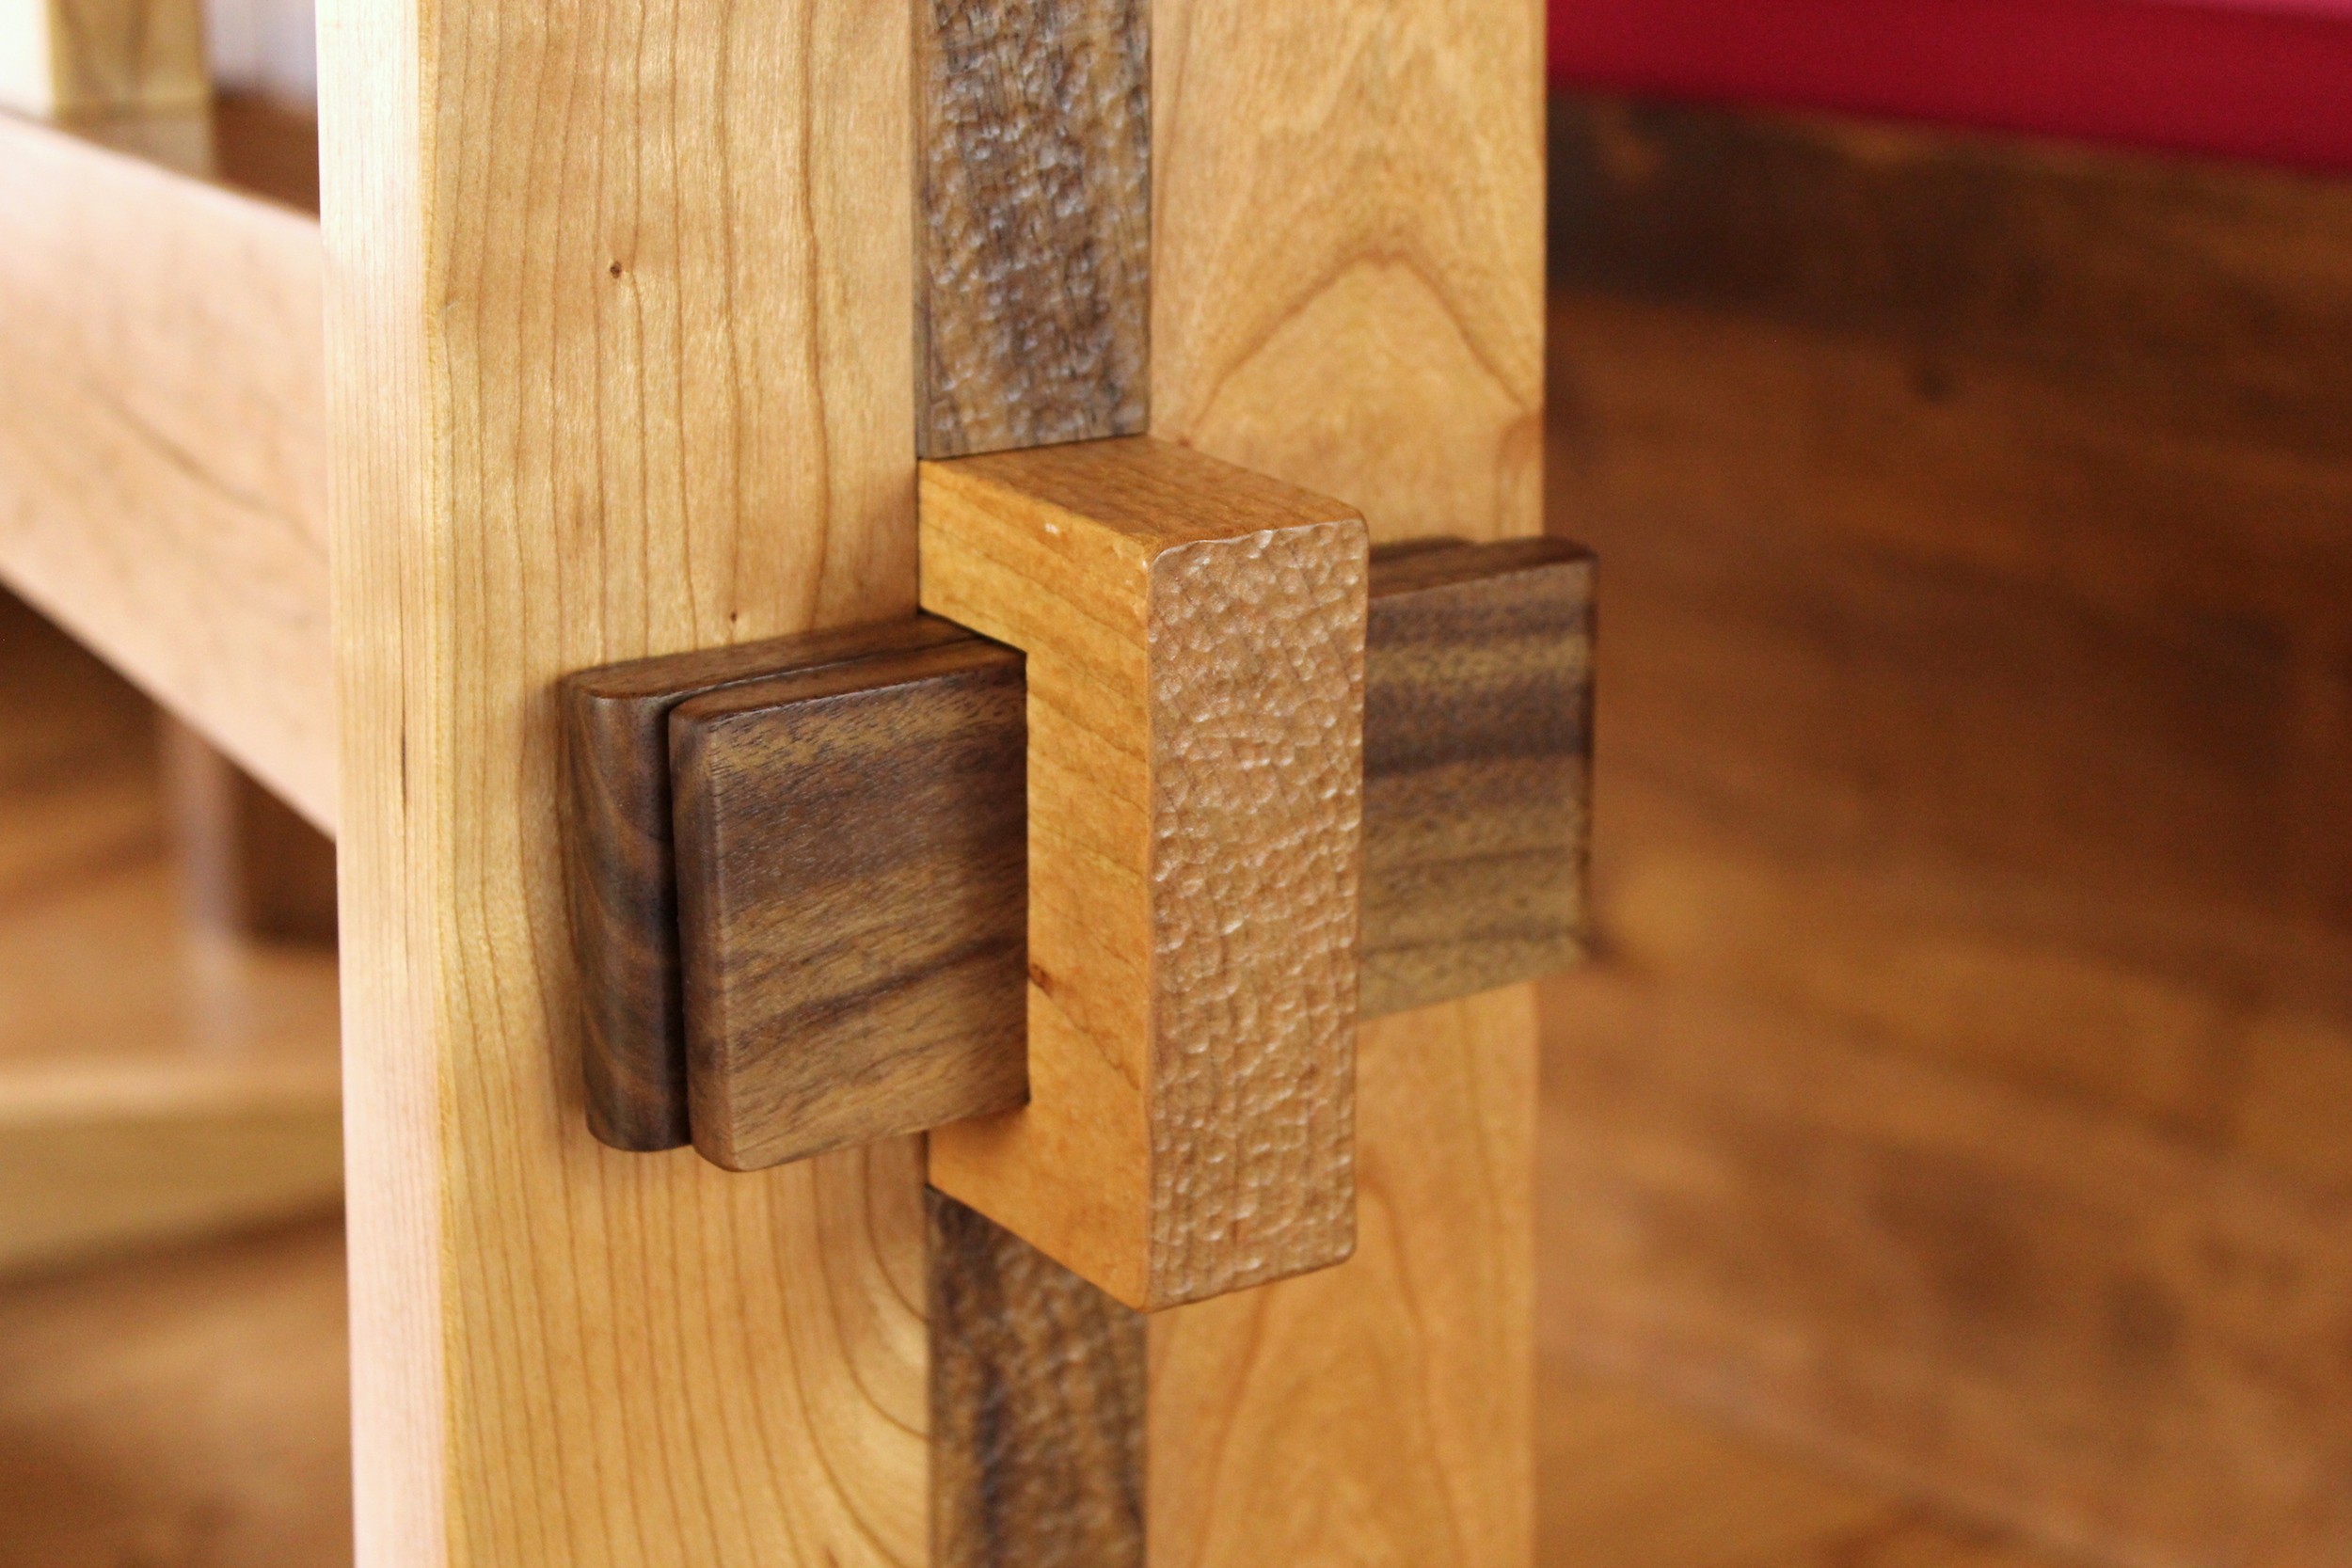
Braces
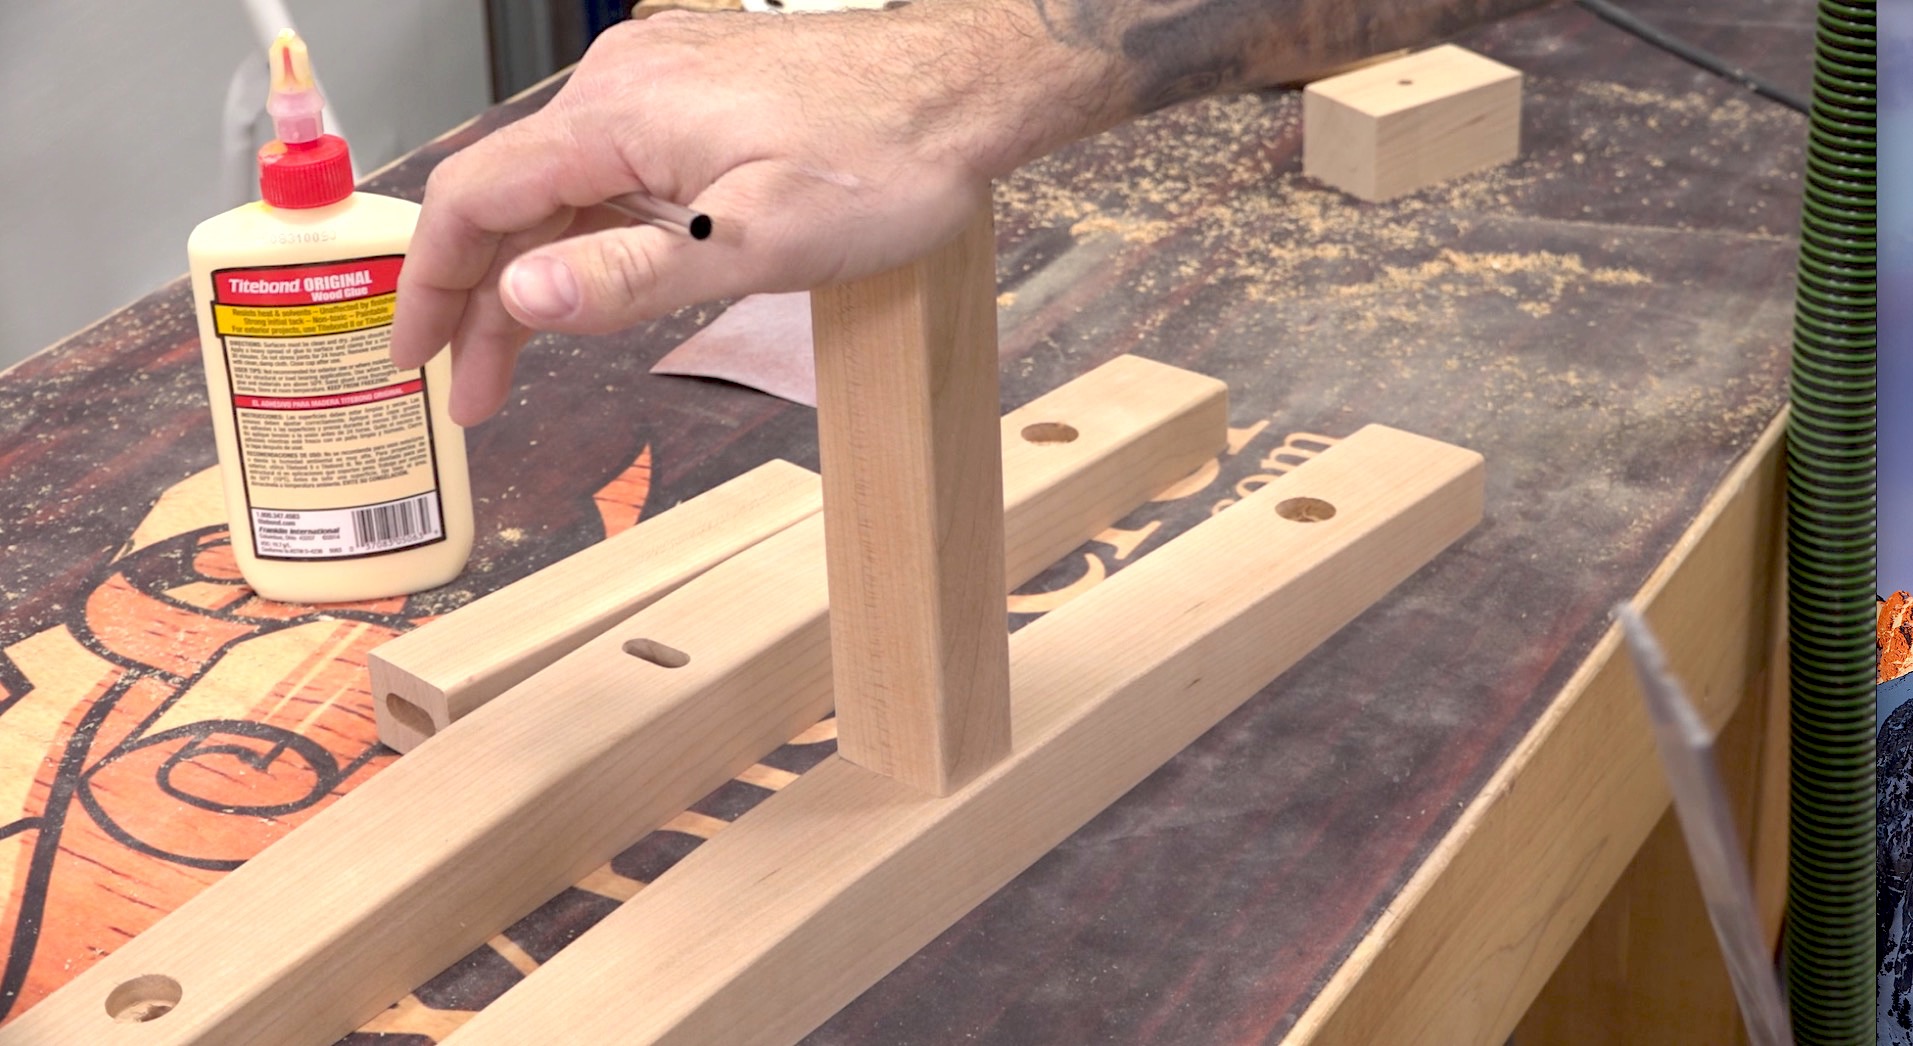 This table is perfectly sturdy without adding additional braces (or cleats) in the middle. But they do offer additional stability and will also assist in keeping the top flat. Furthermore, they add some extra visual interest that you won’t see on many trestle tables. They are sized by dry-fitting the parts and getting the exact measurements from the base itself. The braces themselves are tapered and drilled just like the outer braces.
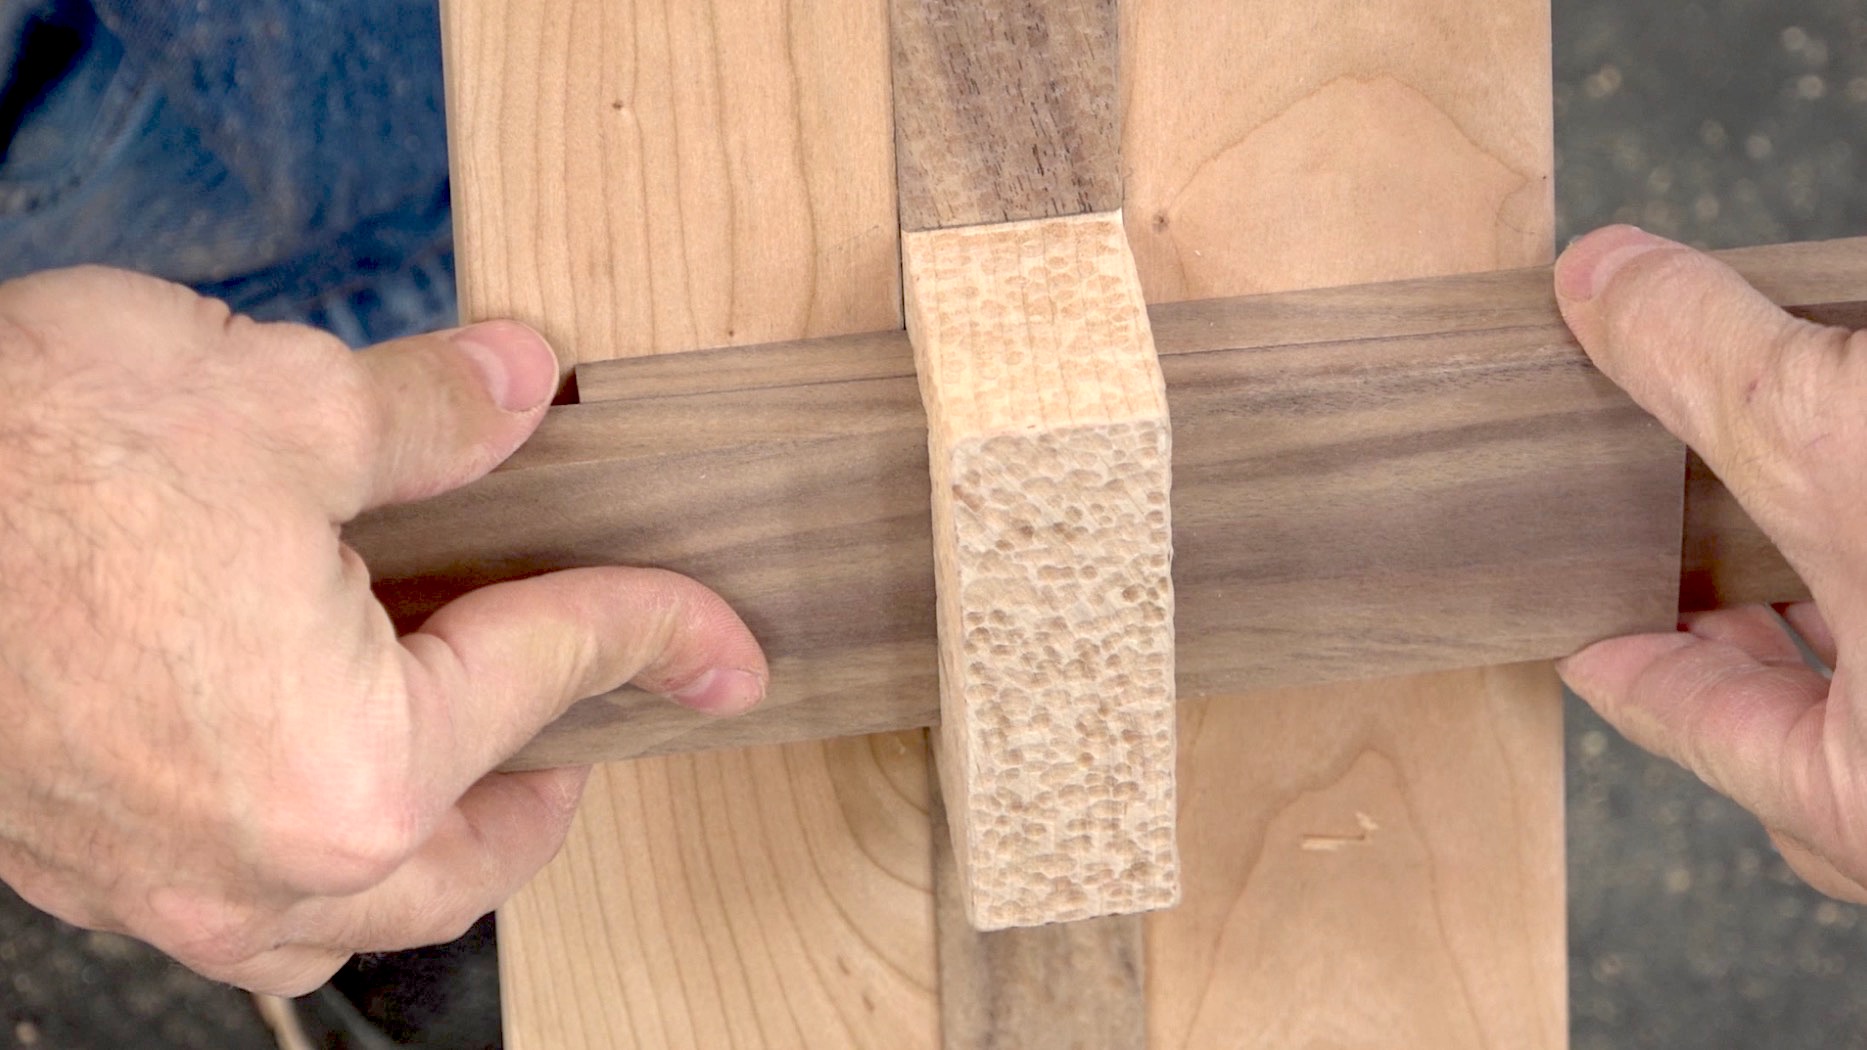
I used the Domino to create the mortises for these parts but the plans assume you don’t have the Domino and feature traditional mortise and tenon joints. You could also substitute two dowels at each joint. However you join them, consider only gluing the vertical post into the brace, and skipping the glue where the vertical piece meets the rail. Someone suggested this to me online and I thought it was a great idea simply because it allows the table to be taken apart and transported easily. And these braces don’t need glue to do their job.
Wedges
 The wedges start as blanks of dimension 8″ L x 2 1/4″W x 5/8″ T. A taper is then cut from one corner to a 3/8″ mark at the other corner. From there the wedges can be fit and trimmed to your liking. I like having bothe wedged fitting within the width of the legs but with a staggered appearance. To get that effect, you can do what I did in the video or trim you wedges to the dimensions listed in the plan.
The Top
 The top dimension is 68″L x 38″ W. While you generally want to size your top based on traditional proportion appropriate for the table itself, my design is more about custom-fitting a table for the space. So if 68″ x 38″ sounds a little odd, that would be why. I’m also using 5/4 stock for my top because I’d like to have a finished thickness of 1″. You could certainly use 4/4 for this and end up with a 3/4″ to 7/8″ top.
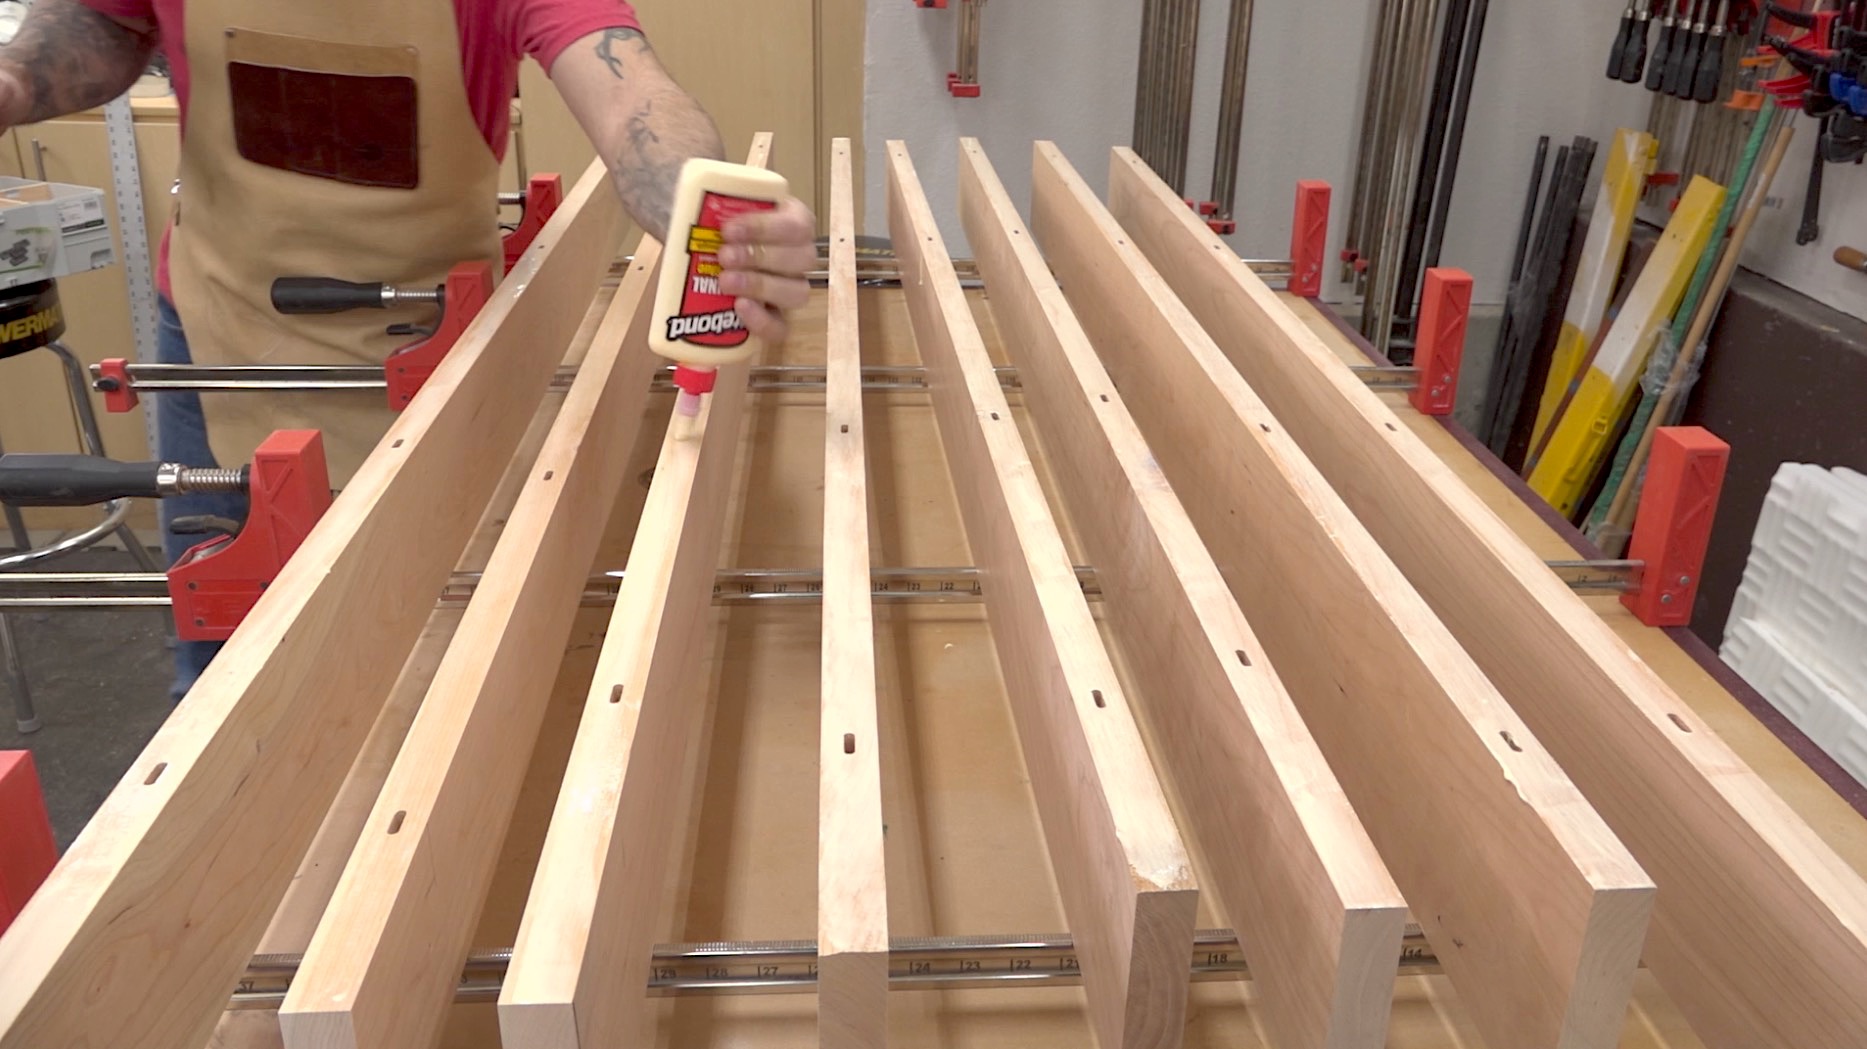
I had to use eight boards to get the width I needed, so arranging the grain is something of a futile exercise. I simply cut my boards around flaws and oriented in a way that looked decent to my eye. Once glued up, gentle curves are cut on all sides using a jigsaw. You can use thin pieces of scrap stock to draw the curves or use a purpose-built drawing bow.
The Finish
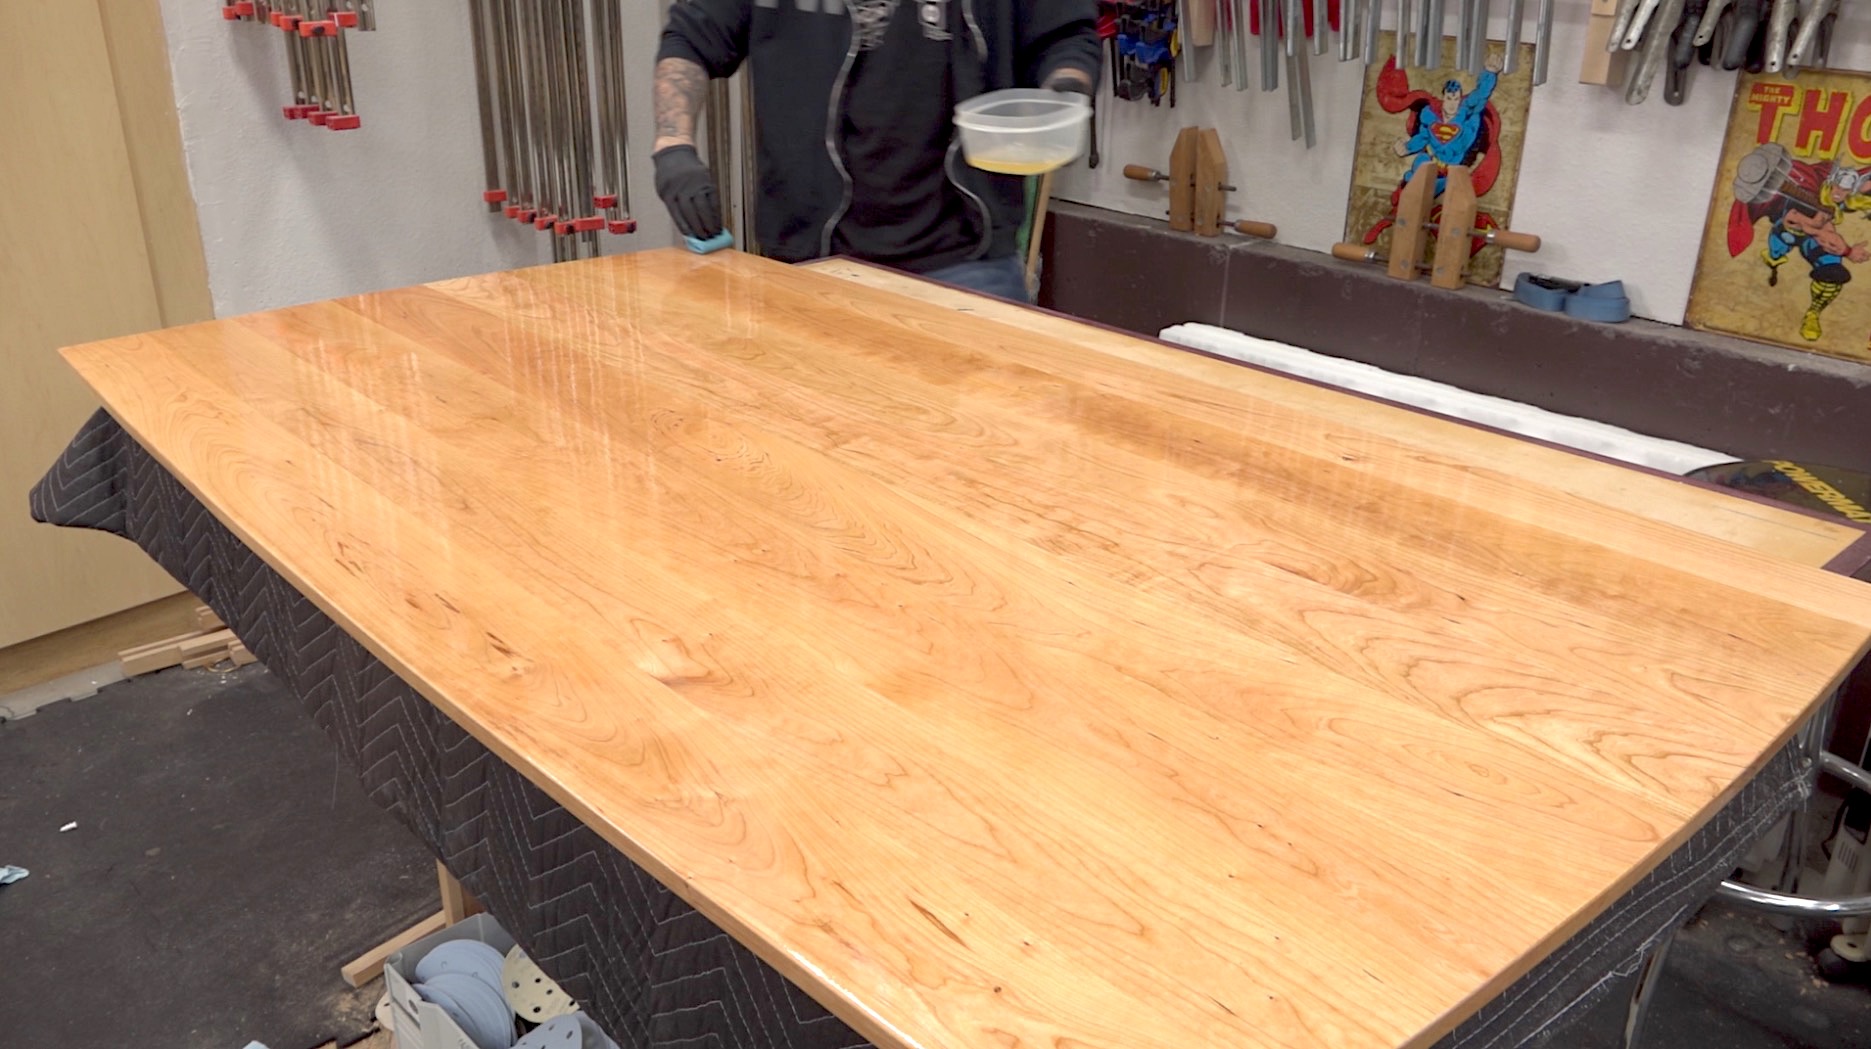 I’m using Minwax Wipe-On Poly for the finish. While many people don’t like the look of polyurethane, if applied with care and in thin layers, it can actually look really nice. I’m using a satin formulation and after the final coat cures, I employ a buffing process that utilizes 400 grit Platin (these are incredibly expensive but can be used more than once) abrasives and a mineral oil/mineral spirits mixture.
Wood Whisperer Thread Taps
 To attach the top to the base I’ll be using classic 1/4″ connector bolts and thread taps. The holes are tapped to a depth of about 5/8″-3/4″. The bolts are then driven in to secure everything in place.
Gallery
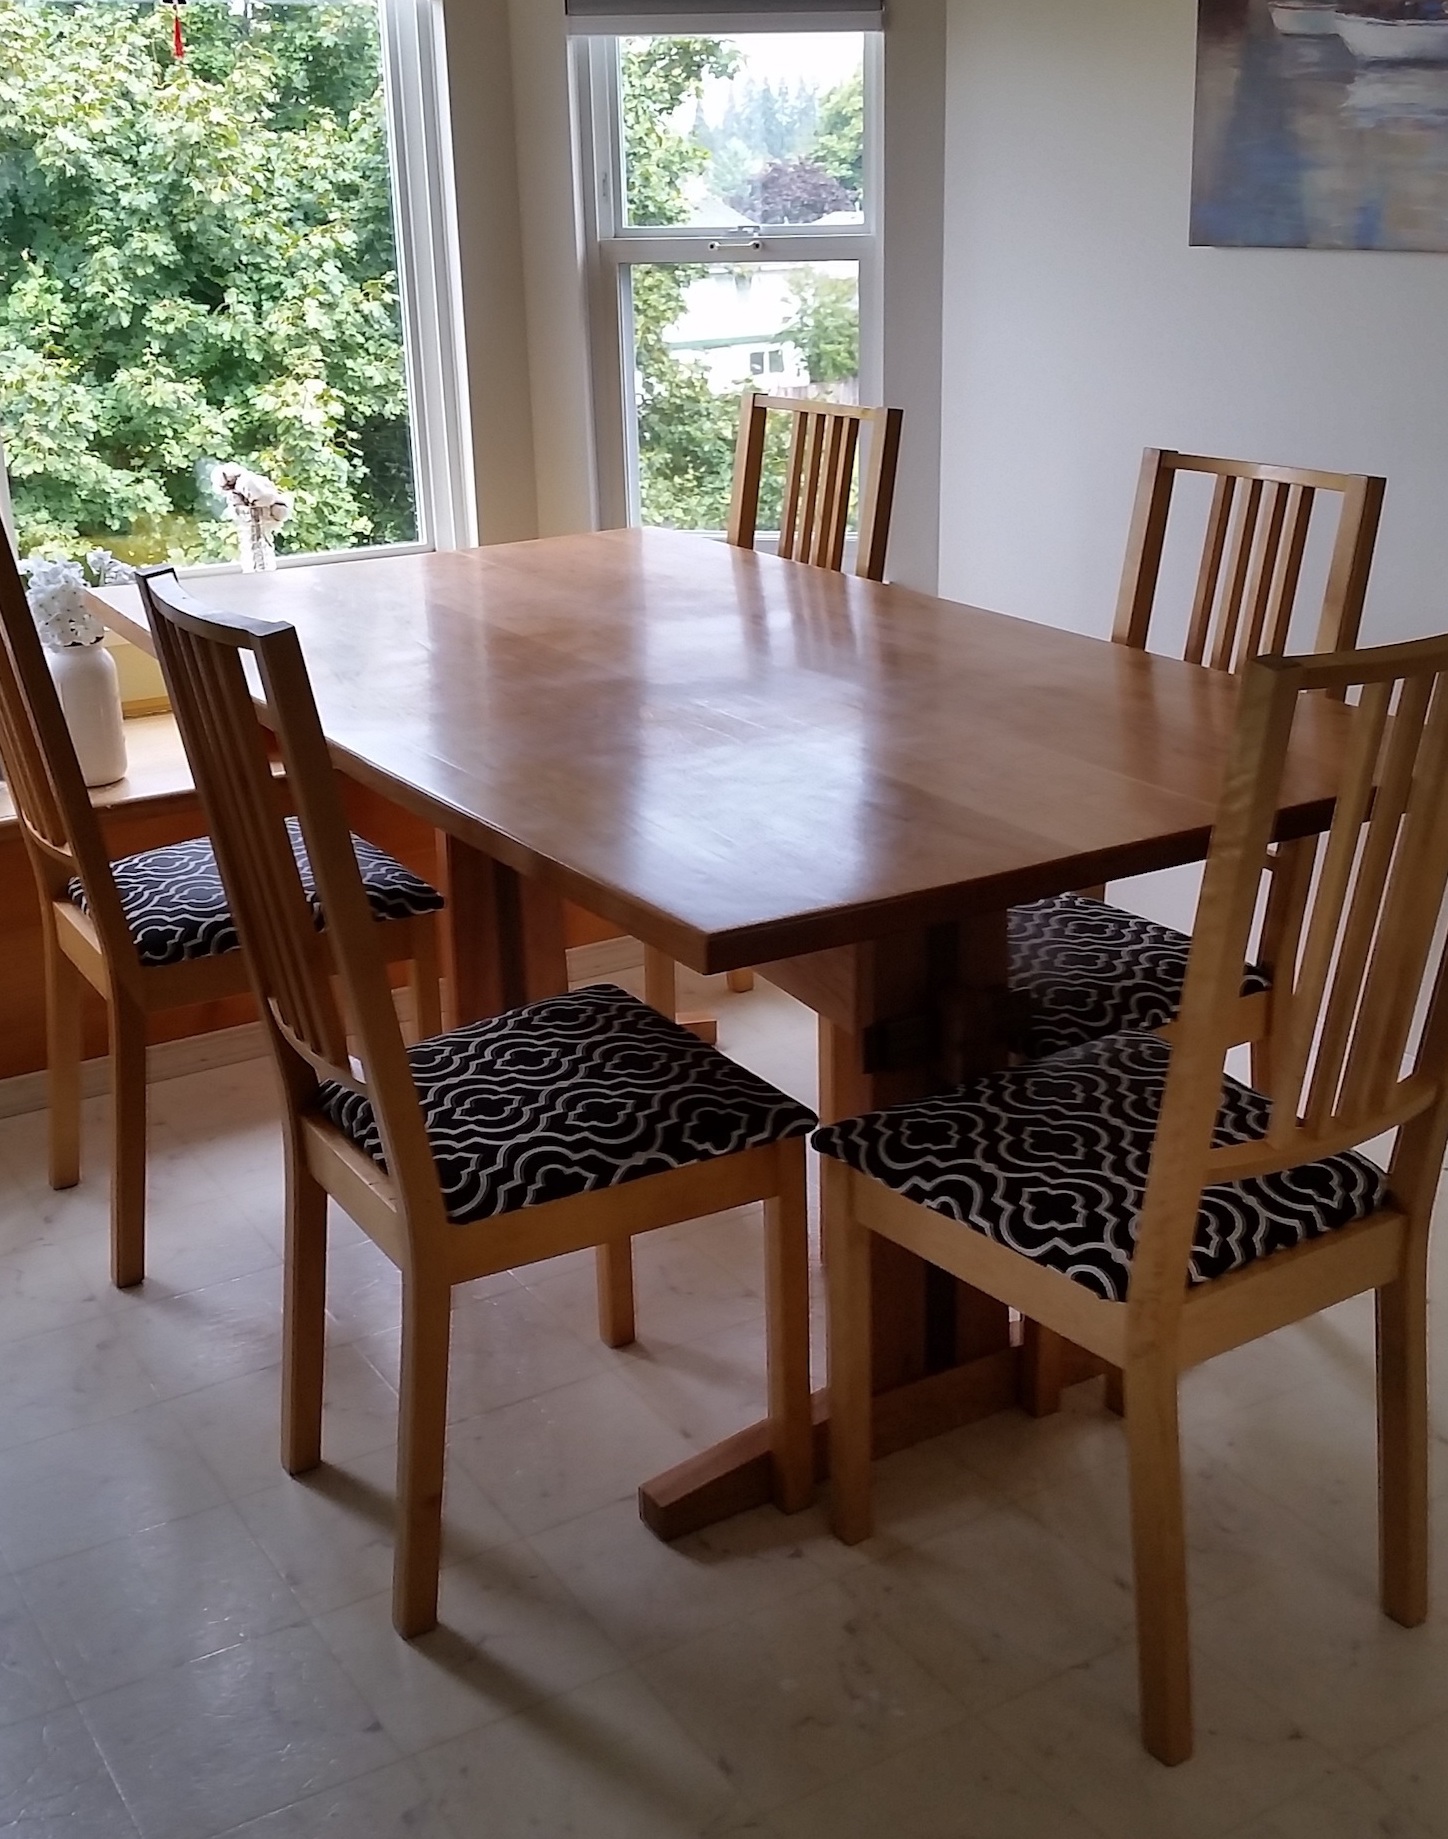
Here’s the final table in place in the kitchen. So far, the family absolutely loves it!


Viewer Gallery