Rusty’s Tool Cabinet
Viewer Project
-
By Rusty Burwell from South Orange, NJ
Added on January 2, 2012
I’ve got a 1 car garage shop that is only a shop when the wife’s car is not in it. Lots of bench top tools and rolling carts. I’ve been ramping up my skills and tools the last couple of years after discovering Marc, Whispering and the Guild – all which give me inspiration and more importantly – hope.
I’ve built some cedar patio furniture, some small porch tables and lots of napkin holders. Following Marc’s always good advice, I took a one-week beginning woodworker class from the nearby Philadelphia Furniture Workshop in the summer of 2009 and had a ball working in a real shop with lots of incredible tools and, most importantly, expert guidance. The result was a great little walnut coffee table and a lot more confidence.
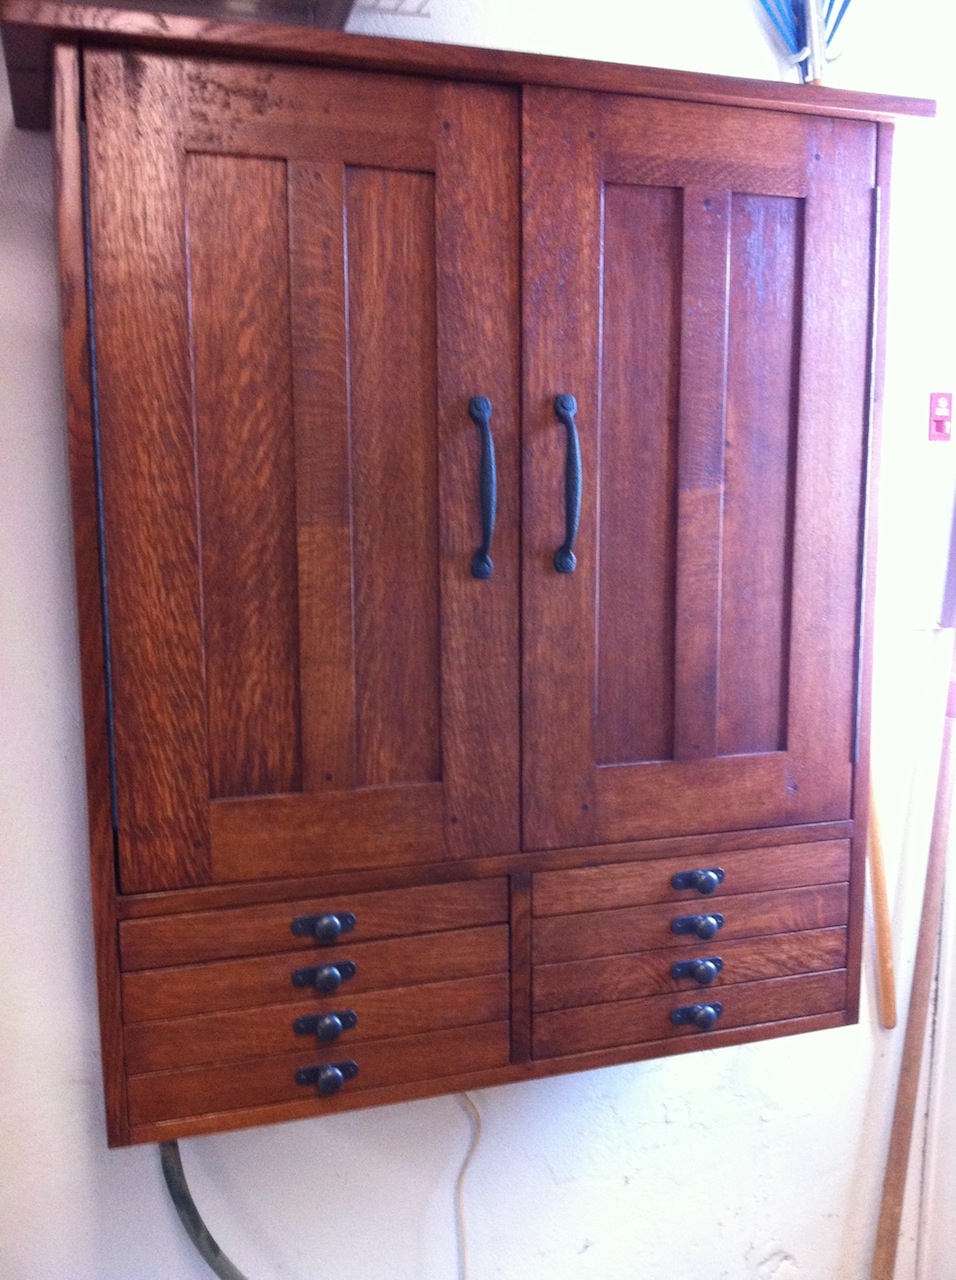
I’ve been wanting to kick it up a notch, so after Santa brought me a 14-inch band saw, I thought I’d tackle a tool cabinet. I’ve always loved mission oak style furniture and have a few antiques around the house to prove it. In this case, that style both fit my needs and my skill set well.
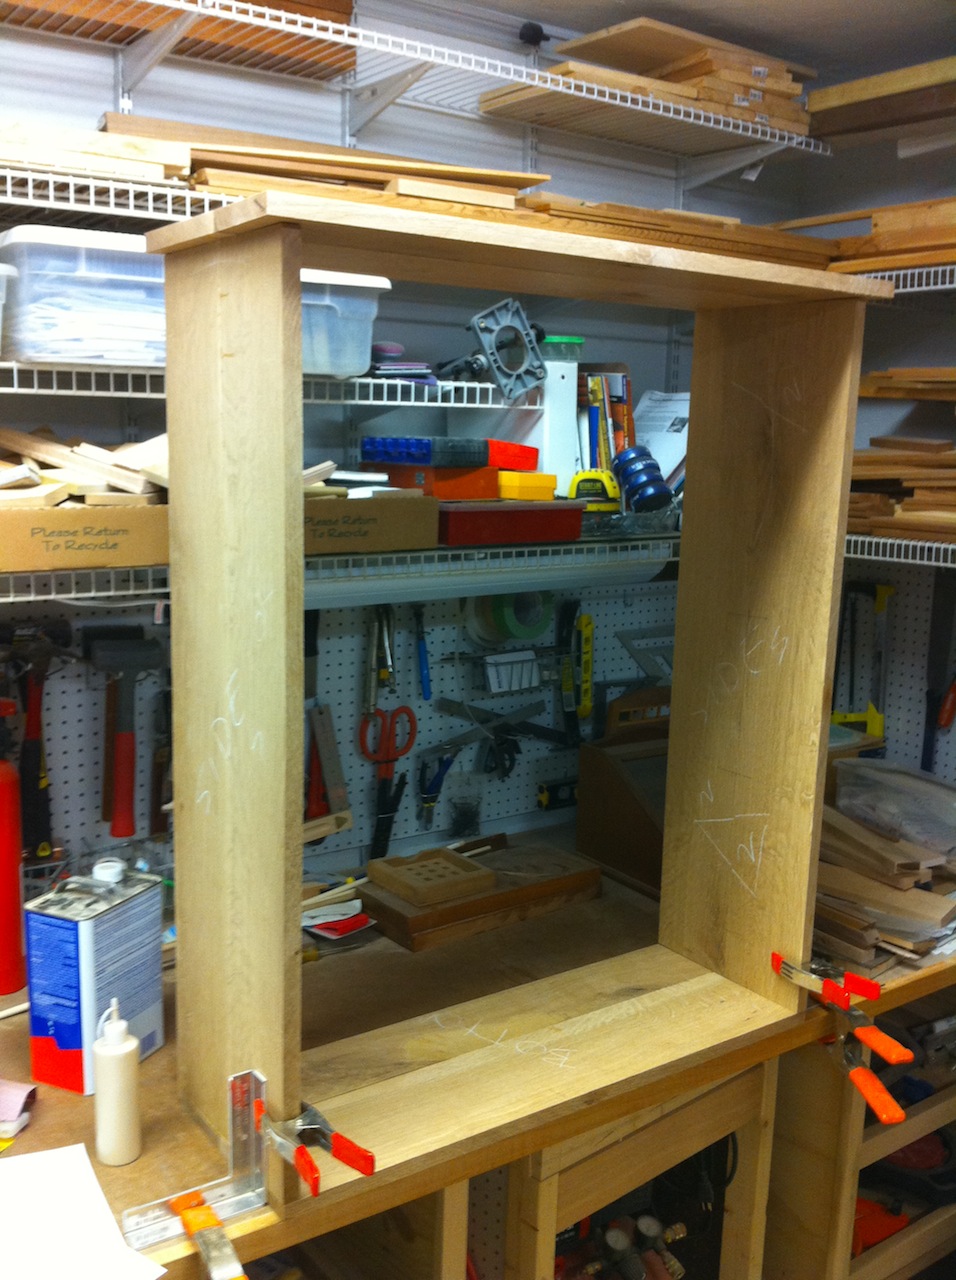
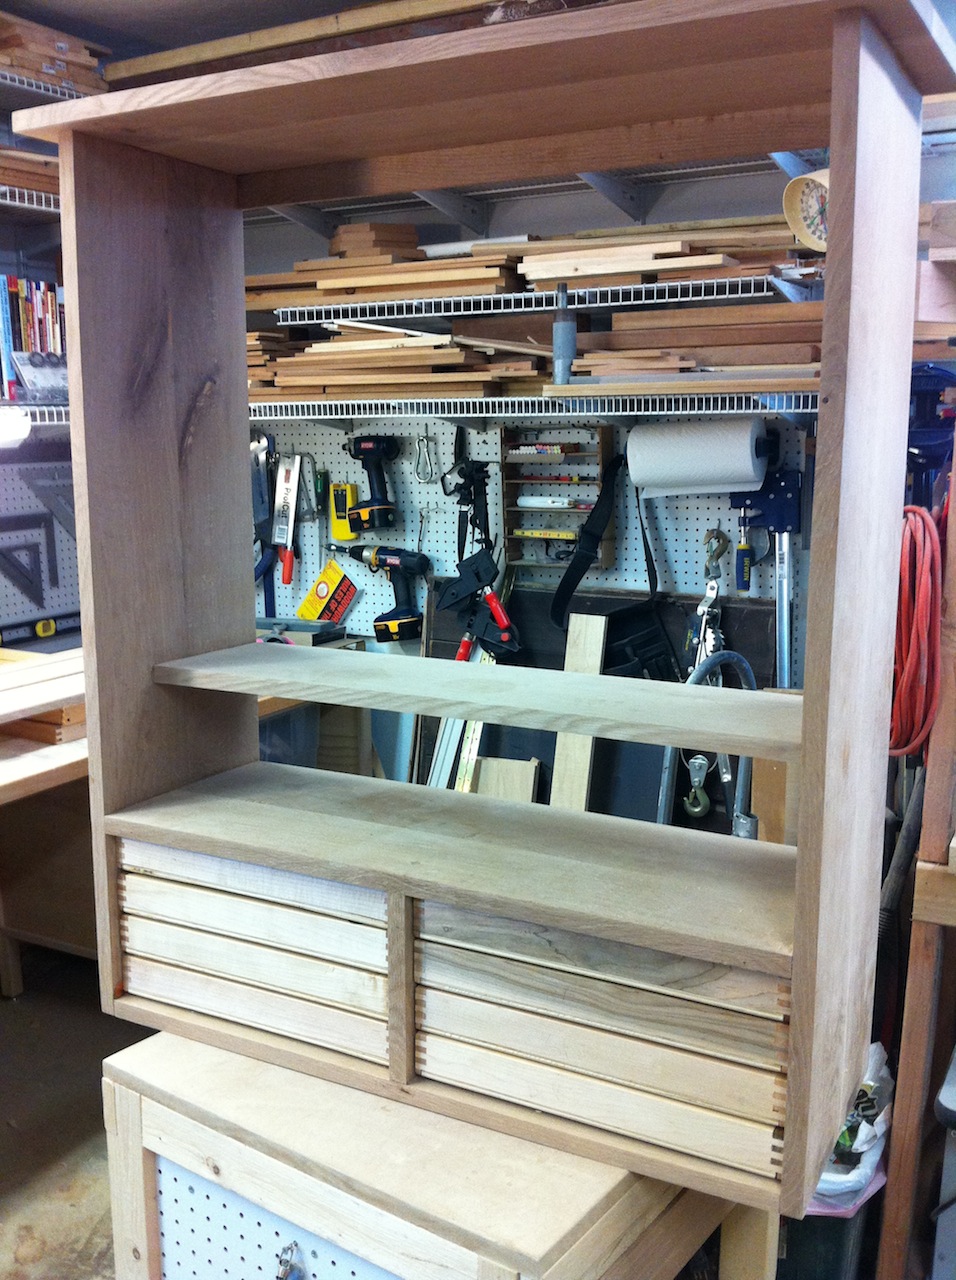
I looked at a lot of tool cabinets and plans online and finally worked out a design that I thought would work for me. Its 30″w x 40″h x 12″d. I picked up some S2S quartersawn white oak from my lumberyard and since I don?t have a jointer, had to make my first jig of the project to cut the other 2 sides square on my table saw. What a wonderful world the web is everything thing you need to know is just a quick search away and there’s video!
The carcass and shelves are put together with biscuits. At the bottom sides of the case, I cut some large finger joints to add some interest. I put in a number of dowels for looks and in some cases to cover screws or add strength. The hardware is oil rubbed bronze.
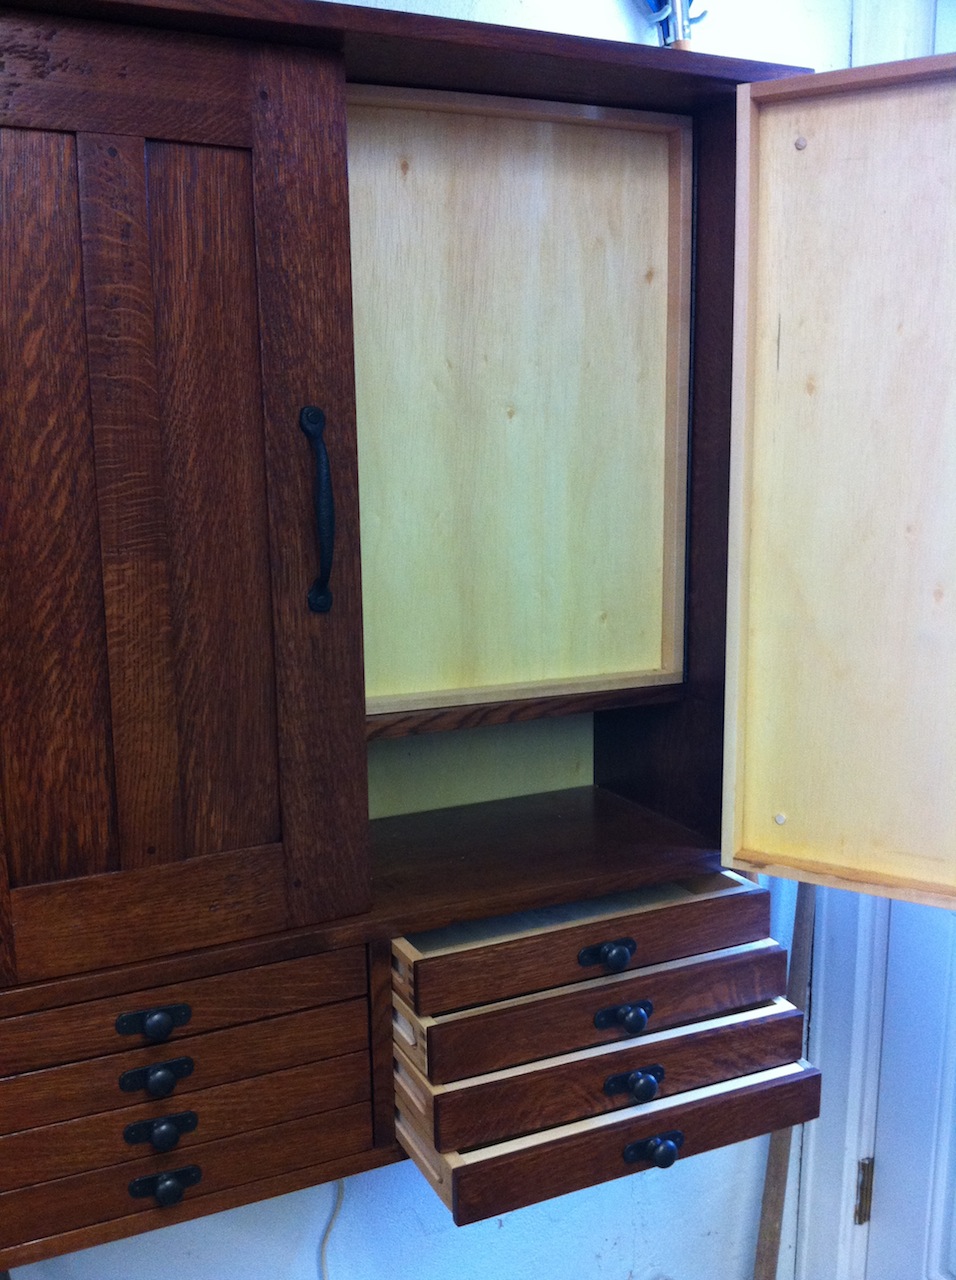
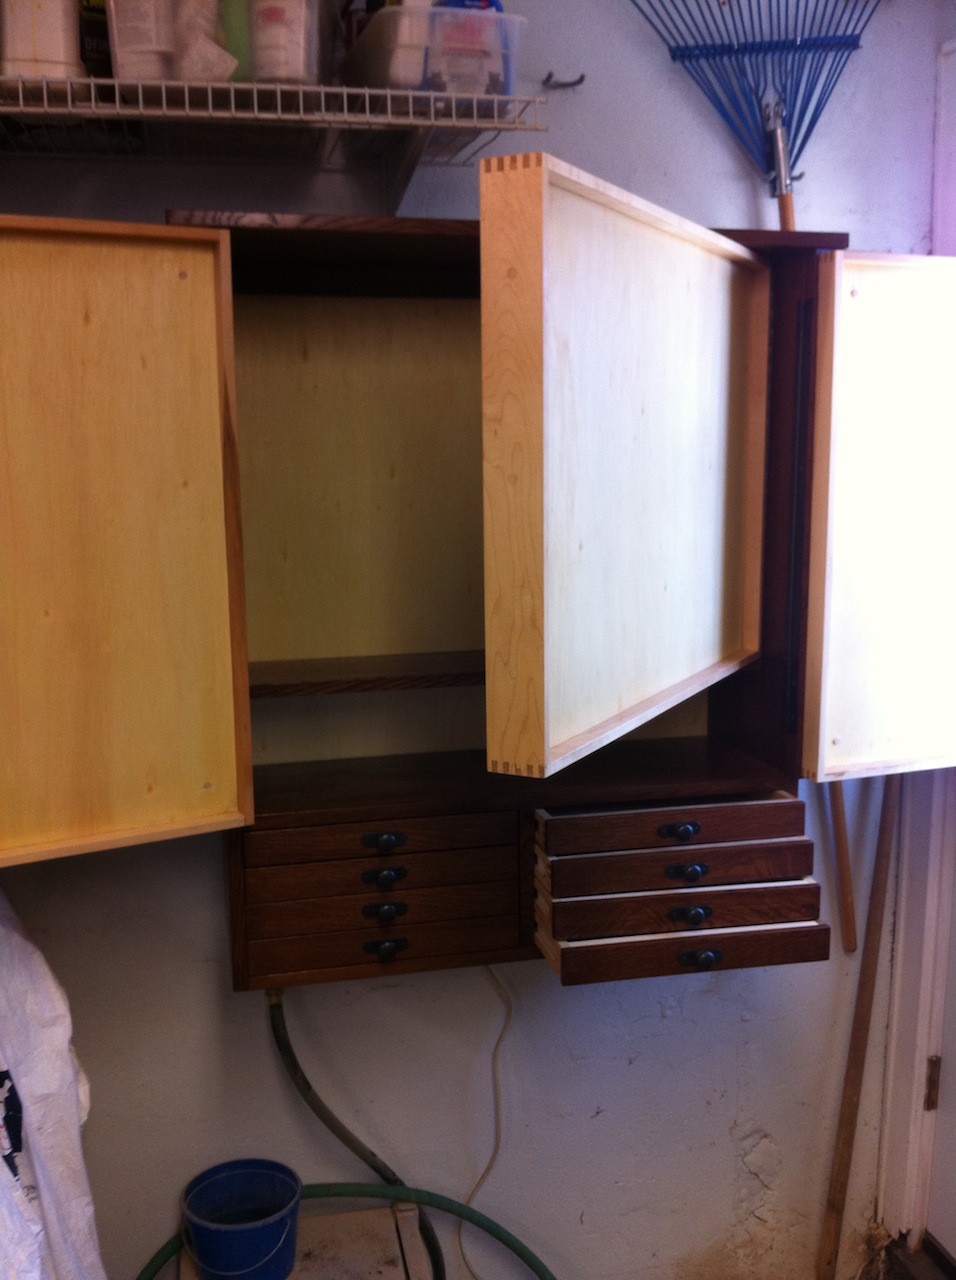
The top area has two doors approximately 15″ x 30″ that are hung on oil rubbed bronze piano hinges. The doors are put together with pocket screws, which can?t be seen because the back of the doors (inside) are covered by a recessed maple tool hanger. The doors open to a shelf and an inner maple door with hanging tool space front and back. Once that swings open, the back wall of the cabinet is also open for hanging tools. Beneath the doors are 8 maple drawers for smaller items. I picked up a Rockler finger joint jig to make the drawers and the tool hanging doors and enjoyed learning to use it.
I found the finishing process to be a lot of fun,not that I knew what I was doing. But that was when all the work really paid off. I am a lot more confident now after viewing Marc’s finishing video and his “You and Dye” video. Once the finish was done, I cut a French cleat and hung the cabinet in an open spot on the wall in the shop. I’m still working on hanging all the tools, but that’s for next weekend.
As for the finish, I used Jeff Jewitt’s ‘Mission Oak Finish’. I chose one of the darker looks – Stain with TransTint Brown Mahogany diluted at 1 oz. dye to 2 qt. water; one coat General Finishes Seal-A-Cell Sealer; one coat Bartley Walnut Gel Stain; and finish with 3 coats General Finishes Arm-R-Seal Satin Finish.
Advertisers


