A Bunch of Clocks – Viewer Project

This Viewer Project comes from Tom. He decided to try his hand at making one of my clocks, and instead of making one or two, he decided to make 19!! Let’s see how he did.

frams
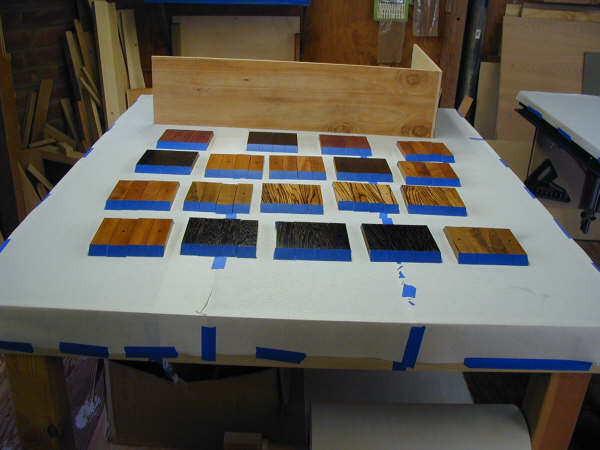
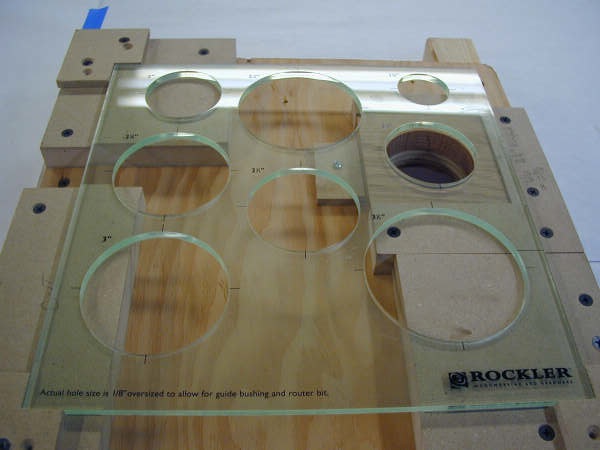
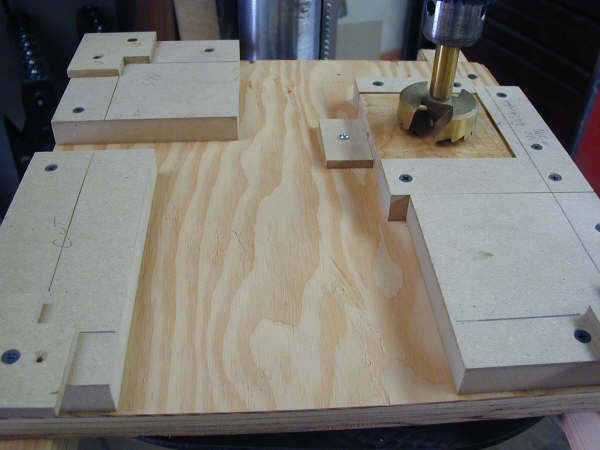
I am now in the gluing stage of the clock project and I thought I would send you a few progress pictures. I took your advice on doing the finish work for the inside of the clocks before the glue up so two of the pictures is the wood being laid out for spraying and the second two pictures are of the jigs I setup to drill out the bulk of the wood for the clock works and then the setup for routing the remainder of the wood that was left. I used a 50 percent solution of Shellac as a sanding sealer and then three coats of lacquer on the inside and I will be using the same sanding sealer and five coats for the outside. My goal is to finish up gluing this week, I can only glue after work and I only have enough small clamps to glue four clocks at a time. My goal is to finish all the gluing by Friday night then start cutting the splines and final sanding on Saturday and then starting the final spraying on Sunday. I will be sending you pictures when they are finished.

router-jig clockface-jig clockface

Three weeks later……..
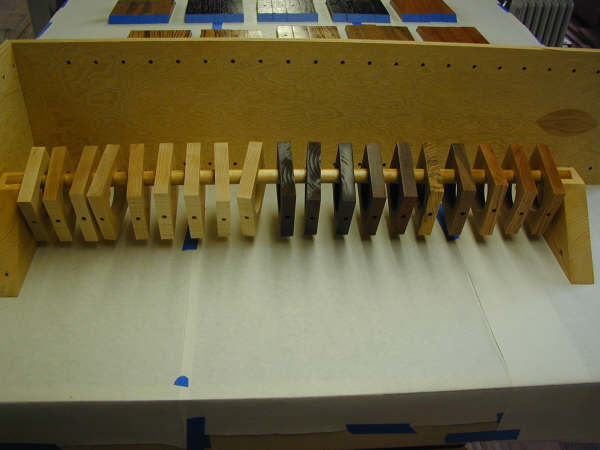
Well, it seems that I under estimated the time it would take to make 19 clocks. Just making, sanding/fitting, gluing and trimming all the spines (152) took me about 8 hours not counting the four hours that I waited for the glue to dry. Sanding each clock between each coat of Lacquer added an hour to each layer I applied. Over all it was a good experience in doing production type work, and I did loose one clock in the process. I didn’t have enough parallel clamps to clamp more that two clocks at a time so I was trying to use some cheep bar clamps so that I could glue up at least four at a time. On one clock it took too long to get the joints lined up and the glue started to set. I tried taking it apart and fixing it but my attempts just made things worse and the holes for the dowels were getting too off center. It was taking too much time away from finishing the other clocks in time so I just moved on. I still didn’t make it for Christmas.

clock-final
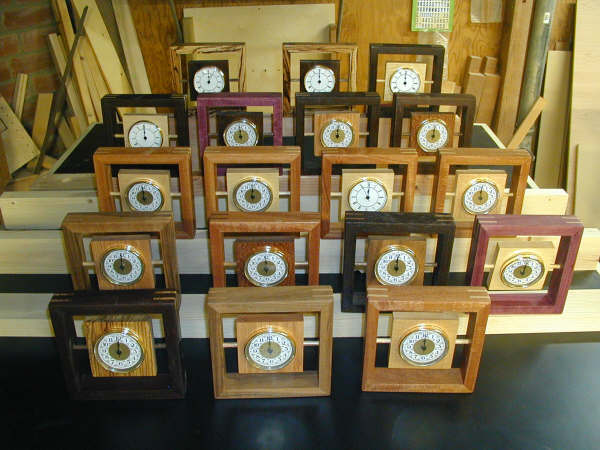
Anyway here is the final picture. I tried a few different shots but couldn’t get a real good one. The wood combinations that were used were Wenge and Maple, Zebra and Peruvian Walnut, Purple Heart and Peruvian Walnut, Purpleheart and Maple, Walnut and Oak, Mahogany and Maple, Bubinga and Lacewood, CA Walnut and Lacewood, Peruvian Walnut and Oak, CA Walnut and Oak.

Comments

  1. Andre March 4, 2009

    Hey that’s super cool!!! I can’t imaging how much of a pain all the sanding (between coats) must have been!!! Great job!

    • Tom March 4, 2009

      Andre:

      Yes the sanding did get a bit tedious but not nearly as much as the splines. If you watched Marc’s video when he made these clocks he would take each spline and sand it by hand to get the right fit. After the glued dried you need to trim the splines and then sand them. Doing each of those steps 152 times was painful to say the least.

      Thank you for your comment, I do appreciate it!

  2. David March 4, 2009

    So where is the 19th clock in the final picture?

    • David March 4, 2009

      oops… nm

  3. Matthew Hills March 4, 2009

    I was going to ask — which ended up being your favorite?

  4. Waid March 4, 2009

    This guy must be Coo Coo! Ha! Oh my gosh I’m funny!

  5. Paul Stine March 4, 2009

    “A man with a watch knows what time it is. A man with two watches is never sure.”
    – Segal’s Law

    I’m sure this is extensible to 19 clocks.

  6. Tim TAN March 4, 2009

    Marc : you inspire people to do stuff. I know. I am up to my 60th cutting board…

    I bet you Tom will do another large batch soon enough.

  7. Eric March 4, 2009

    Really nice work, Tom! Good example of how/why production work is very different from what most hobbyists do.

  8. Jeff Skory March 6, 2009

    Very cool Tom. I really like the zebra wood one. I’m starting to think about doing a batch of Christmas gifts this year since I’ve skipped a few. This might be a possibility.

  9. Al McNamara March 12, 2009

    Nice work, Tom.

    I missed that part of the video on Marc sanding the spines. I ended up putting 3/8″ dowel stock in my drill press chuck and sanding them to size. I can’t imagine the tedium of doing that for 19 clocks.

  10. Peter December 6, 2009

    Just wonderful! The finished batch looks great – and I like all the color combos you were able to get out of there. Can’t wait to try one of my own someday. The key word being… one!

    Although I do like the idea of doing a batch of something for Christmas gifts. Sure would be cool to do all handmade one year.

    Thanks for sharing these – love the purpleheart ones.

  11. Justin October 27, 2010

    A little late on my comment, but thet hey look great! I am in the process of starting my first one…

Leave a reply

XHTML: You can use these tags: <a href="" title=""> <abbr title=""> <acronym title=""> <b> <blockquote cite=""> <cite> <code> <del datetime=""> <em> <i> <q cite=""> <strike> <strong>

Coming Up


  • There are no upcoming events

  • Video: Flattening a Benchtop With a Router

    May 23, 2012
  • Adirondack Chair Class (William Ng School)

    June 4, 2012
  • Video: Turning a Tool Handle

    June 6, 2012
  • Woodworking in America (Pasadena)

    October 12, 2012

Live Shop Cams


Enter the live room →

Pressure Treated Wood Utility Poles for building structures, distribution or transmission.

Cliq Studios sell quality Kitchen Cabinets in a range of woods including cherry, oak and maple.


what wa