Lee’s Walnut Side Table
Viewer Project
-
By Lee from Austin, TX
Added on July 11, 2008
Hey Marc, thought you might like to take a look at the side table I built out of Walnut. Not nearly as cool as the curves and floating top you made, but OK for a first table with mortise and tenon joints. Keep up the great show. We really enjoy both the content and presentation style.
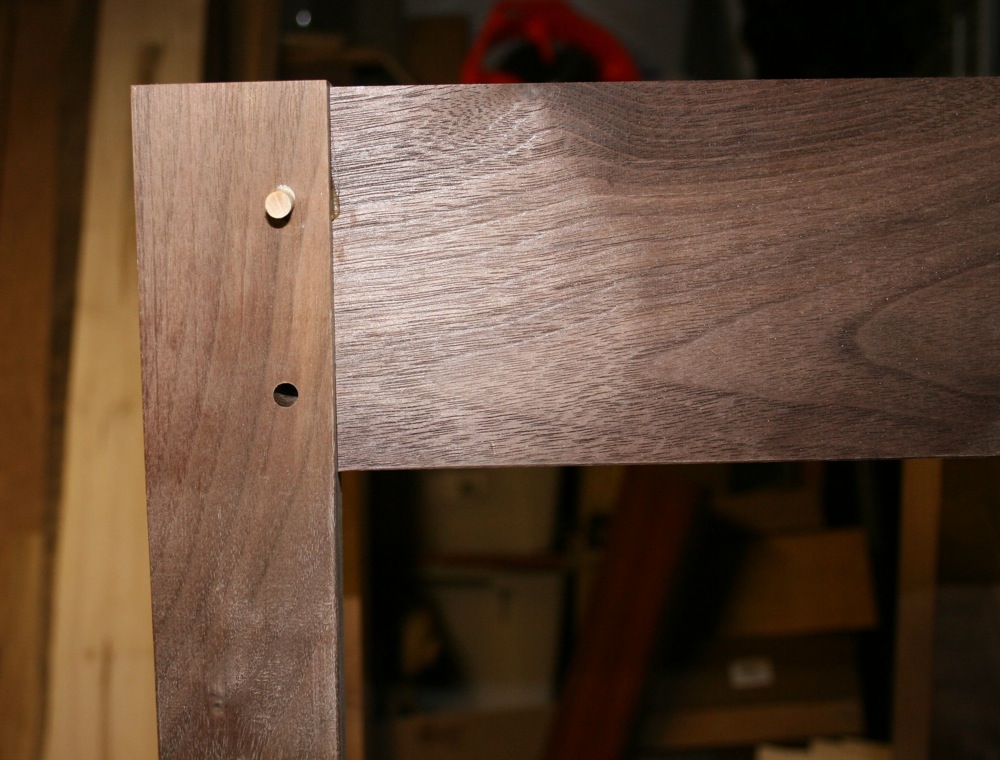
I started out with rough Walnut that I picked up over the course of about six months. One board was 8/4 and three boards were 5/4. The boards were about 6 ft. long and 5 in. wide. I dimensioned it with my Jet 6″ deluxe jointer, DeWalt 13″ planer and my SawStop. Legs ended up 2″ x 2 1/8″ x 23 1/4″, rails 4″ x 14″ (including tenon length) x 9/16″ and the top 18 1/2″ x 18 1/2″ x 3/4″. After cutting the pieces to size, I used my Powermatic hollow-chisel mortiser to cut mortises into the legs. The legs were not exact squares so I paired them up (e.g. Mortise for back left leg connects with mortise for back right leg, mortise for back right leg connects with front right leg,…) so the relative distance from the outside surface of the leg to the rail was the same on each leg. I decided to use the 3/8″ hollow chisel.
I planned for a 1/2″ shoulder on the top and bottom of the tenons which started the mortise 1/2″ from the top. After cutting the mortises, I laid out the legs with the rails to decide which board looked best with certain legs and to mark my cuts. I ended up cutting a 1″ tenon on each end of the rails. I made a cut-off sled so I could be as accurate as possible when cutting the tenons. I cut the shoulder on all four sides up against a stop block clamped to the sled. I just nibbled away the material checking the fit until I liked it.
Since I had the mortise pretty well centered on the legs, I cut the end of each tenon to 45 degrees so the two tenons coming into a leg would not hit each other. I glued up two legs with a rail and then the other two legs with another rail. After these were clamped, I added the other two rails and used enough clamps to ensure adequate pressure to close up each joint. Checking that all four legs were level and all joints were nice and tight, I left it to cook. The top is a glue up of 4 pieces of walnut that looked “right” together. I didn’t use biscuits or dowels in this glue up since the top is pretty small. I used yellow glue for all gluing processes.
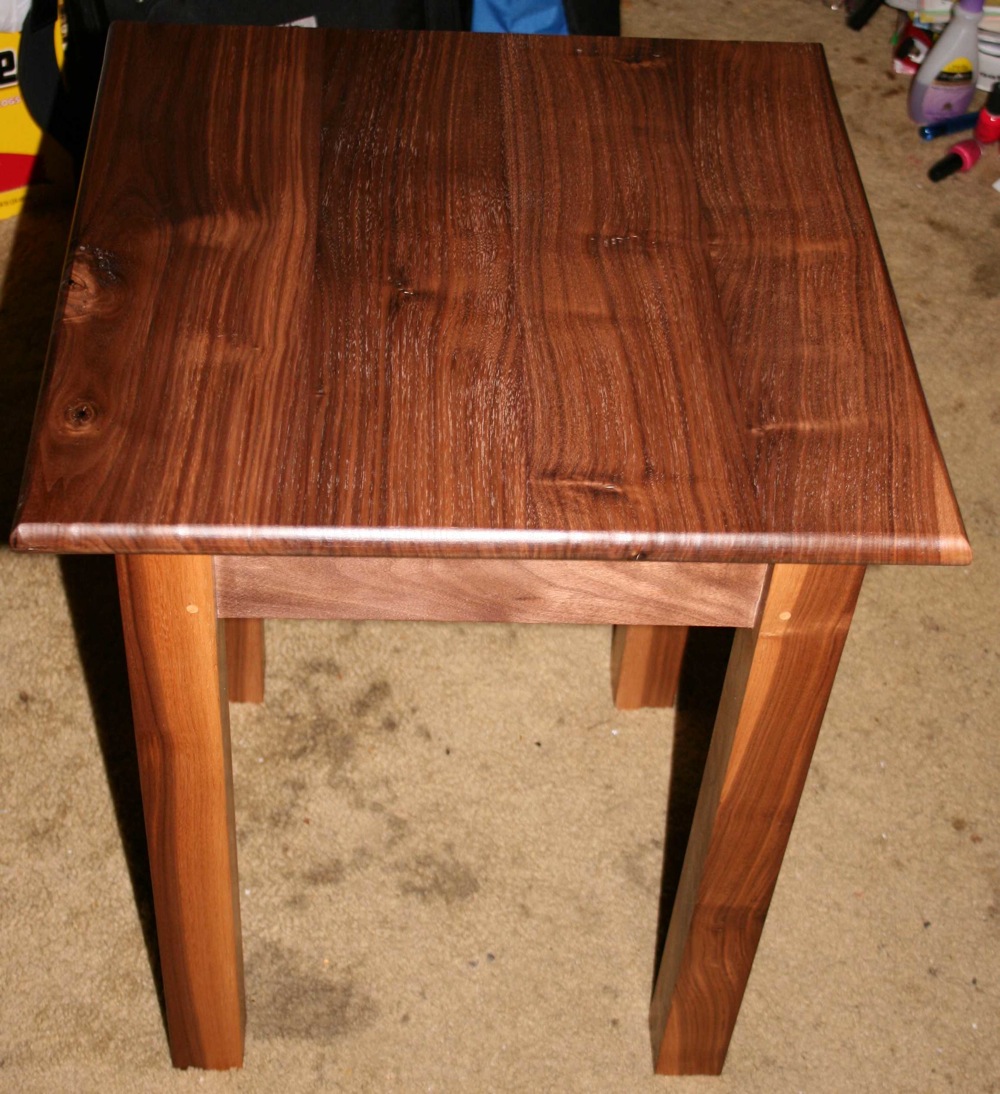
The 4 pieces of walnut were jointed and planed on the top and bottom surface before glue up. The inside edges didn’t touch the jointer or planer. I ripped the boards on my SawStop and the pieces matched up exactly. I scraped the partially cooked glue to minimize the work after the clamps came off. I knocked off the hard edges from the legs and rails with a little oval sanding pad. One pad has something like 60 micron/30 micron and the other has 15 micron/5 micron. I worked down from 60 to 5 and it is really nice to the touch. I sanded and scraped after the base and top came out of the clamps. I used a block plane to put a small chamfer on the bottom of each leg (all four sides).
After this I was ready to start finishing. I love Tung Oil as it seems to bring out the wood. I gave both the base and the top 2 coats of tung oil with a bit of touch up hand sanding. Just enough to remove the nibs. I attached the top to the base with figure eight fasteners. After it was together, I applied some good furniture paste wax and buffed it out. This is what you see in the pictures of the final table. Go have fun making saw dust.
Advertisers


