Vic’s Kitchen Island
Viewer Project
-
By Vic Rice from Shoreacres, TX
Added on June 26, 2013
After years of “planning” to take up the hobby of woodworking, I actually took the plunge about 3 years ago. I’ve spent most of the 3 years getting a shop established (tools, jigs, etc.) that would allow me to tackle a serious piece, at least serious for me. This is that piece! Not only was this Kitchen Island needed, I knew I would be challenged by the build. I designed it from scratch relying HEAVILY on Sketchup. Frankly, I can’t imagine anyone taking woodworking seriously and not benefiting from using this amazing tool. I achieved a significant amount of prototyping, virtually, via Sketchup. This is especially true regarding much of the joinery in this project.
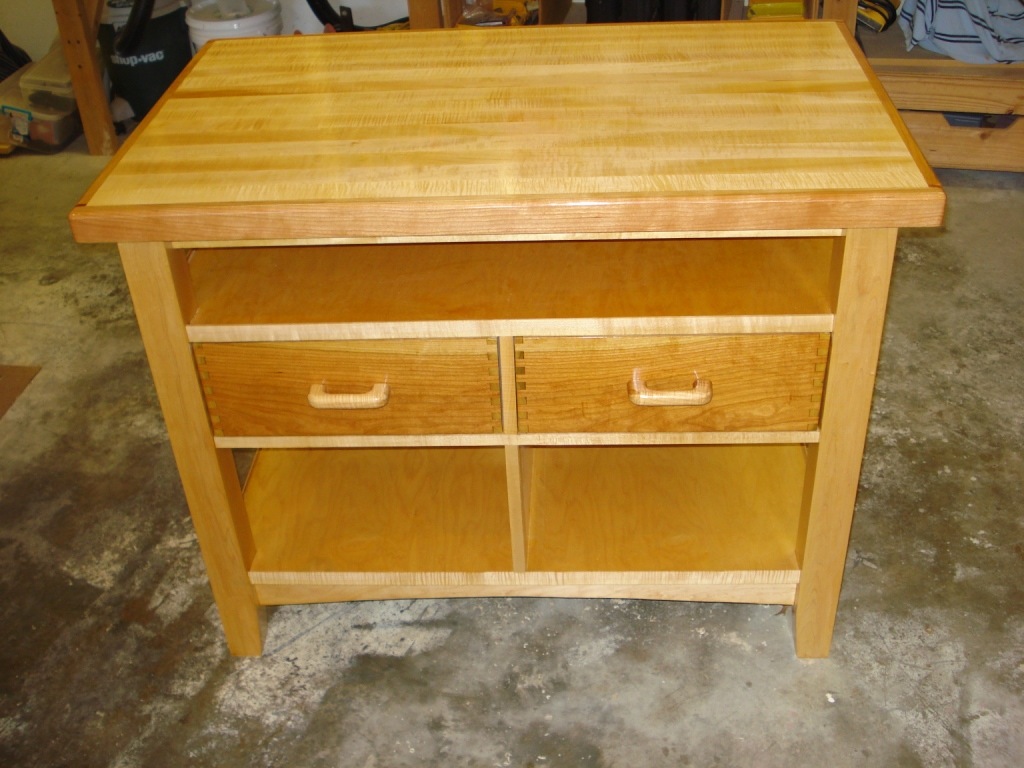
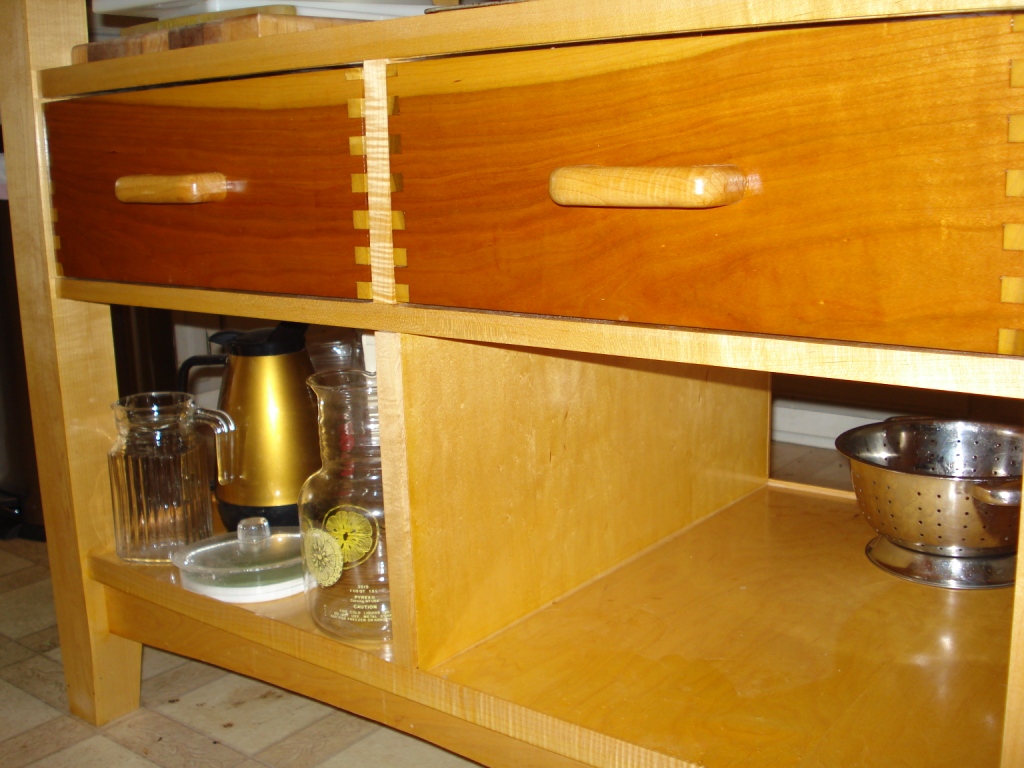
The Island is constructed from hard maple for the top, legs and plywood edge banding. All the shelves are maple ply. The top trim and the drawer fronts are cherry. The drawer sides are poplar.
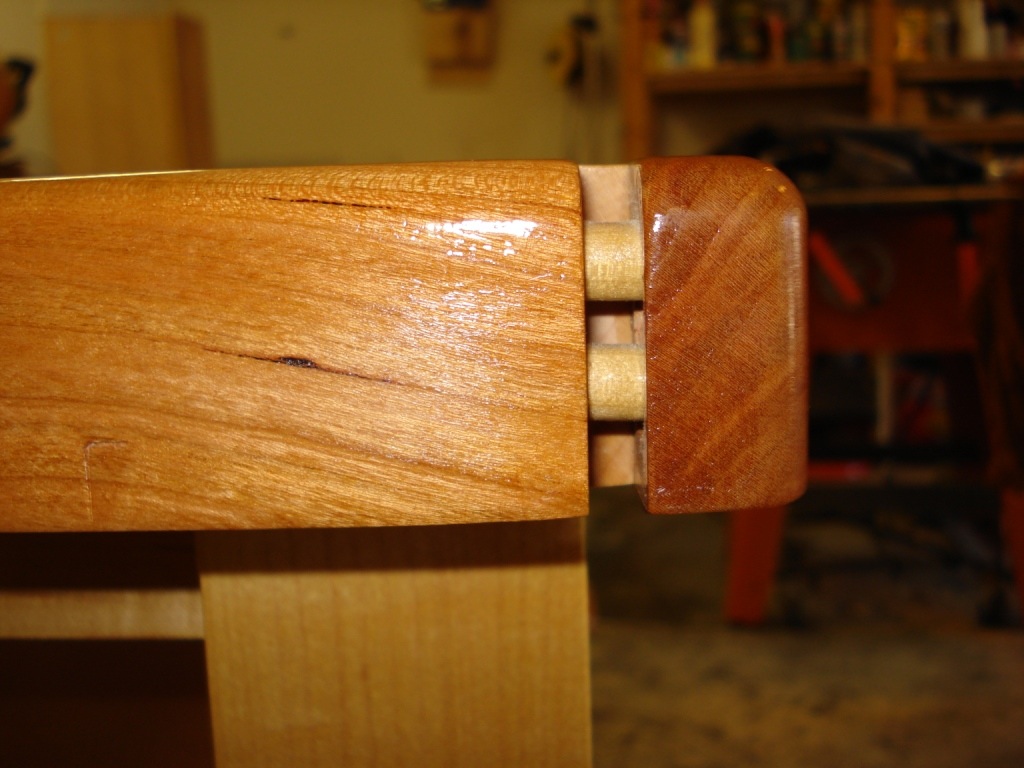
This project had a few “wrinkles” I think are worthy of note. First, I desperately wanted a border trim around the edge grain butcher block top and I wanted it to be some contrasting colored wood. I chose cherry. The obvious issue here is the possible wood movement in the hard maple butcher block. In order to accommodate, I chose a loose tenon based bread board concept. As you can see in the exploded Sketchup image (shows the underside of the top), both the top and the trim are mortised to accept the hard maple floating tenons. The tenons are glued into the trim pieces but simply float in the over sized mortises in the top. As you can see, the tenons towards the edges of the top have elongated holes to accommodate the wood movement. In addition I made use of a draw-bore technique in the placement of the holes to attach the cherry ends without any glue being involved. Hopefully this will adequately accommodate any eventual wood movement.
The second issue with the top trim was what to do at the joint between the end pieces and the side pieces. Again they could not be simply joined with some rigid joint due to the possible movement of the top. So, I chose the dowel joint (kind of) shown in the Sketchup image. The dowels are glued into holes in the end pieces, BUT they float in corresponding holes in the side pieces. I chose this approach simply to provide some visual interest at this joint where the pieces may in fact move apart from one another. I didn’t want a gap to be there with nothing in it. Lastly the edge banding is a bit unique in that I chose to have it extend up above the top service of the shelving to provide a lip. The intent is to prevent stuff from sliding off. However, I suspected that simply gluing edge banding to a flat surface might not be strong enough to withstand the forces that might impact it from stuff hitting the lip. So I chose to make use of a router bit set that created a tongue and grove joint for the edge banding. I figured this would add extra strength to prevent something from knocking the edge banding off. Lastly, I have few comments about the drawers. I did not want hardware for the drawers. This was just a design choice on my part. I used a center runner and guide setup, all hard maple. I also employed some little Teflon “buttons” to give me the offset between the drawer and the case and provide some slick surfaces for sliding.
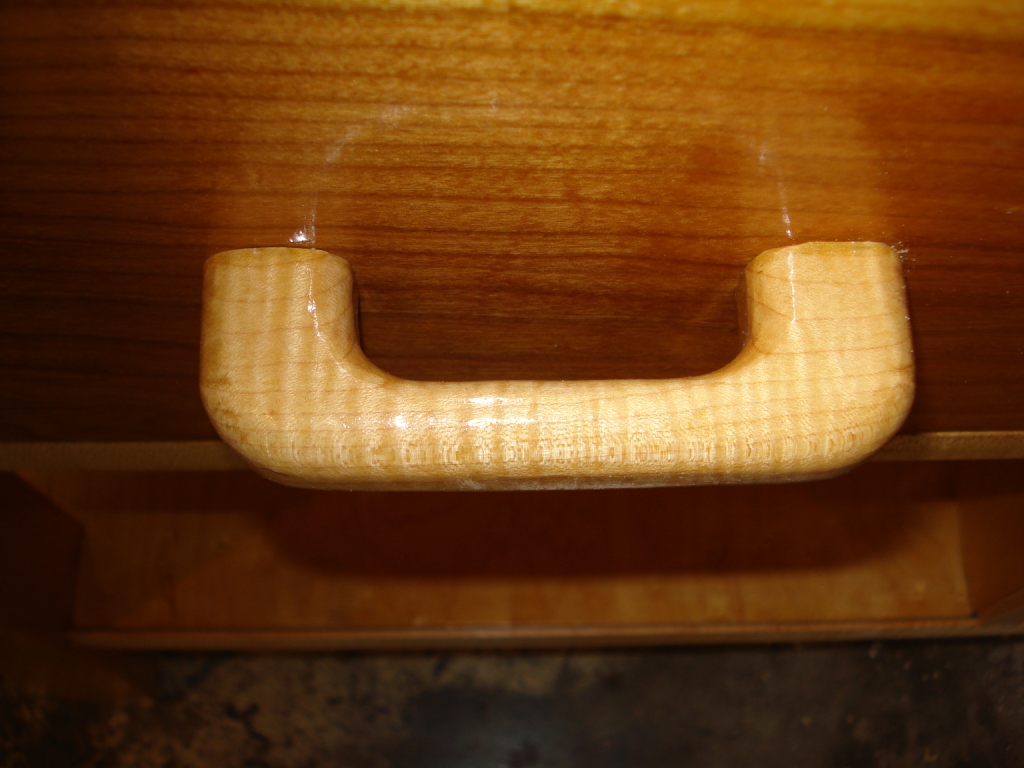
To add visual interest I wanted to use a contrasting wood for the fronts. I chose cherry. For additional visual interest, I used box joints for the front to side connections. This also gave me a reason to use my newly created box joint jig from Mr. Wandel’s design. I found a piece of cherry with some interesting grain and sap wood which I used to have it flow all the way across the front. I fashioned the drawer pulls from some scrap hard maple pieces.
I chose two different finishes for the piece. I was not going to use the top as true butcher block since I didn’t want to deal with the added maintenance. And besides, several of my early projects were cutting boards. So, I finished the top with 7 coats of Behlens Salad Bowl finish. This still gives me a nice tough, glossy, low maintenance finish that is still food safe. The rest of the piece was finished with 6 coats of Waterlox Original. I finished all the parts separately, and then did the glue-up and assembly. I’m happy I did since all the nooks and crannies in this thing would have presented a challenge during the finishing process.
Designing and building this piece was a blast. I’m truly hooked on this hobby! Even joined the Guild!
Advertisers


