Rob’s Lumber Rack
Viewer Project
-
By Rob Mahan from Chelsea, MI
Added on December 3, 2015
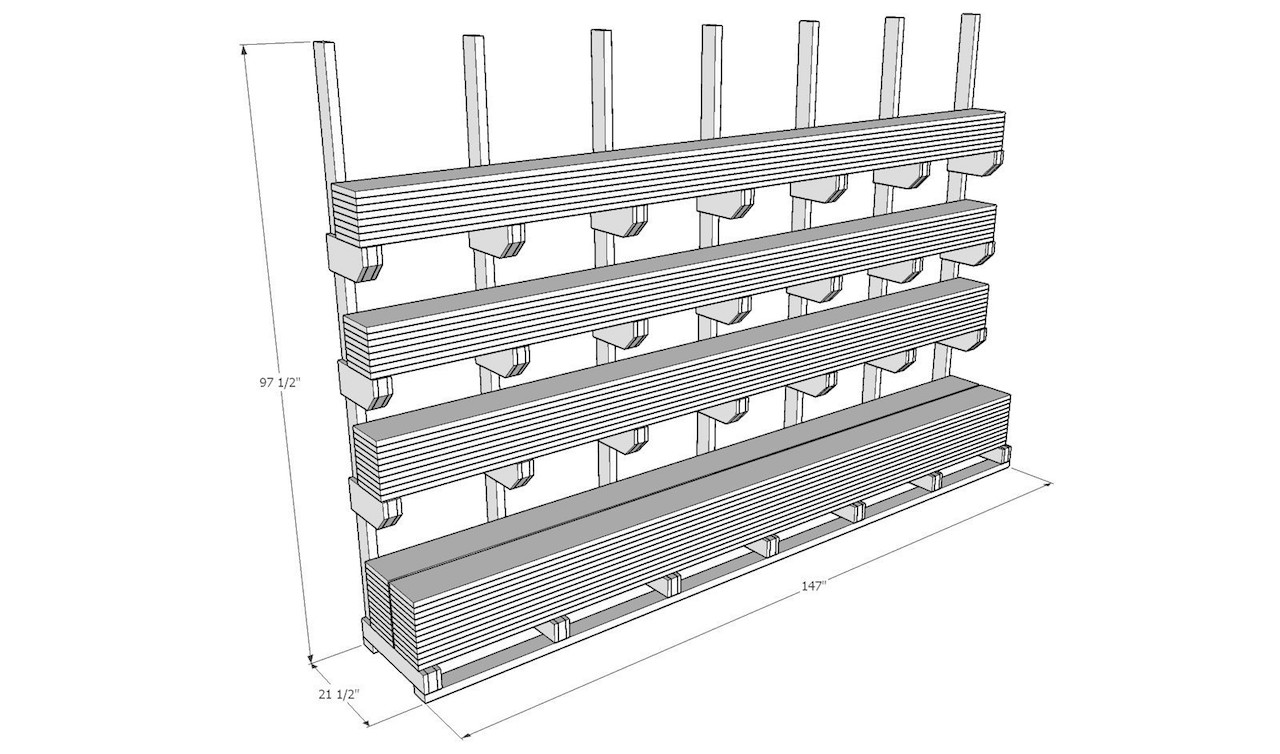
The inspiration for my lumber rack was TWW’s Episode 144-Lumber Rack project! Thanks for the great video and for the SketchUp model. I started with the SketchUp model provided, and made the modifications for my design.
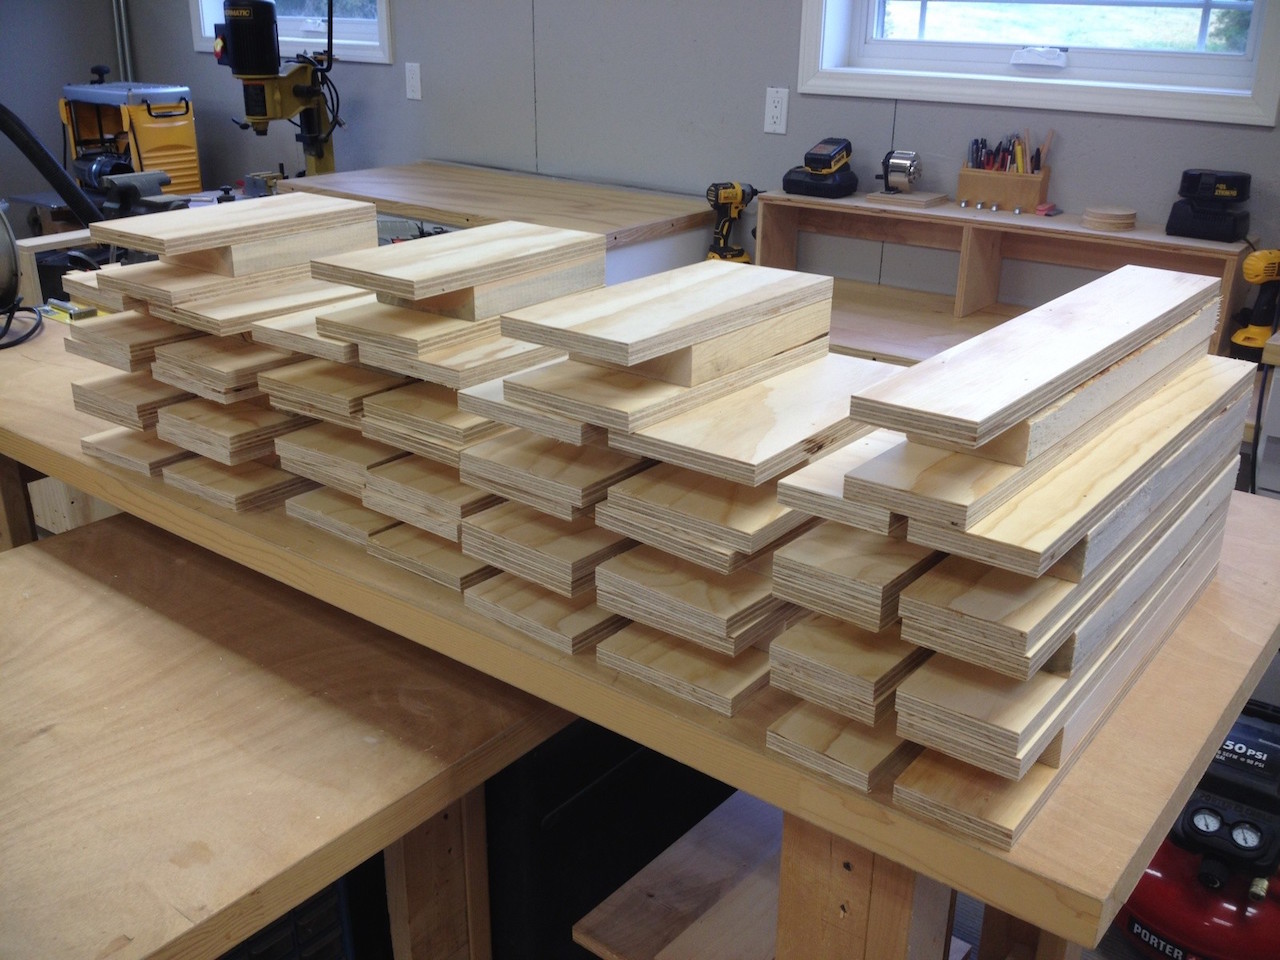
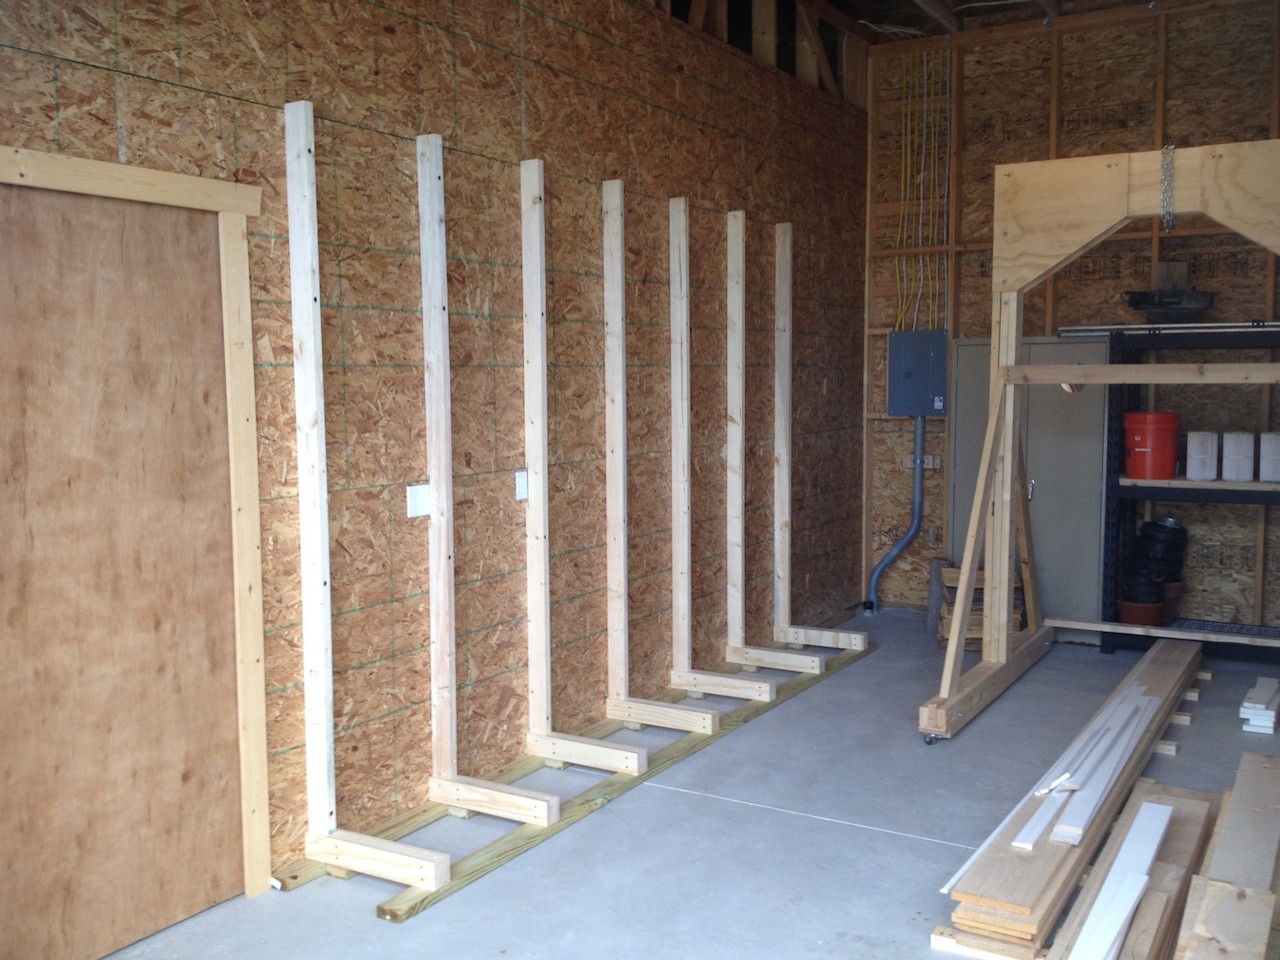
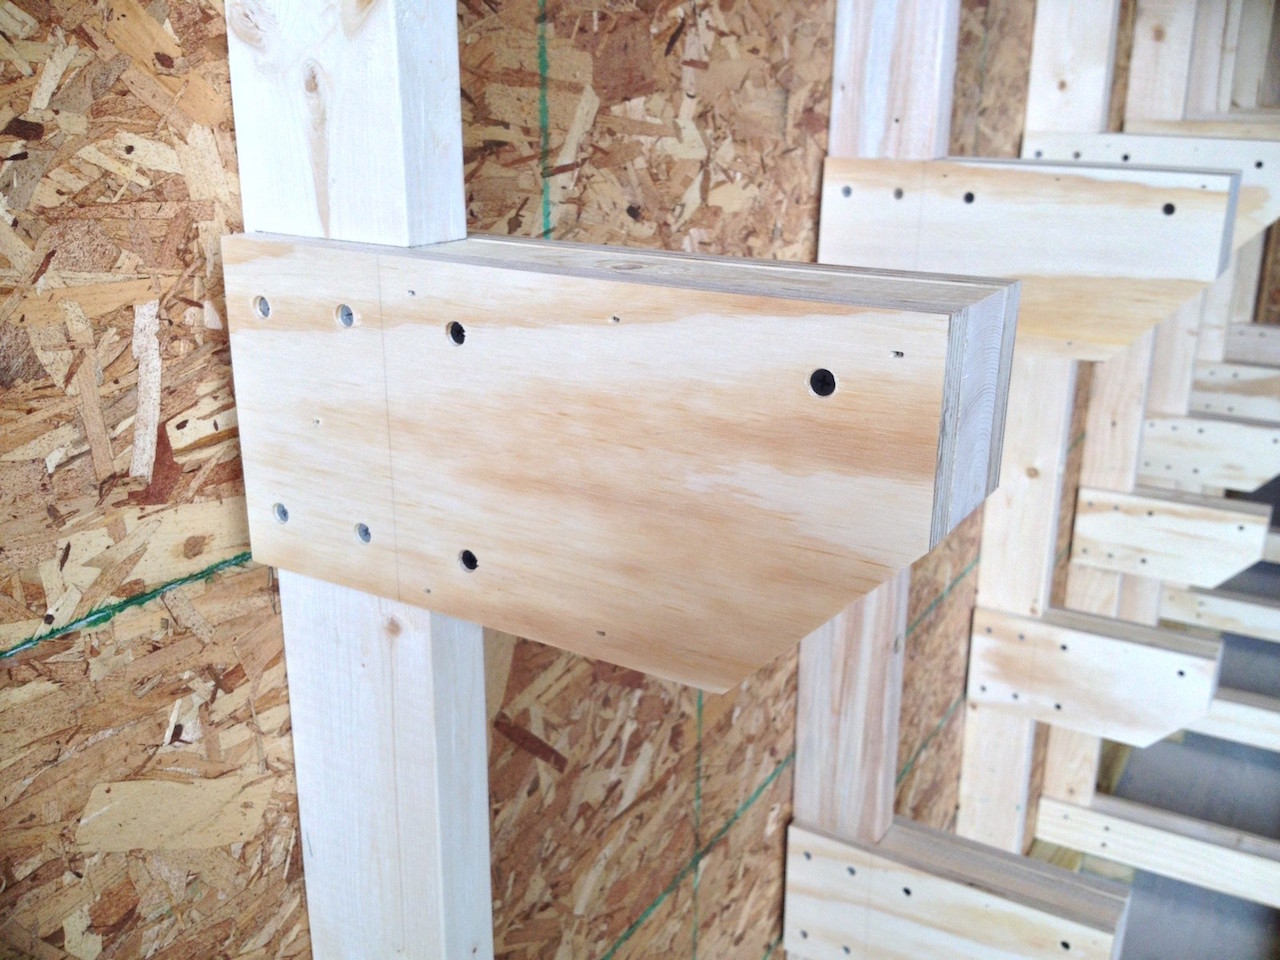
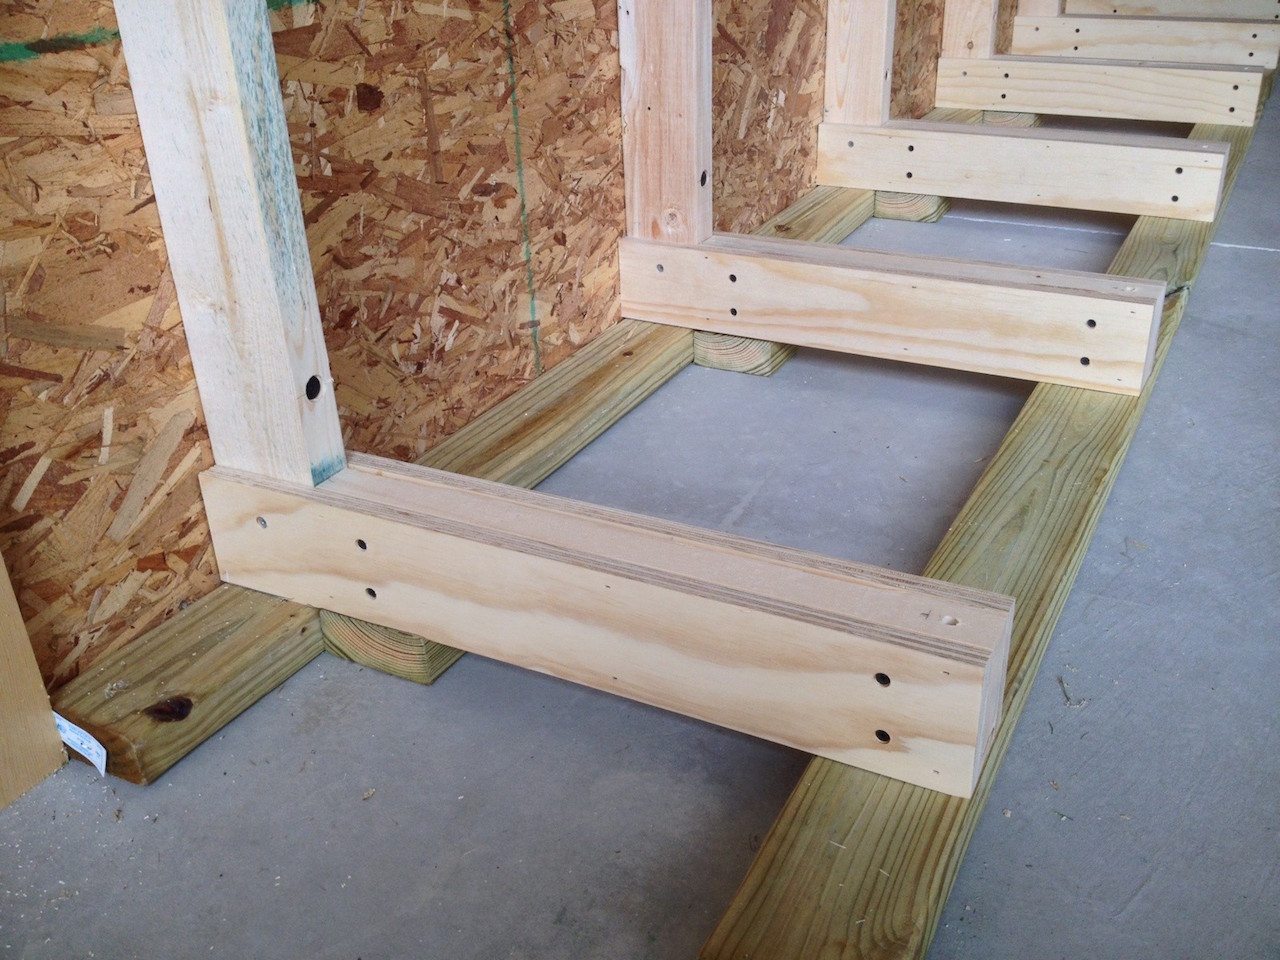
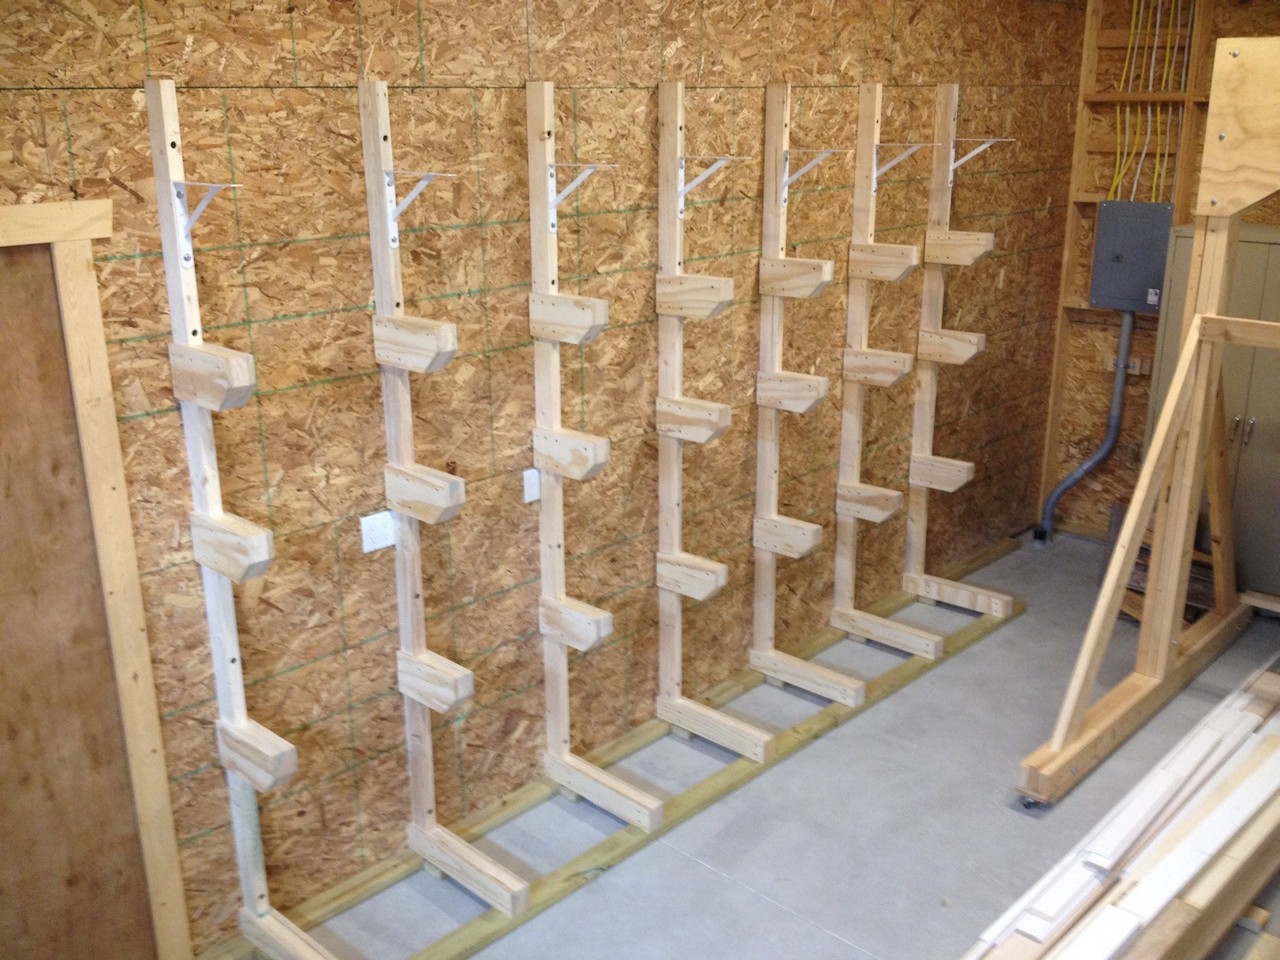
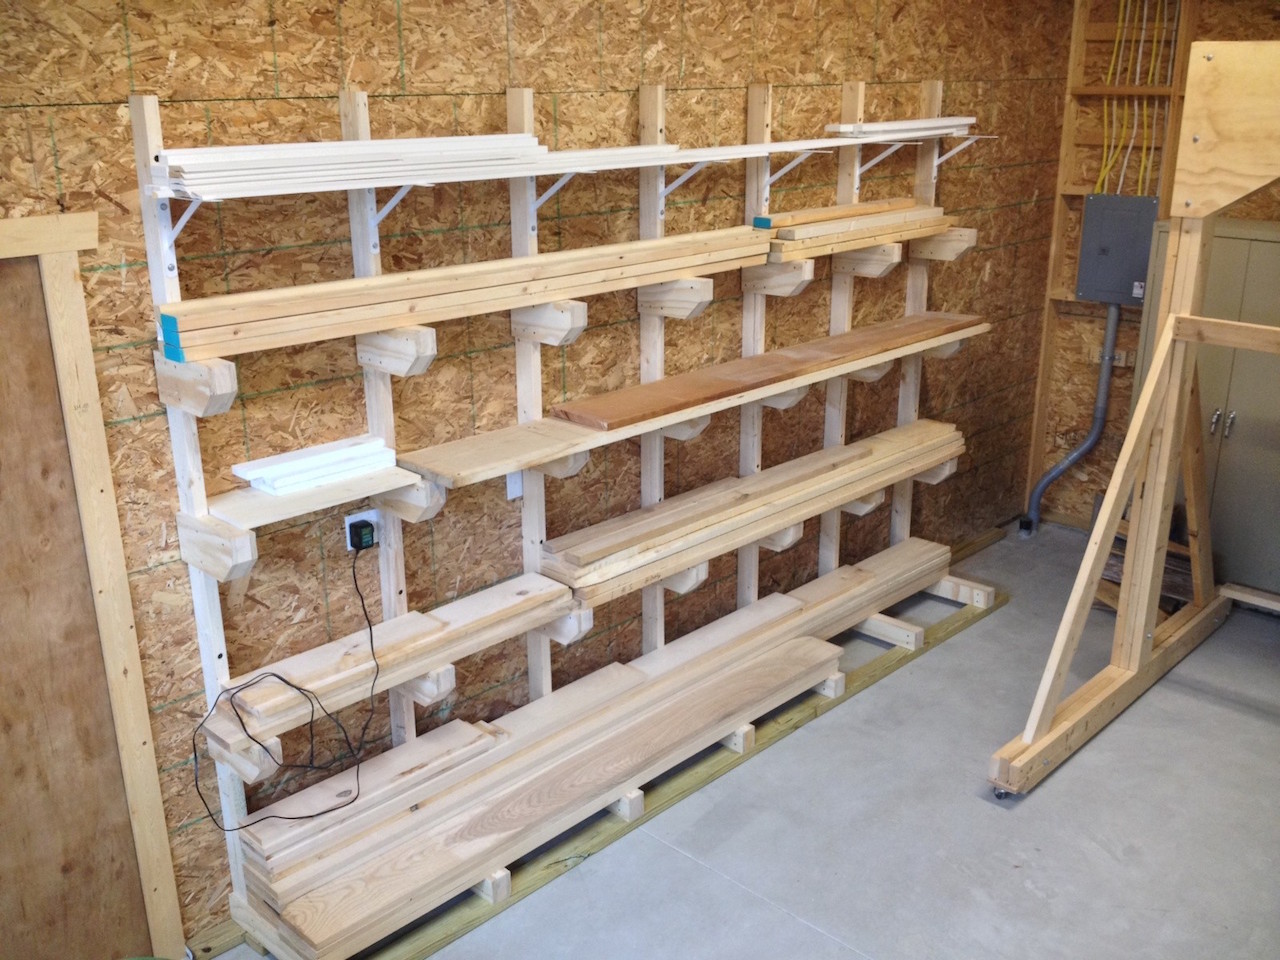
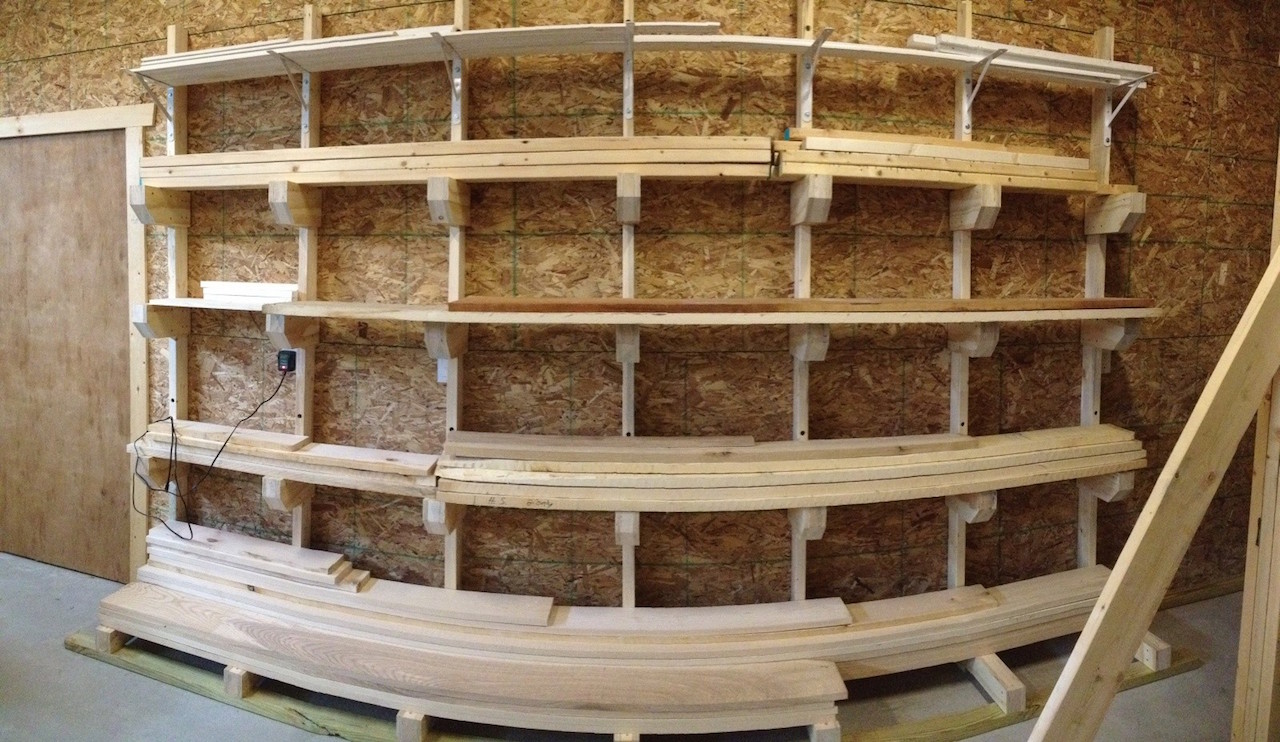
My dad’s words “Build it sturdy!” led me to run my seven 2×4 uprights to pressure treated sleepers on the floor. (Fortunately, I already have storage for sheet goods elsewhere.) My barn was built with advanced framing techniques, so the wall studs are 2x6s on 24 inch centers, covered with 5/8 inch OSB. I also shortened the brackets to reduce their moment arm length, and to accommodate the typical lumber I use, which is seldom over 8 inches in width. The brackets are designed with plywood and 2×6 lumber to increase the contact area with the uprights.
Like Marc’s lumber rack, mine uses shop-grade plywood, dimensioned lumber (pressure treated for contact with the concrete floor), and lots and lots of PVA glue and screws. To fasten the uprights through the OSB sheathing into the wall studs, I used four 6-inch FastenMaster HeadLOK structural wood screws through pre-drilled and counterbored clearance holes in each upright. These fasteners were really easy to use, and are advertised to be replacements for 3/8-inch lag screws…but they’re not cheap!
Once I had the uprights fastened to the wall, I stretched a line at each shelf level as a guide, so all the bracket tops were in a nice plane. BTW, the plywood bracket sides are about 1/4-inch short on the wall side, so I could make sure that the 2×6 cores were in really good contact with the uprights. I added a row of metal shelf brackets near the top of the uprights, for the lighter materials I’d be willing to use a stepladder to store and retrieve.
Advertisers


