Mike’s Contemporary Cocktail Table
Viewer Project
-
By Mike Finnefrock from Williston, VT
Added on May 20, 2013
About 4 years ago, maybe longer, I saw a show on TV–one of those non-network stations–where a woodworker made a piece of furniture that looked nothing like the “Norm”. In fact, the show made the execution appear simple, elegant, and mindless. I immediately wanted to make the coffee table. Alas, I lived in a 1850s era home that was in constant need of TLC and all spare time was dedicated to repair and maintenance.
Just under 2 years ago my wife and I moved to the country, to a 150 year younger home. I suddenly realized that I had time to build something superfluous (well by my previous standards). I started looking around for projects and advice on the internet and stumbled upon “The Wood Whisperer”. As a side note, its a great site, maybe you’ve heard of it, if not, it’s worth checking out. This site had a ton of links to David Marks’ website which, at the time still had links to the DIY network clips.
I realized David Marks was the woodworker I had seen on TV. His approach seemed simple and straight forward: mill, bandsaw, rout, sand, glue, and finish. With all those jigs he used, how could one go wrong? David made it seem as if the project practically built itself.
Before I could blink, all the Woodworks’ videos were removed from the internet, but at least I could still look through DJM’s website at the finished project photos. I found the photos of his Contemporary Cocktail Table and loved it! I taught myself the steps by reading (TWW site and FWW), listening to podcasts and watching videos. Well, that and constant home repair helps to familiarize one with tools.
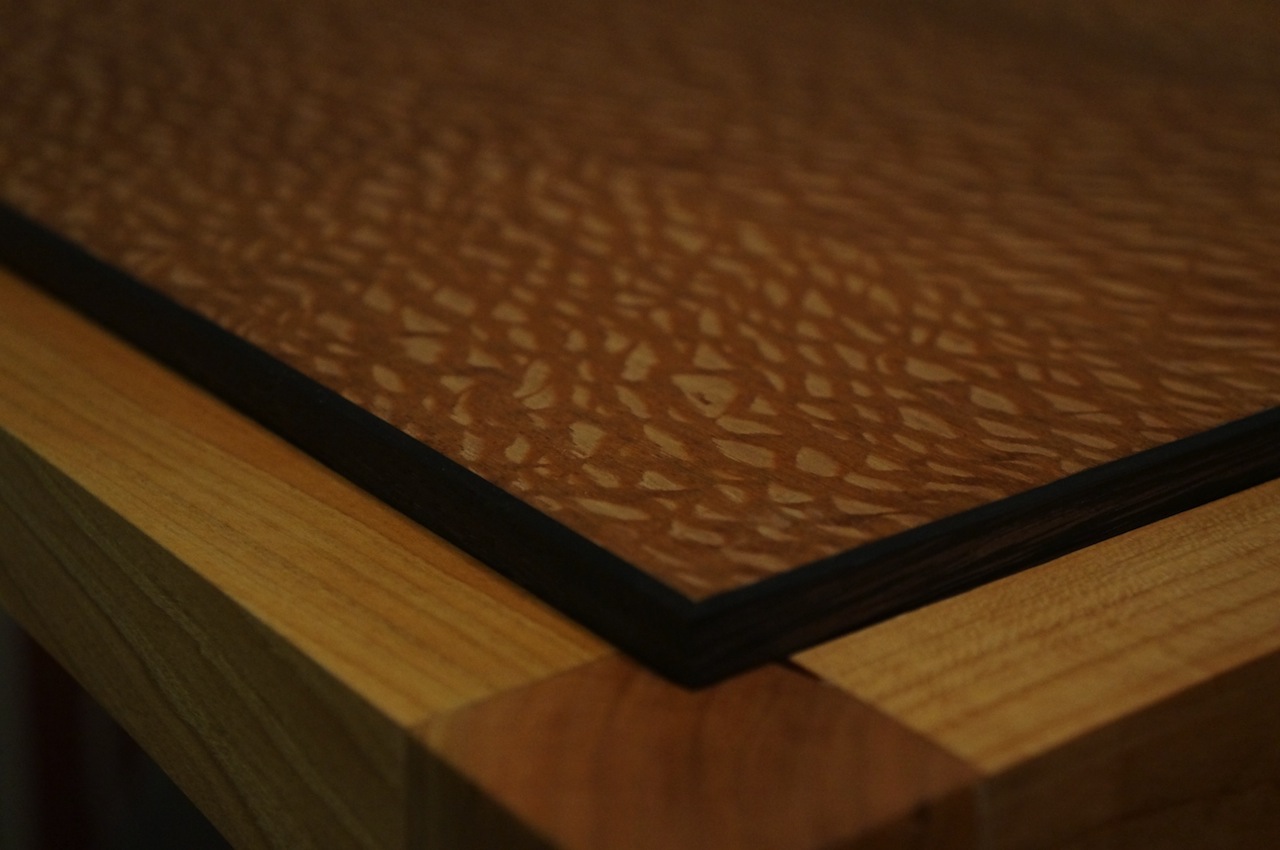
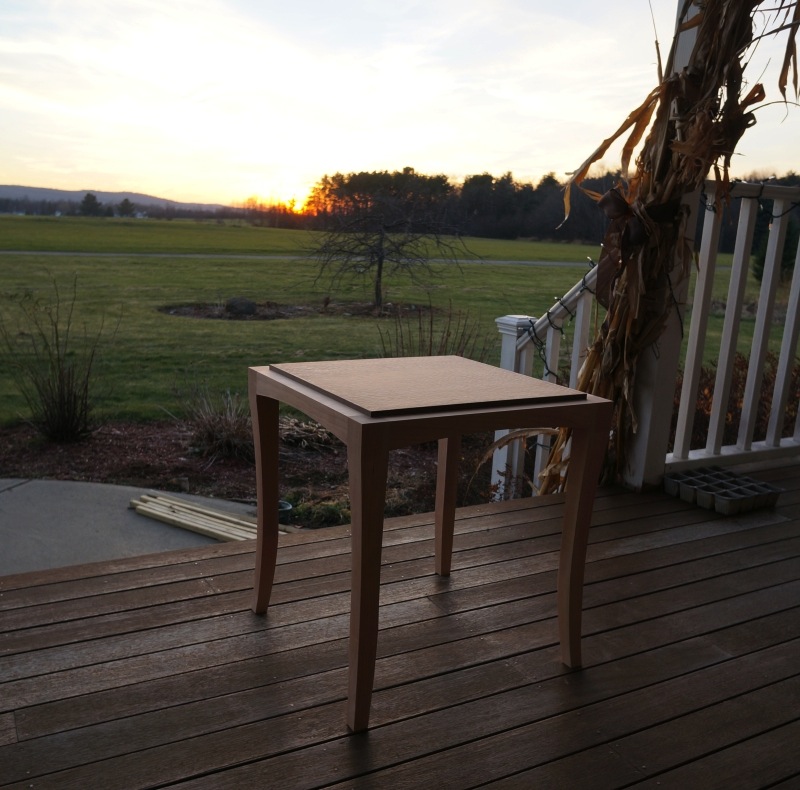
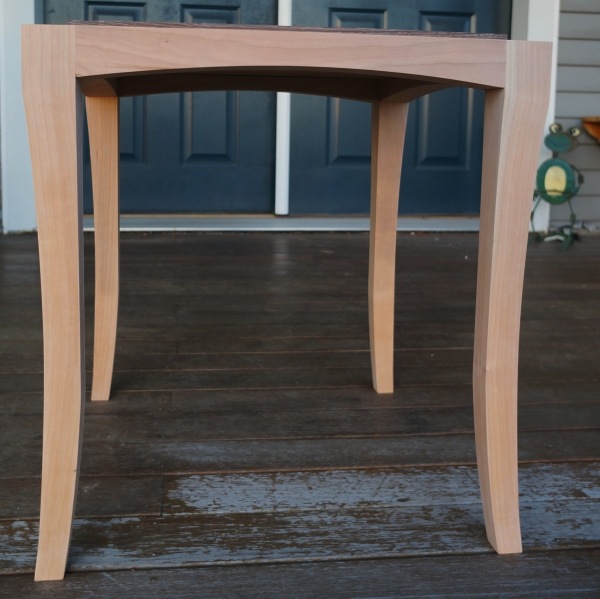
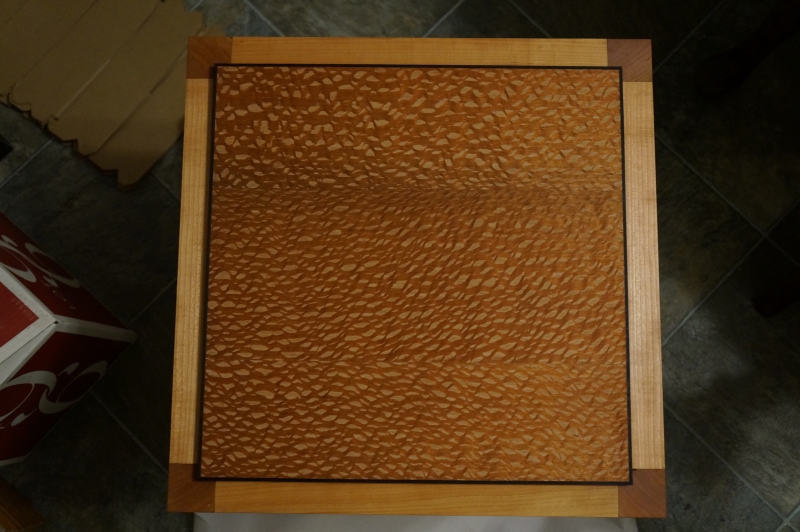
Armed with a bit of knowledge, DJM’s awesome project and Sketch-up, I jumped right in. This is my first piece of fine furniture. It took almost 3 weeks to build plus sketch-up planning. I did the rough milling at a friend’s house and the band-saw and router work in my basement. The legs and aprons are cherry. The edges of the rough board went to the legs (rift) and the rest went to the aprons. The joinery is hand cut mortise and tenons. The top is 3 pieces of lacewood veneer. The back side is cherry veneer. I edge banded the top with thin strips of Wenge cut on the table saw and mitered on my chop saw. I sanded to 320 and finished with a 1/1/1 oil, mineral spirits and varnish basement blend.
The Table was presented to my sister as a house warming gift and she loved it! Now that the whole family has seen it…well let’s just say the requests are still coming in.
I sure have learned a lot. A lot more than expected! As can be seen in some of the photos:
1) Always glue up the legs before chisel work for the top begins. I had blow out on one corner of a leg where the inset is because the grain was unsupported.
2) The inside shaping of the legs should have started 2/3 the way up instead of only 1/2 way up for more elegant curves.
3) Veneers are impossibly thin and leave nothing to sand. I just barely exposed the plywood substrate on one corner and was unable to completely flatten/clean up the veneered top.
4) Sap wood – Come on man! Always popping up where I didn’t expect it. There must be an art to board selection that only experience brings.
4) What the heck is up with snipe? Getting rid of it is the equivalent to snipe hunting in boy scouts. I wasted a ton of time futzing and in the end had nothing to show for it. I learned to make my pieces longer than needed and just cut the snipe off.
Thanks for all the information. I couldn’t have done this without the online community!
Advertisers


