Justin’s Wee Lassie
Viewer Project
-
By Justin Thiel from Ohio
Added on July 22, 2015
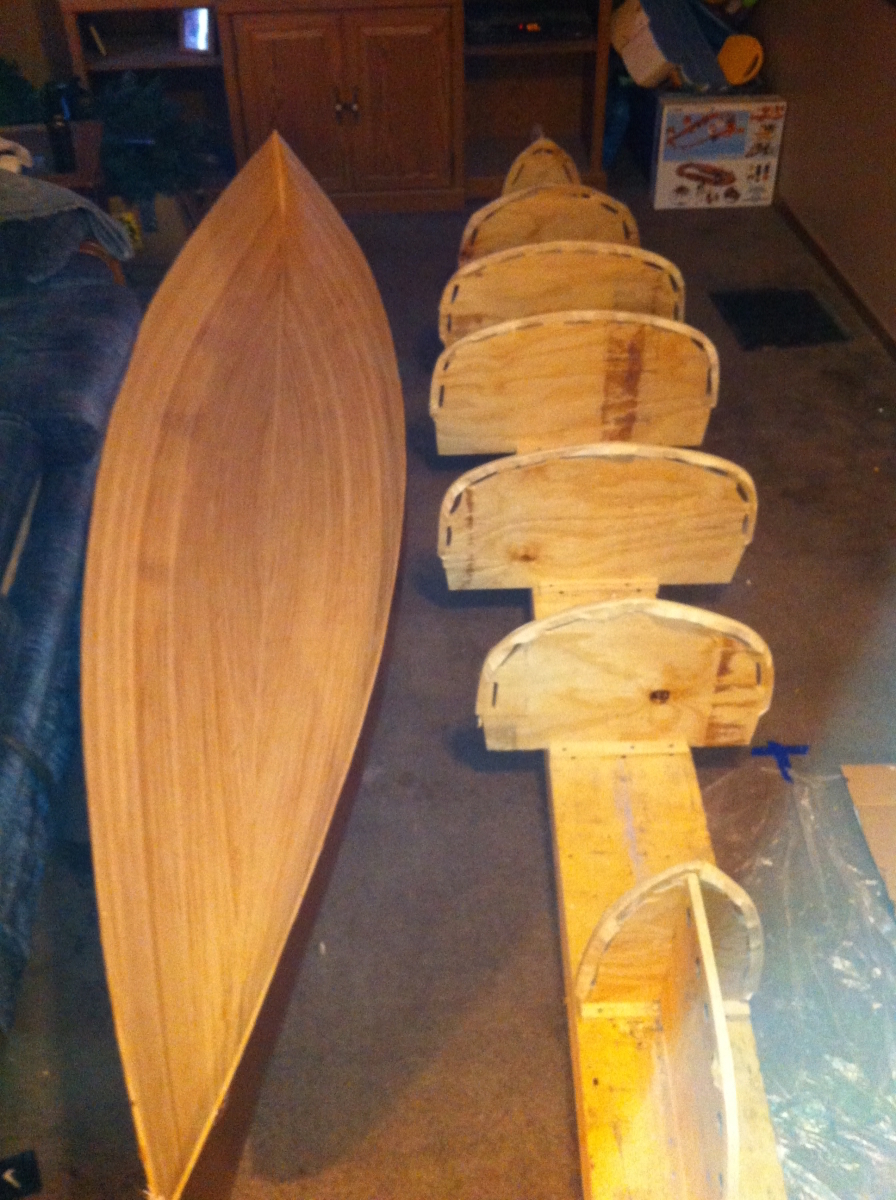
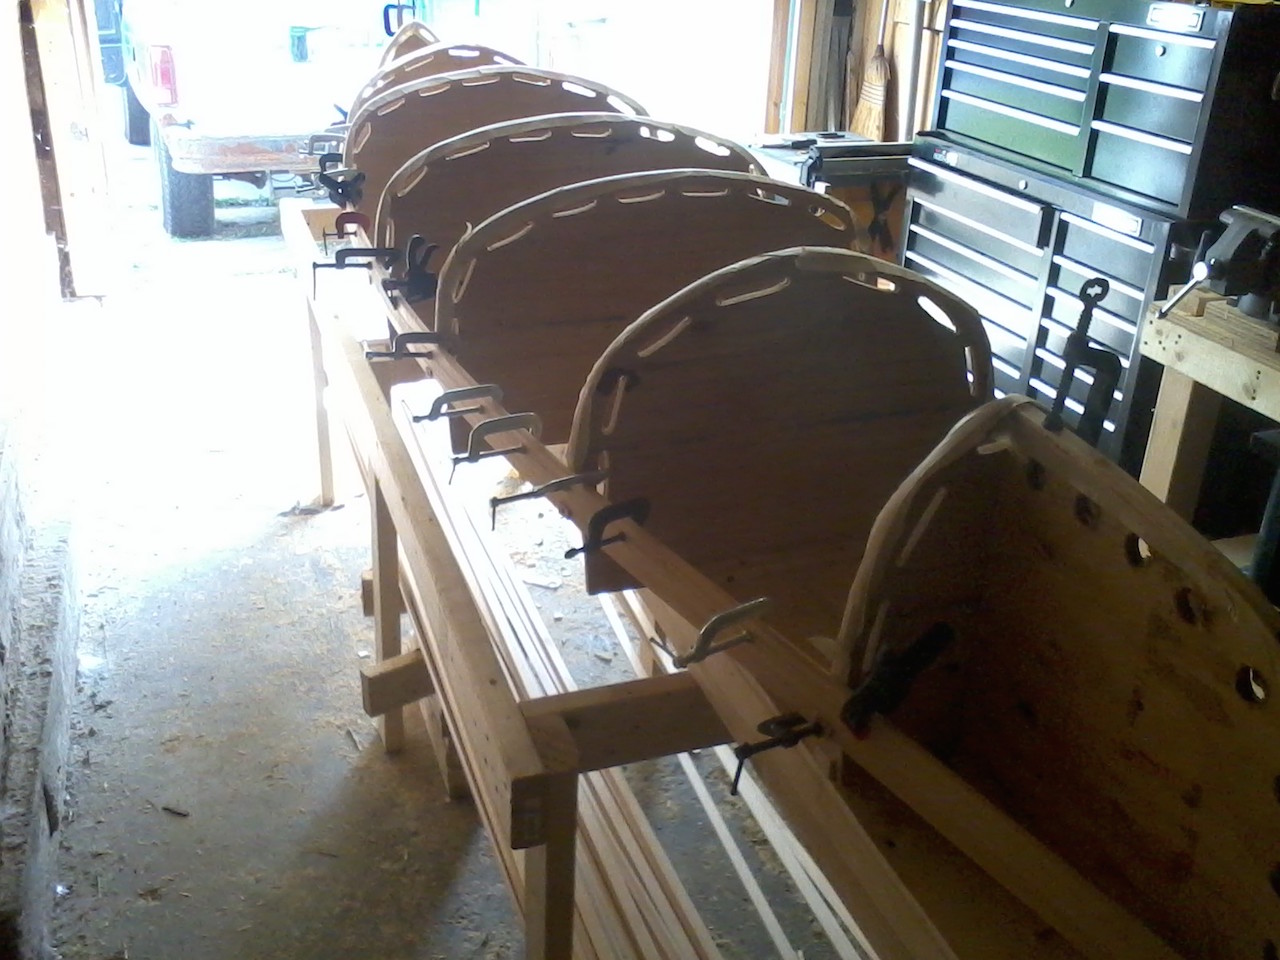
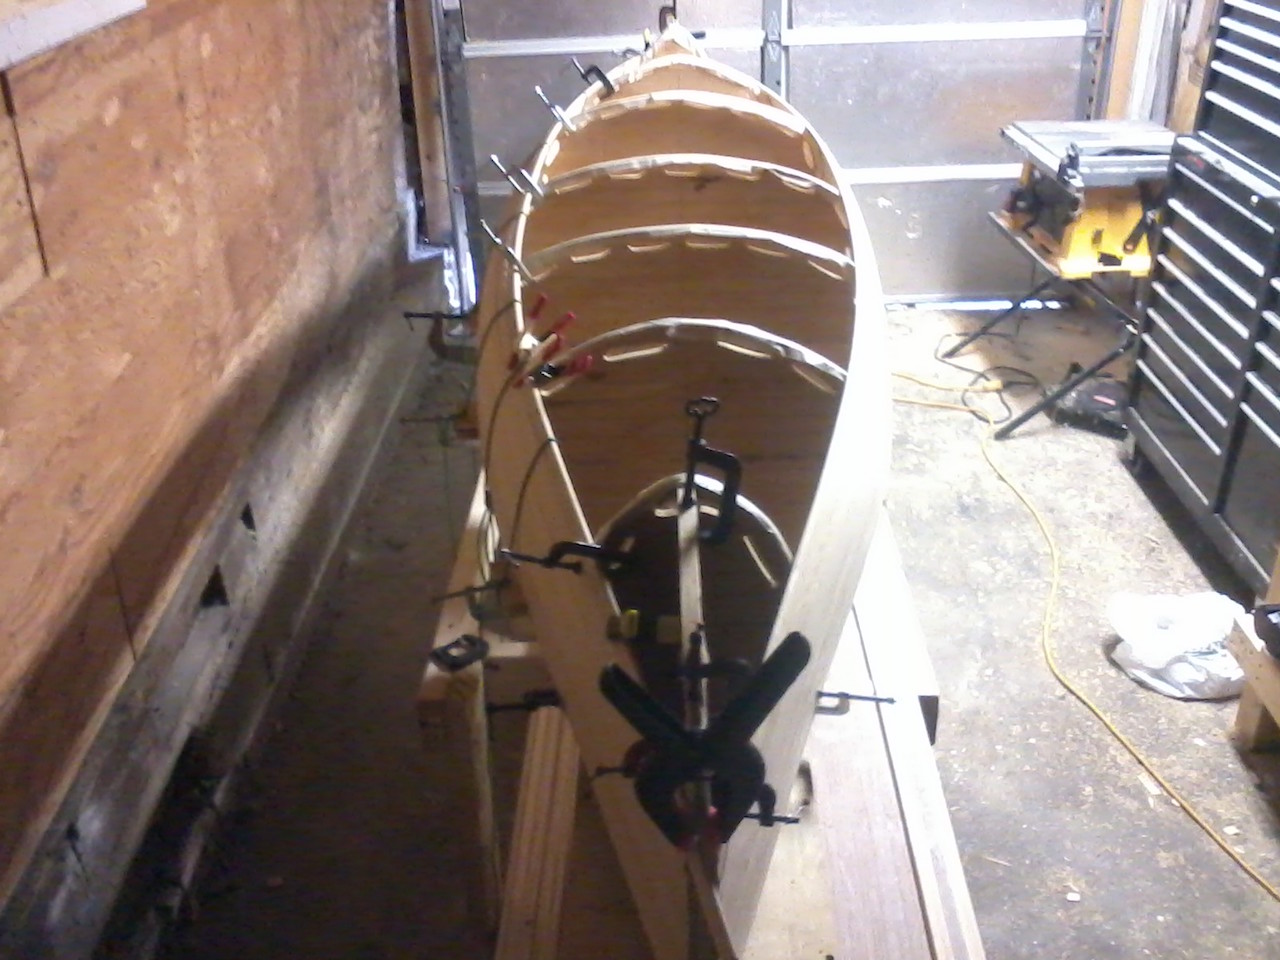
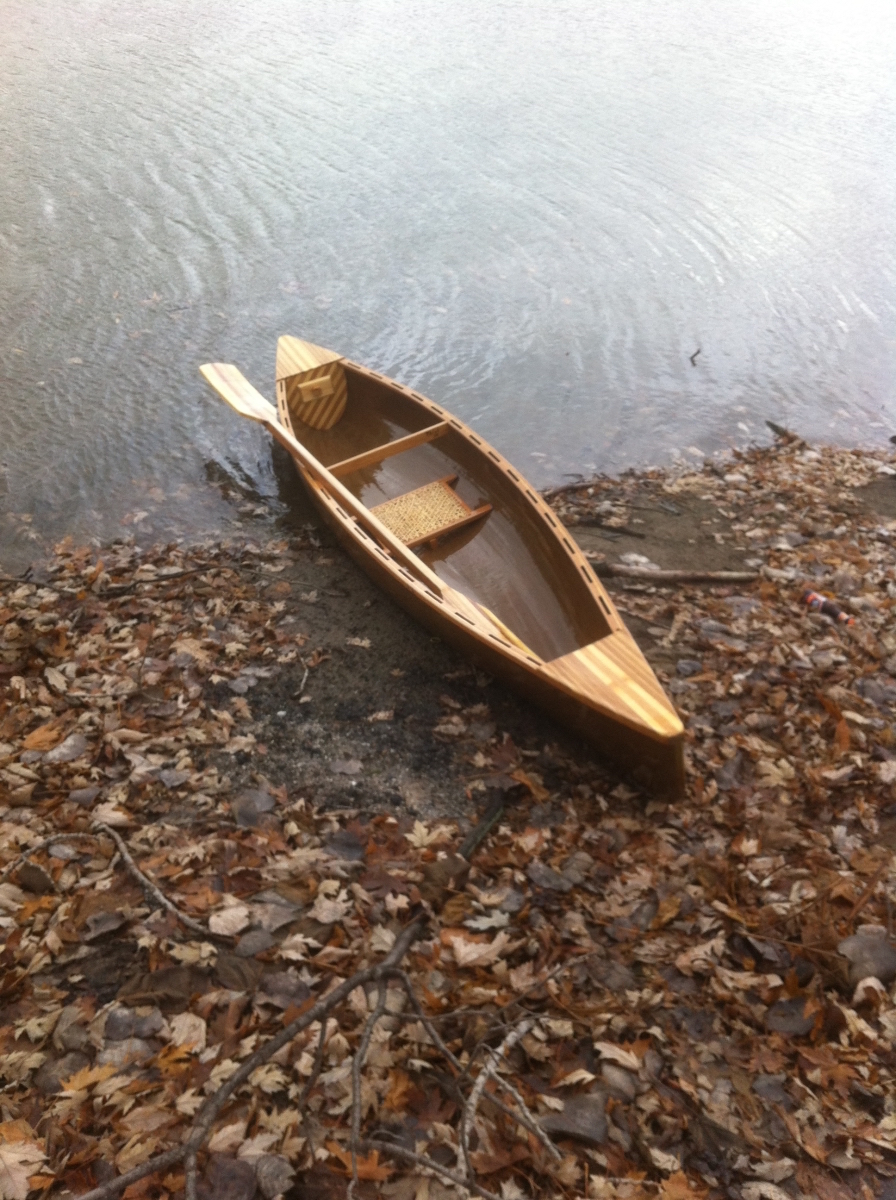
This project started for me in June of 2013, after flipping through both Featherweight Boatbuilding by Mac McCarthy and Canoecraft by Ted Moores. Due to the size of my one car garage shop, I was limited in options but went with the Wee Lassie design out of Fbb because, well it fit and the entire book describes specific instructions for that exact boat. With just enough room to walk all the way around the molds comfortably. I began ripping 1/4″ strips out of 1x8x12 select pine boards, then running each one through the router for a bead and cove on each strip. I cut the slots out of the molds for gluing, clamping, and tying each piece one at a time which took a considerable amount of time to let each one cure together before being able to move to the next, vs stapling each piece to each mold. The strips went on simple enough until getting to the big transition of the side to the bottom of the hull. The best method I found was to free-hand the angle on the table saw to fit good, then clamping and tying to the other side in order get an accurate cut to meet the keel and sister strip.
Once the basic hull was constructed, I faired it, but by this time it was getting cold in Ohio, so I continued the project in the middle of the living room. I was obligated into a water-based stain to adhere properly to the epoxy/resin. I researched and found to use conditioners to prevent blotchy spots in the pine, I sanded and sanded, raised the grain and sanded. It went on like paint on a brush, thick and smeary with the brush strokes and it was still blotchy after wiping. I sanded a quarter of the boat back to bare wood and re-coated it thick and dark. Although I would go back and buy the conditioner, I got the bolder look and it hid a lot of small imperfections.
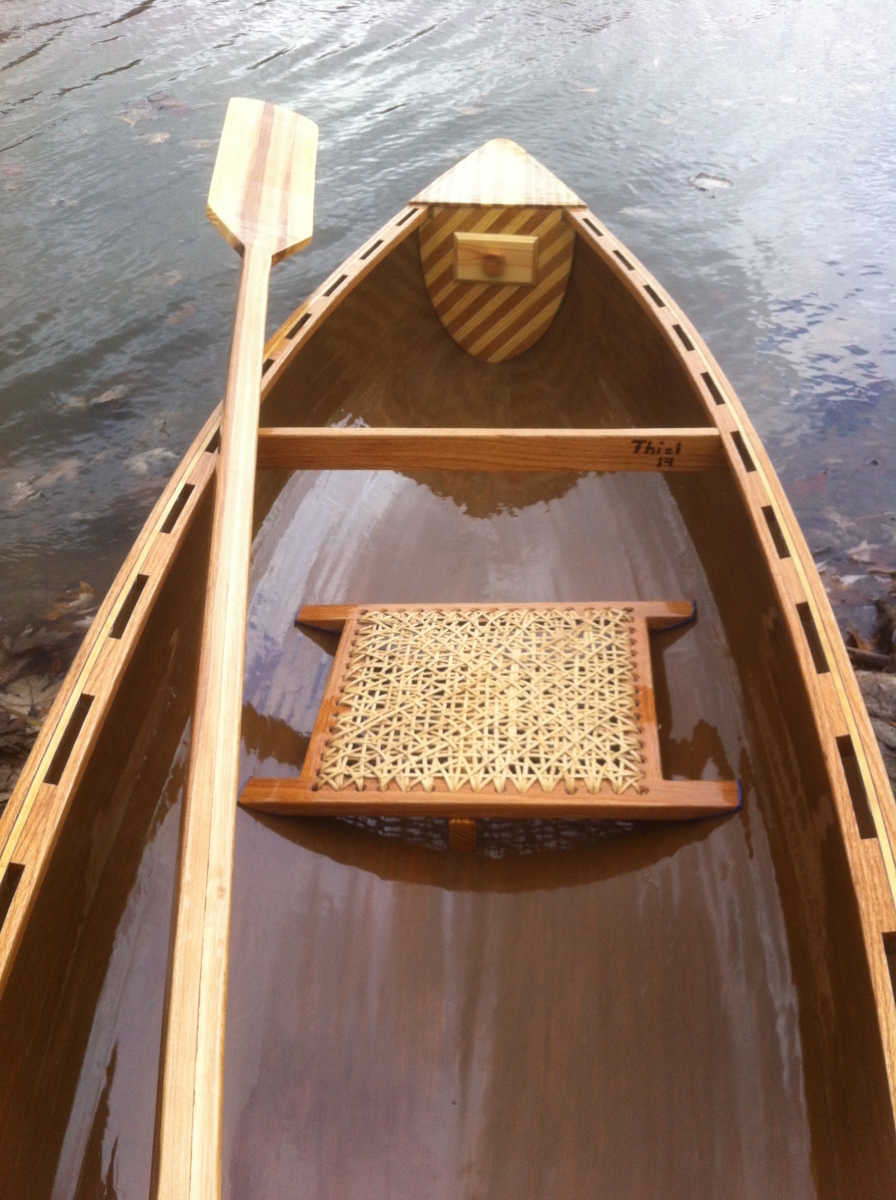
After laying the cloth and putting on 4 coats of epoxy/resin, (buy the 15$ epoxy spreading tool and save days of sanding) pulling it off the molds and flipping it over was a great feeling. The rails and thwart are red oak epoxied to the hull and really adds a nice looking trim. The red oak seat was mortise and tenoned together with holes all the way around for hand weaving with natural cane which was a nightmare. The compartments were cut from a piece of plywood with red oak and pine strips glued to it and epoxied in place around the door. The decks had one piece of red oak down the center, then pine on each side, finishing with hickory. The paddle is all hickory except for 4 pieces of pine. Two full-length pieces and the the rest cut with a jigsaw, faired with a belt sander, epoxied together to form cupped ends to scoop the water, and then sealed with epoxy.
Everything was coated with 4 coats of marine grade UV,Z-spar Flagship varnish to protect the epoxy and the color from fading. Finally after countless hours of sawing, planning, sanding, brushing, and sanding, I was able to sit in my little boat floating in the river, laughing to myself thinking I made it, everything is good. I only spent maybe 20 minutes on the water due to the weather, after all it was November in Ohio! All I could think was that all the work was so worth it!
There was a huge learning curve in this build and I’m sure I would spend half the time building another one by doing things more efficiently. The total cost was around $700: hull-$90, epoxy resin fiberglass-$400, varnish-$100, and paddle-$40. The experience of building this boat and imagining all the time I’ll spend on the water going to different states and exploring new waters and wildlife, is truly gratifying and I encourage anyone wanting to build a similar boat to buy Featherweight Boatbuilding and to just go for it.
Advertisers


