The Tops
 The table and bench tops are assembled from multiple smaller boards. Normally I like to use the widest boards possible for something like this, but this particular batch of cedar features boards that contain the pith (center of the tree). The pith can be quite unstable so for the longevity of the project I am cutting each board down and removing the center section. Ultimately it’s a good idea to leave your boards at their full width to make the glueup much easier.
Breadboard Ends with the Domino
I decided to include breadboard ends on this project for a couple of reasons. First, is the fact that it looks cool. Second is stability. By running across the width of the table, a breadboard end will help keep a panel flat over time. Furthermore, by blocking the end grain, a breadboard end will slow down the uptake and loss of moisture by covering and protecting the end grain.
There are lots of great ways to make breadboard ends but they all have to satisfy the same requirement: the top must be allowed to expand and contract. I have seen designs out there that simple screw the breadboard to the table with no allowance for expansion and contraction and unfortunately that’s a recipe for disaster. Because I was already on a Domino XL kick, I decided to see if I could use it to make the joint. I did a quick web search to see if anyone had already done this and found this blog post. Seemed like a quick and easy way to get the job done so I gave it a shot.
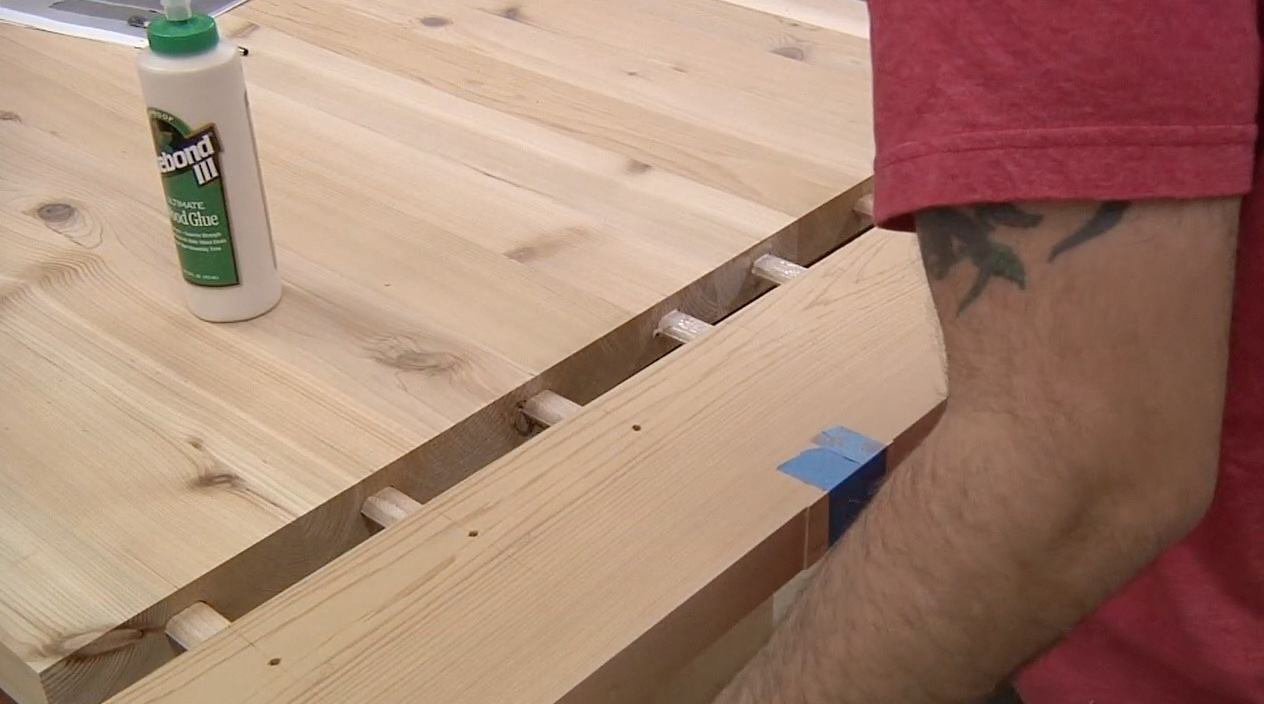 For those who are Domino nerds, I’ll explain why this works. The Dominos are glued into the table side of the joint with glue and no slop. On the breadboard side, the two center mortises are cut with no slop but the outside mortises are all cut on the loose setting. This loose setting will allow the table to expand and contract but they won’t do anything to hold the breadboard end tight against the table. So I used glue on the two center Dominos, locking them in place and drilled through the outside dominos for dowels.
If I were a little more motivated on this project, I would have tried what would surely have produced a tighter joint: the drawboring technique. But laziness won and I simply drove the dowels through with clamps holding the breadboard tight against the table. Keep in mind that this setup will require these thin dowels to flex when movement occurs. In the ideal world I would have a nice slot cut into the outside dominos that would allow the dowel to move side to side. But given the fact that dominos are quite narrow, I opted to take my chances with the flexing dowels.
Extra Protection
 Before applying the finish, I gave the table some extra protection by sealing the bottoms of the legs. By preventing moisture from being pulled up into the end grain, the longevity of this table is increased dramatically. The product I used is a 2-part epoxy finish called Clear Penetrating Epoxy Sealer (CPES).
The Finish
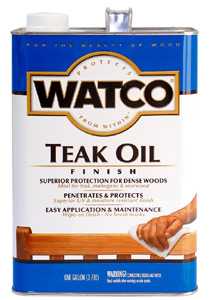 The finish I chose was Watco Teak Oil. Teak oil is not made from teak wood, but FOR teak wood. It can also be used for other woods so don’t let the name fool you. Teak oil is really just an oil/varnish blend that’s formulated for outdoor use. It applies just like a danish oil (flood on, wipe off) and produces a low lustre finish that adds at least some protection to the surface. I’m not a fan of heavy film finishes, especially on outdoor pieces, so this finish product fits the bill.
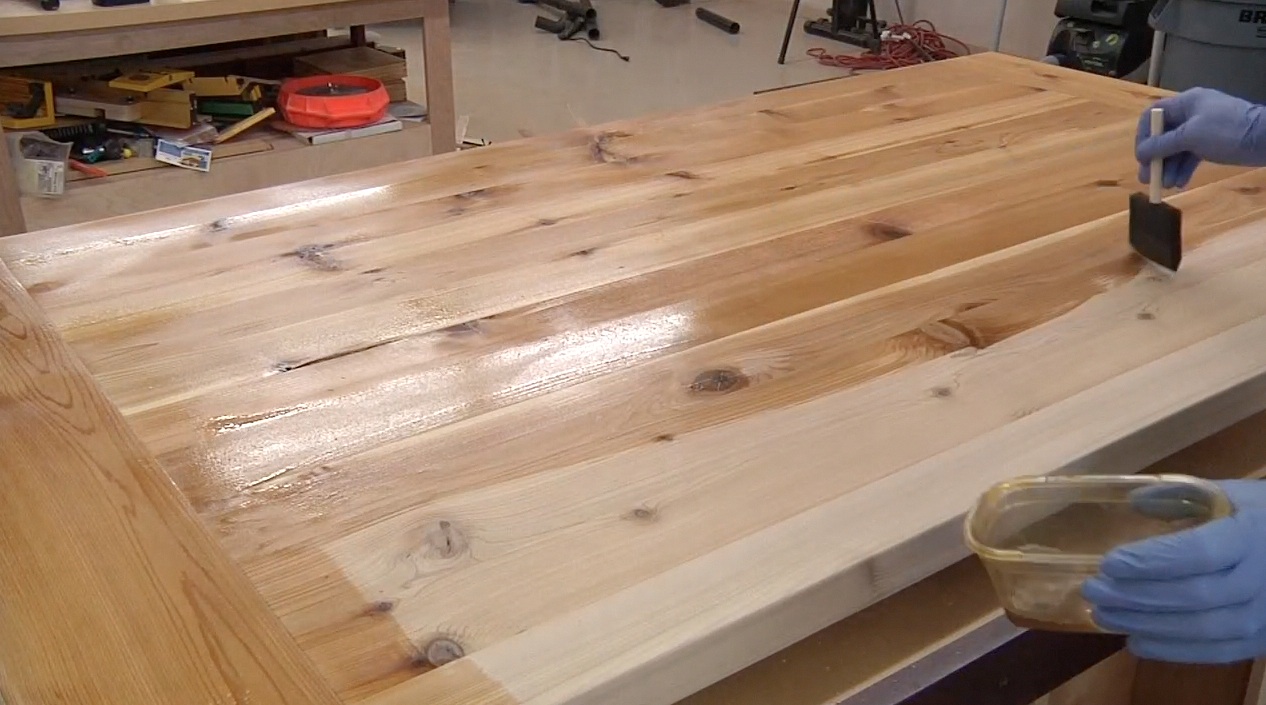 The thing to keep in mind is that this isn’t a low-maintenance finish. Every year or two, I’m going to have to give this table and benches some love. Perhaps a very light sanding and a light reapplication of the teak oil product. But since I do this stuff for a living, I think nothing of spending an afternoon re-applying finish to one of my projects every year or two.
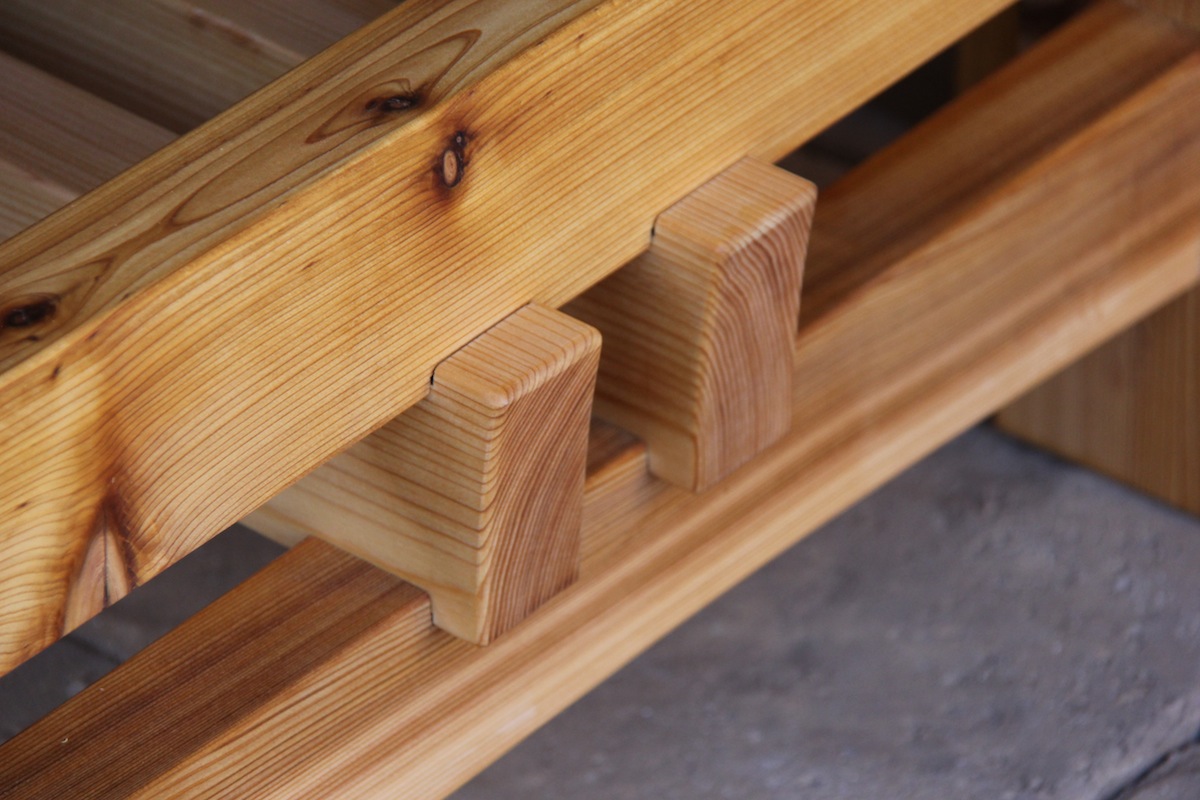
Attaching the Tops
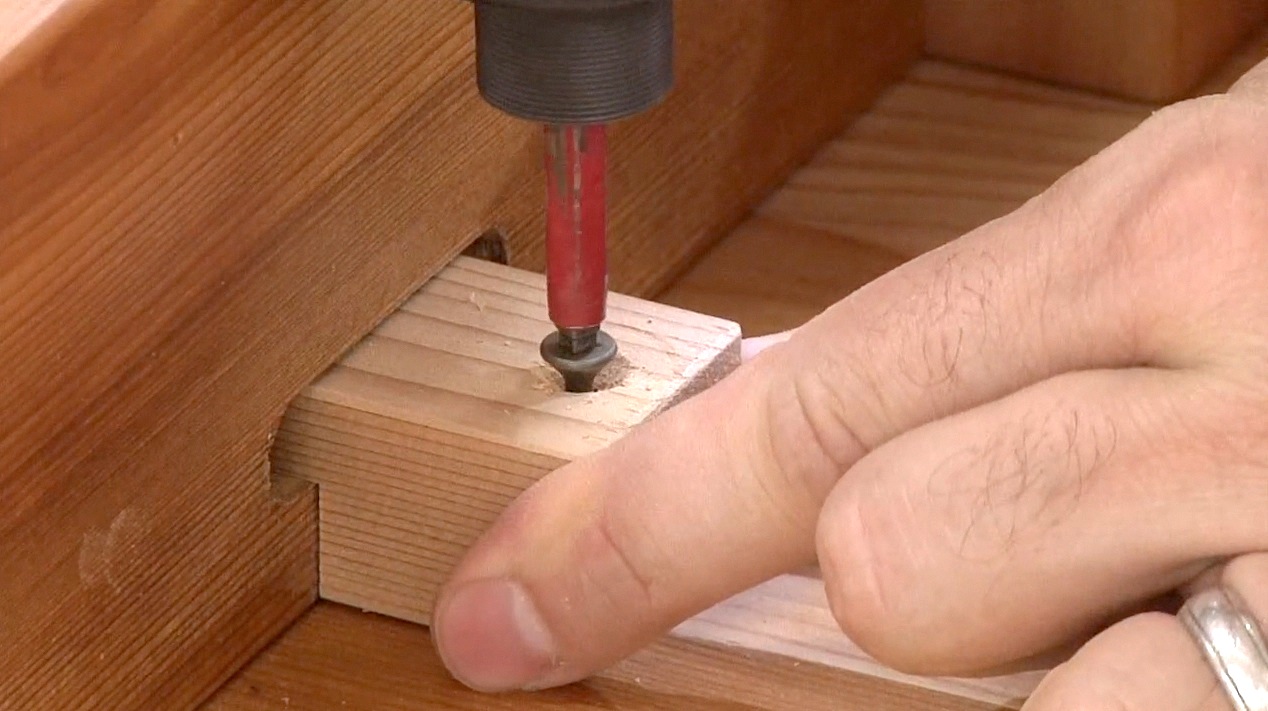 The table and bench tops are attached to the frames using the shop-made clips we made previously. Each clip is positioned in such a way to allow for movement as the tops expand and contract over time.
The Plans
Thanks to the assistance of my good friend Aaron Marshall, we have both a SketchUp File and a PDF plan that you can download.
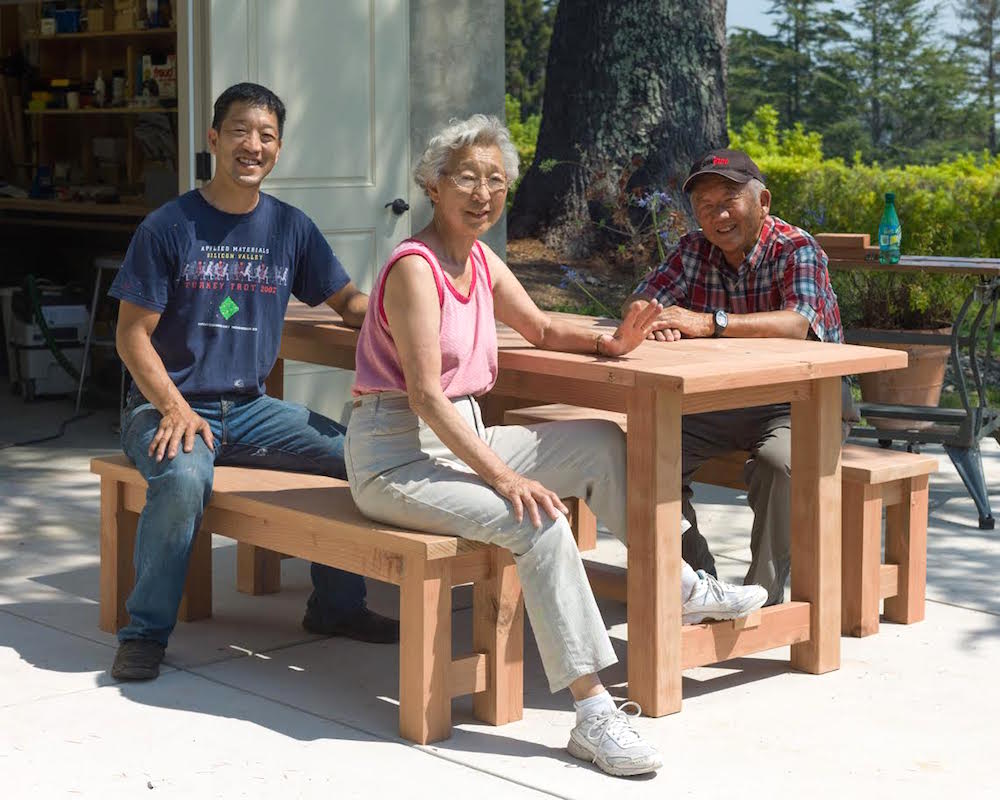
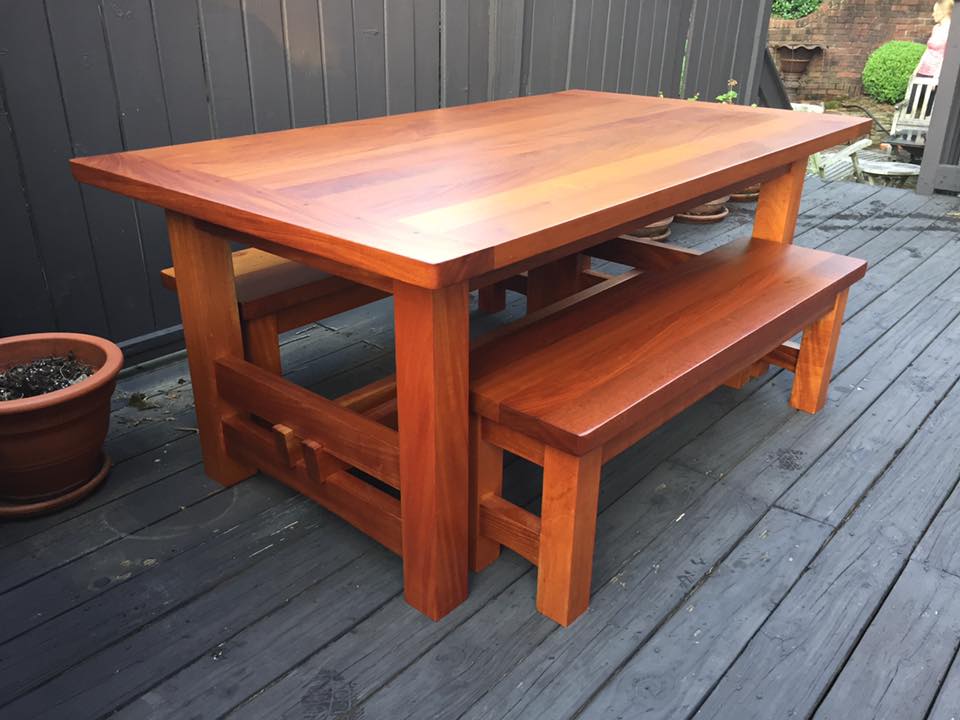
My Gallery


Viewer Gallery