Go with the Flow – Continuous Grain
Article - September 22, 2009
One of the things I feel sets a craftsman apart from a woodworker is the continued attention to higher quality and detail. A very important detail that you should always think about is grain continuity. This is one of those things that the average onlooker has a hard time putting their finger on. If you could place two nearly identical boxes in front of them, one with continuous grain and one without, they would most likely prefer the look of the continuous grain version and not necessarily know why. Continuous grain imparts a sense of harmony to the piece that discontinuous grain disrupts. That’s not to say that the other box can’t be beautiful and well-constructed. Its just that it would lack that one little extra detail that would turn a home run into a grand slam!
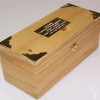 Here are a couple of real-life examples from our good friend Google. These two boxes both have disrupted grain patterns. As a result, they fall a little short of their potential. Let’s take a closer look at the box on the left. The grain is not only disrupted where the front meets the side, but also where the lid meets the rest of the box. These are two very important areas for box-makers to focus on.
 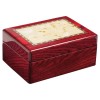 Looking at the box on the right, we can see the front to side joint is disrupted. But this person was careful to make sure the lid was matched to the rest of the box. In all likelihood, the box wax constructed as a closed cube and the lid was sliced off, similar to the process used in this video.
Now I don’t mean to disparage the woodworkers who created these beautiful boxes. Clearly a lot of effort was put into their construction, and not everyone cares this much about continuous grain. But when I see a box as finely crafted as the box on the right, with its awesome burl inlay and fine lacquer finish, I almost expect to see that beautiful grain flow wrapping around the front.
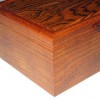 Here’s a box from West End Woodworks that makes excellent use of grain. It is so well done that its almost difficult to see where the lid starts, and the grain from the front just wraps right around to the side. It produces the illusion that a board was just bent to a 90 degree angle! Very cool!
One other thing to keep in mind here is your choice of wood species. The more pronounced the grain, the more important it is that you pay attention to it. If you are using a wood with a relatively muted grain like the mahogany (below on the left), it probably won’t be nearly as noticeable if the grain isn’t continuous. But something like walnut (below on the right), would be incredibly noticeable.
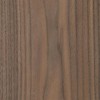
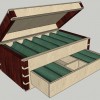 What inspired this article was an email I received from Guild member Brandon who asked about creating a continuous grain drawer front for his poker storage box. I happen to have a few pictures of this process from several years ago when I was building a hall table and I thought it would be a great time to share this information with you.
It all starts with a board that is slightly wider and longer than you actually need (by about 1/4″). We are essentially going to cut the drawer front out of the middle of the board, and we need that extra material to make up for what we lose to the blade kerf. I like to use the thinnest blade in my collection and I start by ripping the top and bottom (lets call them “rails”). This leaves us with a wider center piece that needs to have its ends trimmed off in order to release the actual drawer front. So two quick cross cuts at the mitersaw or tablesaw will yield a drawer front and two side frame pieces. Its critical that you keep everything straight so label all of your parts and use chalk to draw reference lines if you need to. Now put the drawer front aside for later and glue the frame back together. If you are careful about it, the frame will look like one continuous piece and you won’t even see the new joints. And your drawer face will be perfectly matched to the wood around it. If you have a well-tuned bandsaw, consider using it for this operation so you can take advantage of the super thin kerf.
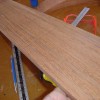

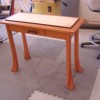
So do you guys have some great examples of grain flow that you can share? Post a link to the images right here in the comments area. To post a link, just copy and paste the URL into your comment.
**Gratuitous plug** – So if you like the look of the hall table pictured above, consider taking my class at the William Ng School in January.


