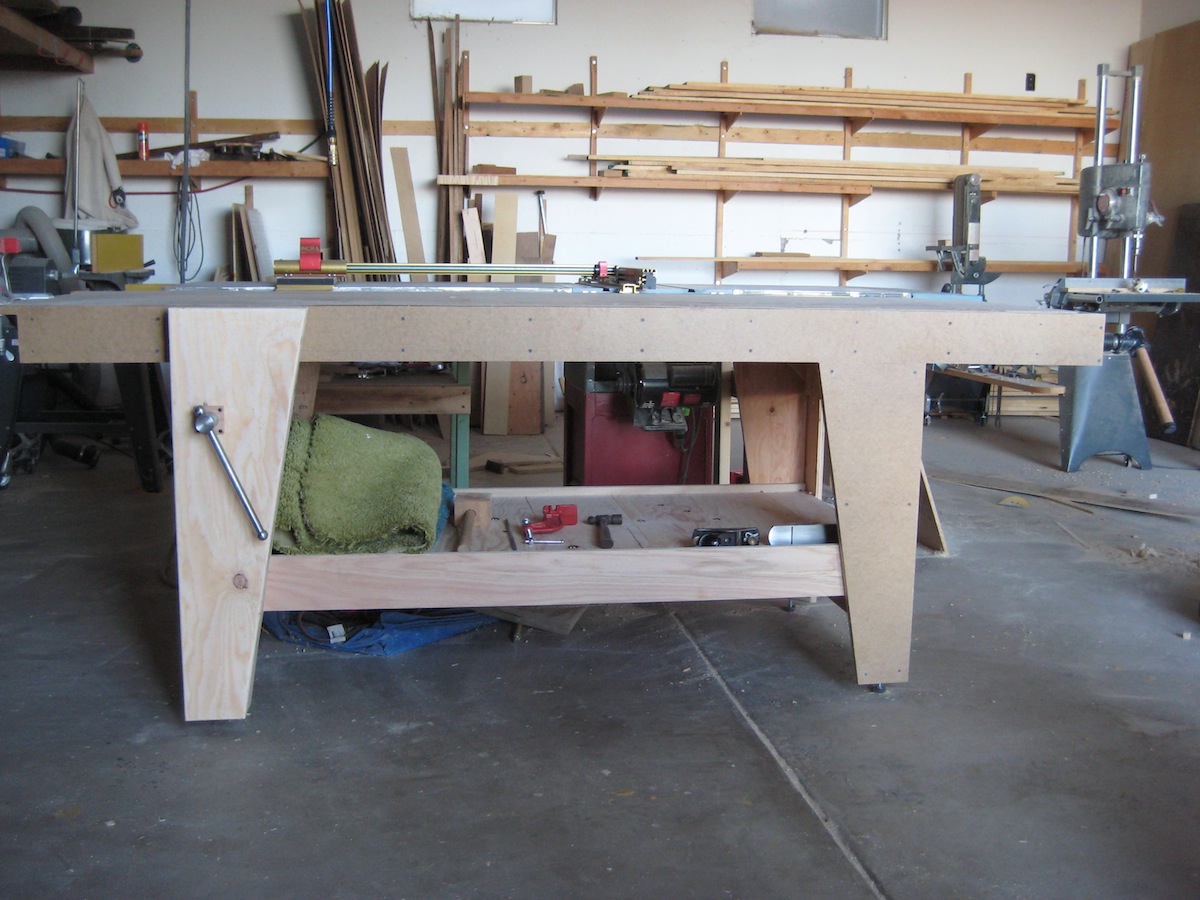
I think most people have an unhealthy addiction to tradition, old is not always best. I really like your “best tool for the job” approach, I always want to work that way. Recently I’ve been trying to trim every project down to absolute functionality, both in production and use. I’ve tried to let the use of each piece dictate everything about it (size, shape, material, finish), while also finding the quickest and cheapest way to produce whatever that thing may be (so long as all functionality is retained). The first thing I tried with this method is my latest workbench, I’ll briefly highlight the main advantages over traditional bench making methods and materials.
Cost – this bench cost me about $80 altogether.
Time – No glue ups, no material surfacing, altogether it took me around 8 hours.
Tools – No jointer, no planer, this bench can easily be made with a minimal tool set.
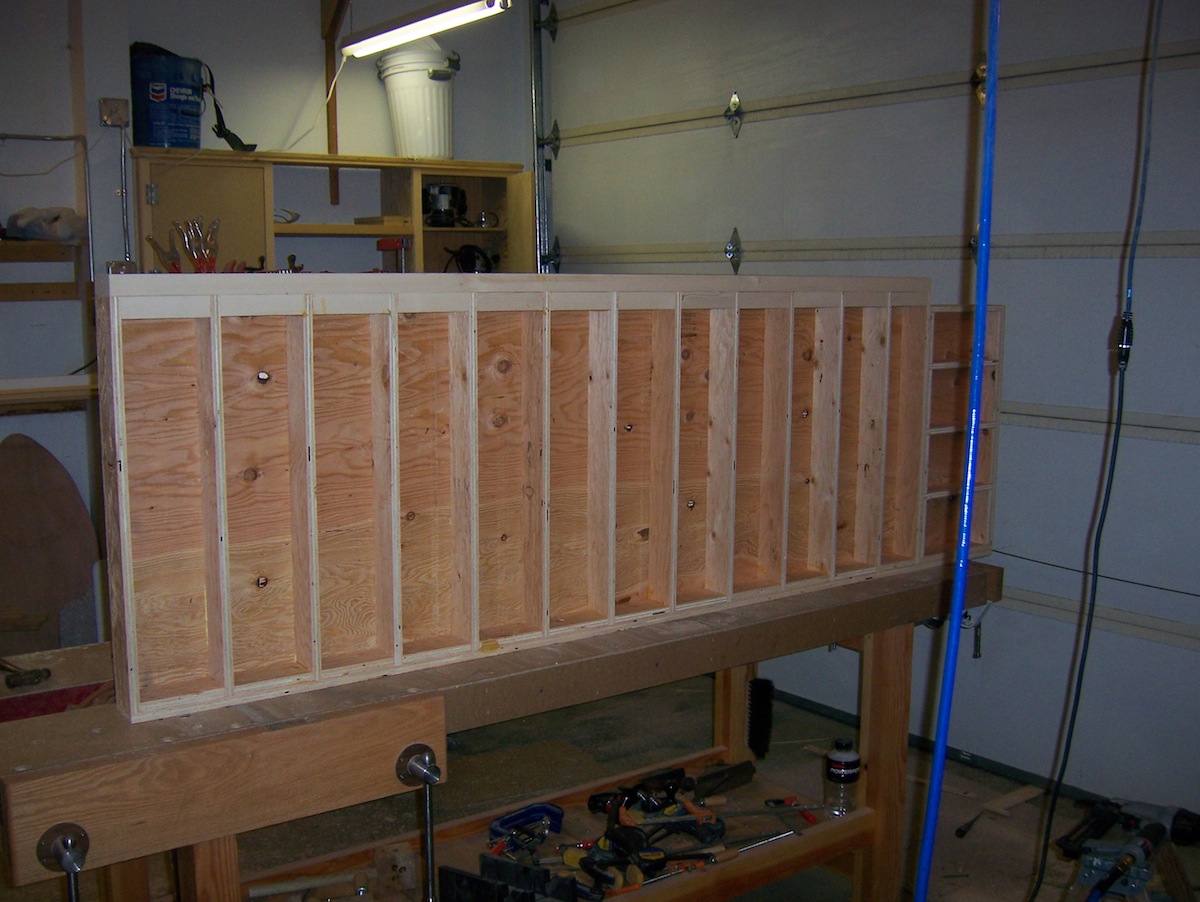
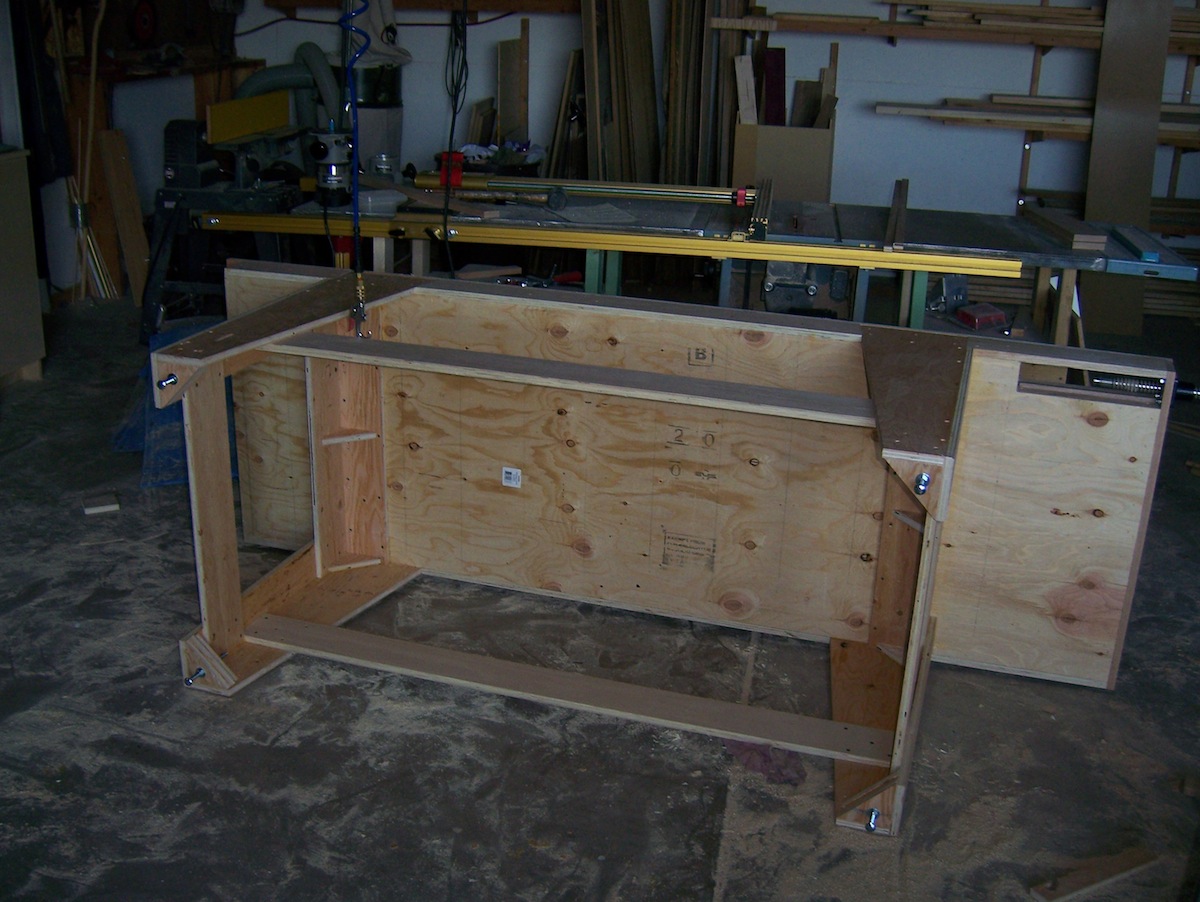
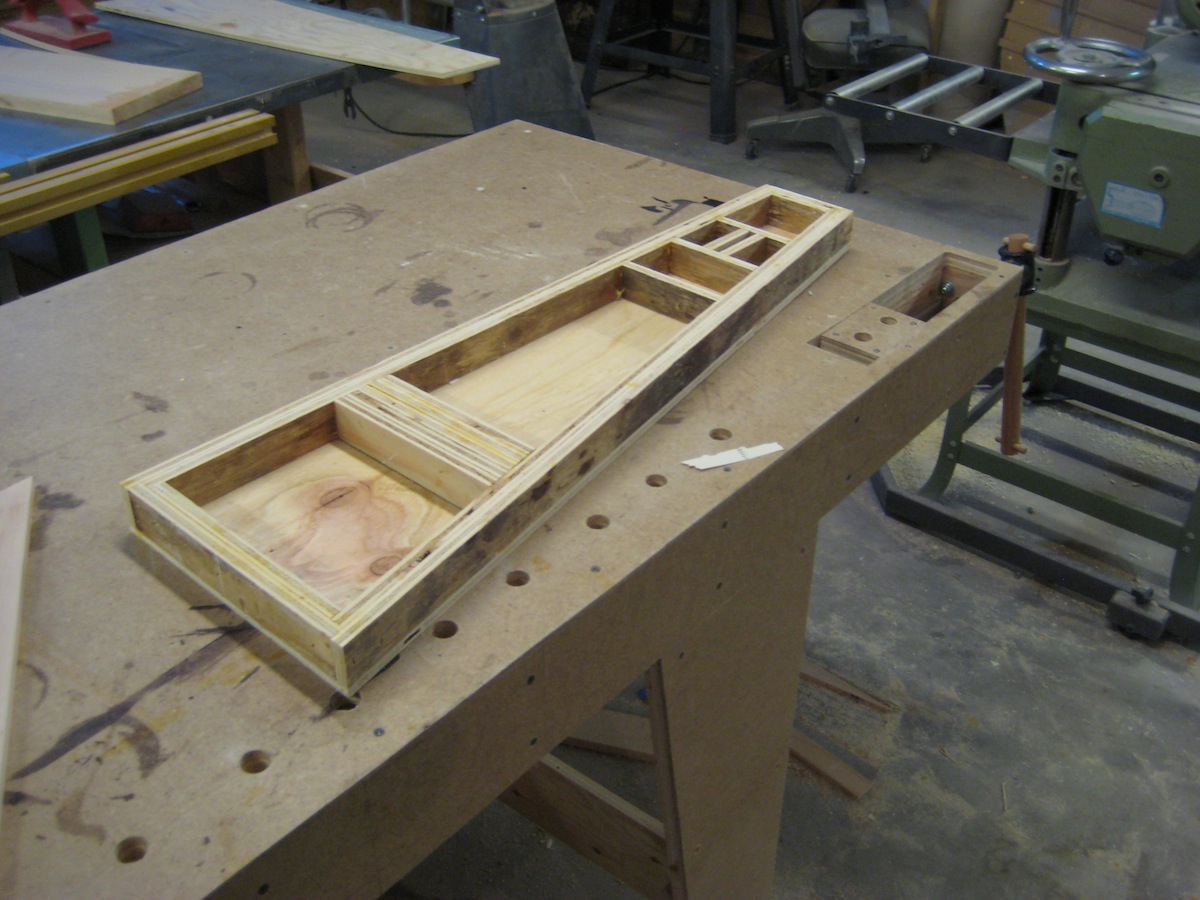
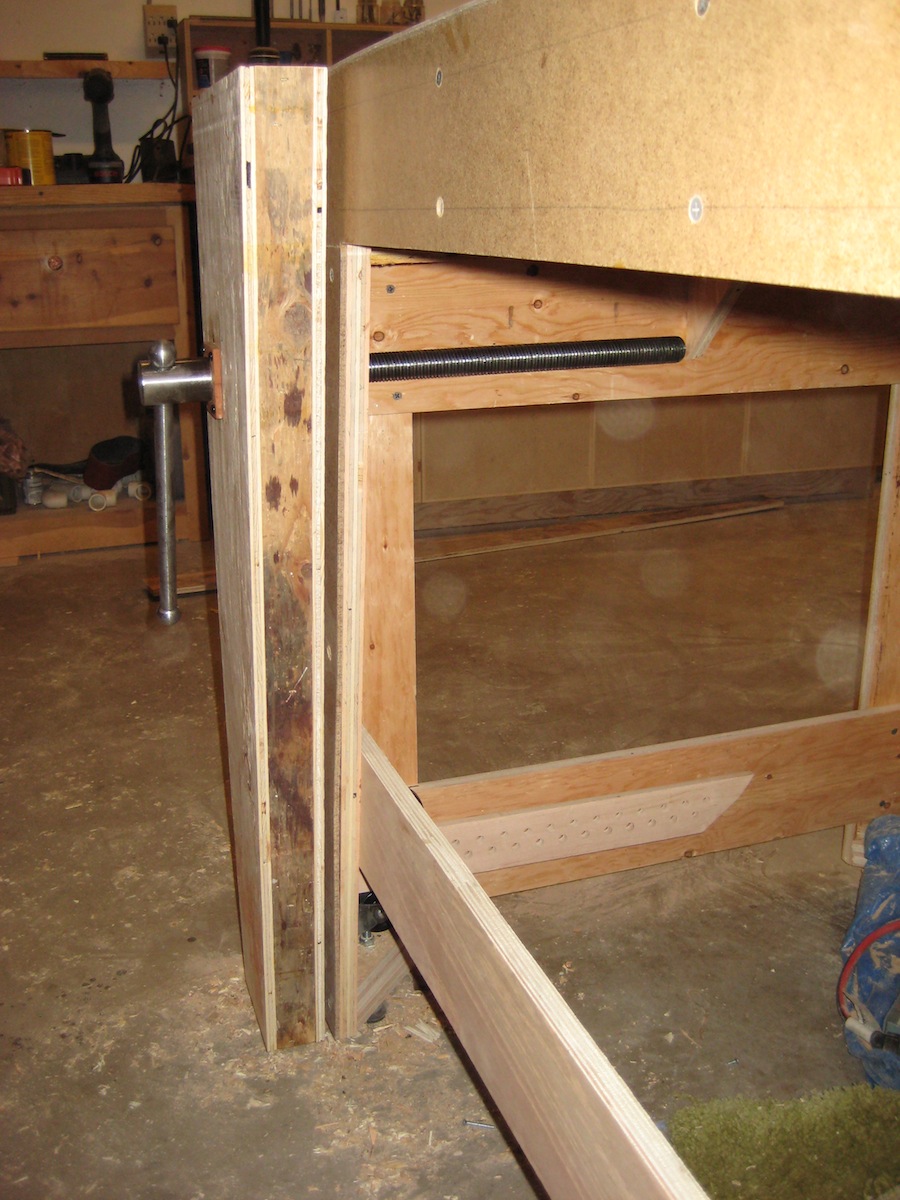
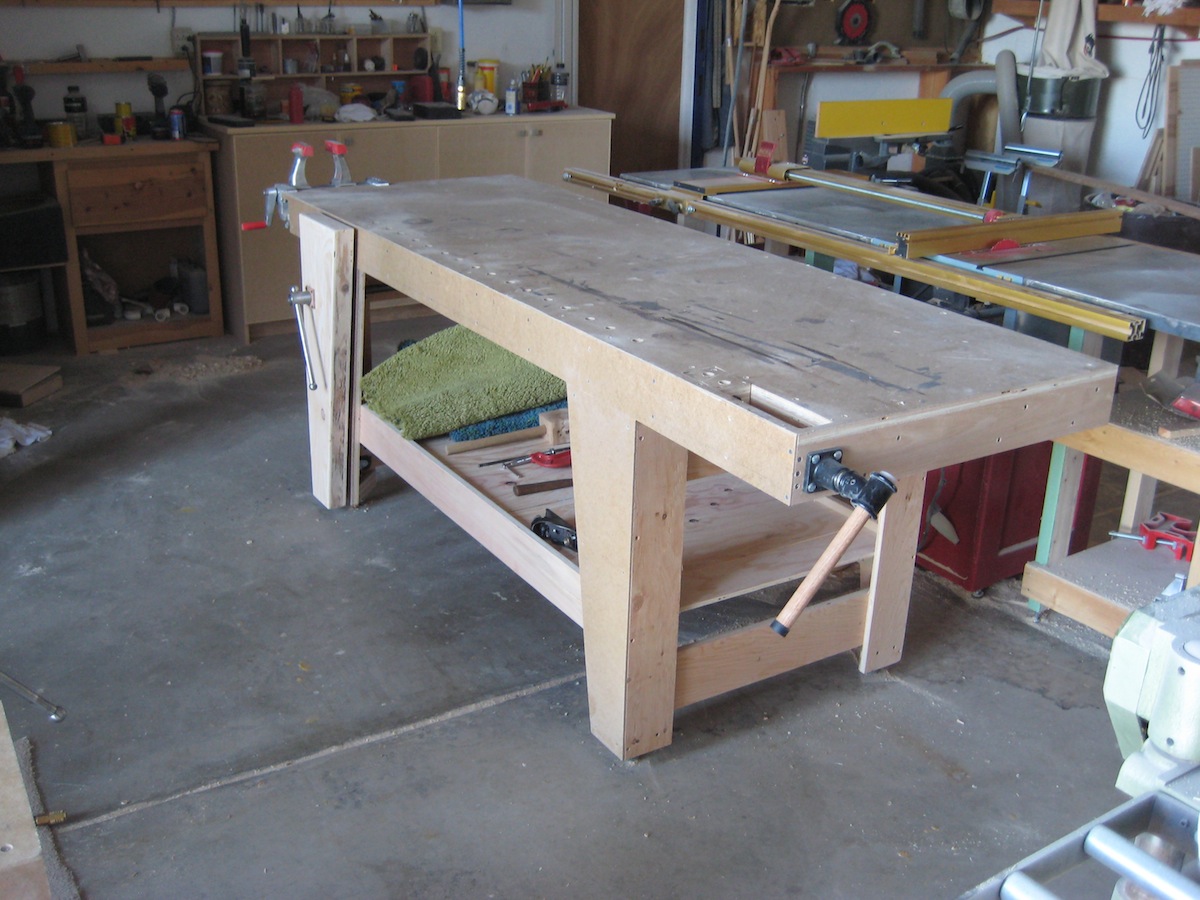
The top is flat and stable, never needs to be flattened. This design is extremely rigid, no chance of racking. The leg-vise chop is also a torsion box, lending the same benefits. 8/4 lumber is expensive and all solid lumber warps over time, not a torsion box. I made the chop from scrap 1/2″ and 3/8″ ply, its light and flat. I have a nice solid bench (modeled after the 21st century workbench by Bob Lang) and I can’t think of a single reason why I’d rather use it than the torsion bench. There are no drawbacks. This bench is cheaper, faster, easier, more stable, and every bit as functional.
So what do you think? Blasphemy or brilliance? Is there still a reason to labor over a solid wood bench? I think with the addition of a sacrificial/replaceable top, Bud’s bench has a lot of appeal for me, personally. And that’s the key isn’t it? A workbench is a very personal piece of functional furniture, so to each his own. But I would love to hear your opinions on this concept.


I am thinking about building a large bench with the dual purpose of storing plywood sheets underneath. Here is my general idea:
http://tinypic.com/m/ftfs7p/3
I wonder if the torsion box idea might simplify my top, possibly bottom and mid levels as well. The bottom and mid will be “shelves” to hold plywood sheets. Could the torsion box be thinner (than my 2x6s) yet equivalent or better strength?
The bench would then become a workbench, assembly table, etc etc.
I was sizing it up initially for a 49 x 97 mdf. I needed the extra inch so that the openings below are large enough to hold 48 x 96 plywood.
Thoughts? Is this plywood storage idea insane? Right now, though, I just have my sheet stacked up against a wall. My shop ceiling is only 97″ high at the low end and maybe 100″ at the high end, so there is not much clearance and trying to tip those into face up/down position is a nightmare, so thinking a large table with storage below might work. But open to better ideas!
Not a bad idea, though I probably wouldn’t bother going through the trouble of creating torsion boxes for the shelves. Just stringing some 2x6s or 2x4s should provide all the strength you need to support the weight. Keep the torsion box for the top where flatness is truly needed.
It’s certainly not what I consider the “ideal” plywood storage solution, but if you’re tight on space this might be a great way to get double duty out of a table.
That is a great workbench. I love the craftsmanship and using the torsion box concept to build great things. There is this company Sing Core that has created torsion box panels. I wonder if it would be affordable to build a workbench like yours using these panels?
Really impressive! Certainly not blasphemous. Inexpensive. Solid and relatively easy to build. It answers the question of is a workbench a
I have a question. Is there blueprints for this bench and a Material list.
Thanks
Great Fabrication, the concept isn’t new but the execution is invaluable. I would add 2 observations:
1: Use glue – Ply gains it’s strength from the run of wood fiber in each lamination, screwing does not join these fiber layers from separate boards together. Glue will allow better transfer of forces through joints and give better durability through lower load bearing.
2: Feet – Point load feet also creates issues with vibration harmonics, movement…. Use some left over ply to build small box frames around each pin foot so after leveling you can fill the box with rapid set concrete $5 a bag and have solid leg to floor load transfer.
These 2 steps will firm up your bench significantly.
I actually glued everything except for the sacrificial top and all the hardboard. Since I’m using this bench as an out-feed table I went with rubber leveling feet.
Excellent concept. It’s possible to obtain detailed plans?
I think is awesome. I’ve been wanting to build a mobile workbench since I saw the torsion top video. I have a smaller shop so mobility is key. Having a slightly lighter but still strong, flat bench like this would be perfect.
I am finishing up my first work bench and already thinking about my next one. This looks like it could be my next and last bench. I definitively like it, I might just love it.
I grew up as a weekend warrior in my father’s humble basement shop. He has always been fascinated with tools and building things. One of my best memories in the shop is actually helping him build his new workbench. We had recently moved and his previous work area was attached to the walls and thus went with the house.
The new workbench was a masterpiece to me as a 8yr old, though it was actually a very simple thing. We used standard 2x lumber for legs and frame work and a plywood top, it looked much like the photos above.
It has been almost 30 years now and he still has that thing! It has endured hundreds of projects, pounding, and splattering of various liquids. Not to mention the half dozen or more moves across the country and back that it has made.
It is a heavy thing, but the two of us (once I was a bit older) could move it around pretty easily. He moved once again about 2 years ago (finally closer to me) and has been upgrading his shop space- a one car garage bay that can expand into the second stall with the movable equipment stands we have built for it. Now he is also upgrading that old workbench. He has enclosed the once exposed frame so he has hide-away storage for some of his smaller tools/boxes. Some of which are tools that belonged to my great-grandfather!
So I guess what I am saying is that a simple, inexpensive workbench can not only be very functional and durable, but it can also give you cherished lifetime memories of working with your father, or son and ties you to the past (in this case my great-grandfather whom I remember very well). Thanks for the original post- and allowing me to think about working with my pop in his shop!
-Chris
Nice design. Very utilitarian. Well thought out and well made. I used a bench like this for many years. Used it for painting and finishing and never had to suppress the weeping when I spilled purple PVC pipe primer on it like I did with my beautiful solid maple top recently. I like the idea of using a torsion box for a top, but i like the idea of a solid top better. personal preference.
Also my gut reaction upon seeing the construction of the top is that it seems to have too many ribs in the short direction and not enough in the long direction which is more likely to sag. Time will tell. And you said you had no glue ups. Not even your torsion box? How will it maintain rigidity with just screws holding it together?
I glued the torsion box, I guess I meant there are no clamping glue-ups as with solid lumber. Also, I’ve used two torsion assembly tables similar to this (they were actually even wider with fewer stretchers) and they never sagged. I am confident that this bench will stay flat.
I think you made a lot of friends around here with your design. I made a base for my TS using torsion box construction and it doesn’t sag at all even with the 1,000 plus pounds so I am sure you will neve have a problem unless you park your car on it!!
Nate
Bud,
While I’m still gonna use that 100+ year old barn wood for my hand tool bench, I LOVE your bench. I’ll be contacting you for ideas to incorporate into the assembly table/outfeed table I’m building next. I want to be able to do some clamping on it and will need some bench dog holes to do some steam bending. Your approach is fresh and inspired. Form following function..who’d of thought!! Great design and execution, Bud!!!
Vic
Great job on the workbench. All that really matters is it suits your needs and you enjoy utilizing your bench.
Jerry
Although a solid wood workbench top has the downside of needing to be periodically flattened, it’s one great advantage is that it CAN be flattened to the degree that you need, and reflattened if necessary.
One issue I see with a torsion box workbench top is that whether it is made of MDF or plywood, if it goes out of flat, there is no real good way of reflattening it again. A torsion box workbench top may not necessarily cup overall like a solid wood workbench top, but I can see small humps or hollows forming in the gaps between the structural elements of the torsion box, either due to time or to fluids spilling on the benchtop.
One that that seems to be missing from the dicusion (forgive me if I didn’t get all 64 comments on the first skim through) is how the workbench helps in your woodworking evolution. I spent most of 2009 working on a version of Bob Lang’s 21st Century workbench. It’s nearly done (I stopped to get some xmas projects done) and plan to finish it early next year. It’s made of Ash and it didn’t break the bank. I got 100 bf of Rough 8/4 Ash for $250 from my local hardwood supplier. Once I got that price I knew I’d make the whole thing instead of just the top out of Ash.
During this time period I learned to use a dado stack, hand cut dovetails, use a shoulder plane, cut mortise and tenons, and overcome obstacles I’ll run into on REAL projects. Granted, I could have learned some of these things with Bud’s bench but I don’t intend on using plywood and screws to make my furniture in the future.
Shop projects are great practice for the real deal so don’t overlook that when you make the decision on your next bench. And for the record, if I was doing this for a living I’d really consider the torsion box route since it’s fast, cheap, and easy.
I agree. Building a workbench in the past was one of the first things a woodworker did to learn his skills and prove his abilities. And the traditional workbench was the perfect platform for planing, sawing, chiseling, etc. It was the result of centuries of refinement and proven design.
I think the biggest difference today is that most cutting and shaping tasks are done on peripheral machines. The workbench has in many cases become nothing more than an assembly table. As such, the lightweight plywood construction is probably all that is needed by many if not most of today’s woodworkers. The traditional bench still has it’s place for those of us who enjoy using traditional tools. But it’s clear that one design will not fit all.
DD
Maybe this has already been said in one of the previous 64 posts … but here goes. When I saw Marc’s torsion box table project for the first time, I had never even heard of such a thing. After watching it and thinking, it made a lot of sense as an absolutely stable assembly table. It was also a large horizontal surface … and we all know what happens to open horizontal surfaces in a shop (especially in the middle of a project). But Marc’s torsion box table used some of the support elements of Norm Abrams’ outfeed table and then Marc made his own outfeed table with some mods from Norm and gave some credit to Norm. I made my own connector/outfeed table that connects my two back-to-back table saws … and my table use elements from both Marc’s tables and Norm’s.
I really like where we are going with this because it puts strength and stability above weight and mass … lighter, flatter, more stable and cheaper. You have to like the concept.
But … an assembly/torsion box table is not the same as a 2″ thick solid maple work bench. If need be, I can hit almost anything with almost any hammer and not worry that the bench won’t be able to withstand the severe concentrated blow. That is about the only situation that would concern me with this “skeletal” design.
Just my 2-cents.
One more thing …
I already have the “classic” double vise bench of solid maple. It is over 15-years old and is as good as ever. It is a total gorilla in strength but it is small, as per the original design. This is a shot of my little maple bench … http://api.ning.com/files/u*M3.....C02187.JPG
That said, my bench will do some very specific things that a “skeletal” design plywood bench will not do. But, if I had the room, my next “bench” would be made like this “skeletal” design. Flat … light … cheap … hard to beat.
Looks great. I have been wanting a better bench for sometime, but the fancy benchs are not in my price range. I would rather buy some equipment/tools for the price of a solid. (I need a joiner and planer!)
This is a great design. I have been looking for a quick inexpensive work bench that would provide the functionality of a traditional workbench without the cost. While the making of a traditional workbench out of hardwood may be a right of passage, and a personal experience and provide a great deal of satisfaction, I really need to accomplish a number of other projects. Both for my learning experience and to justify the effort such a bench would take. This bench is a great alternative.
Well, shoot.
I was over the road truck driver for several years just aching to do wood work – good wood work, as in no nails or screws allowed and as much hand cut joinery as I could develop the skill to do. It is intended to supplement retirement income. Still got a ways to go but the greatest progress noted (it may be a mental thing) was after I gave a neighbor the 4′x8′ plywood bench I made – legs and stretchers of 2×4′s and 2×6′s, top of 2 sheets 3/4 ply with 1/4 hardboard on top, and 2 vices,3/4 ply full bottom shelf as well. and replaced it with a Sjobergs cabinet makers bench.
The Sjoberg does look nice, and it takes up less room in the kitchen than the other did. The Sjoberg – the mental thing I mentioned – tells me junk work is not allowed, so much of what I have done gets cut up and thrown out.
An added benefit of the Sjoberg is that it also freed up enough room in the kitchen that I have not only enough room to keep another smaller bench there, but my 6″ joiner – on wheels stays there and, it opened up enough additional space that I now can roll my 14″ band saw in and out of the pantry to re-saw as needed. And, with all that I can still access the sink, washer and dryer, microwave, range and refrigerator. And there is more!
The added benefit of the Sjoberg is that I now have lots more room to move about the radial arm saw, table saw, drill press and 13″ planer which are located in the living room (closer to the wood rack which extends down the hall towards the bedrooms and bath) with another bench on one wall. Even more flexibility in the “shop” will come this week when I rip the carpet out of the living room and get casters put on the table and radial arm saws. I anticipate also being able to gather all my clamps in one place.
Next major decision is which bedroom should become the finishing room. I halted the building of my library system pending that decision, which is a pain because I have books still in boxes and on the floor.
Oh, I did get upset with my self a couple times for not putting something under my work with a hand saw and when I drilled through a piece, not once but twice! and into my bench. But I did not cry! Had a chisel take a piece of it as well. Hell, it is a “Work” bench, if it is pristine, then you not doing anything productive.
Perhaps I can do a video so you see I not lie about it. lol
Nice bench – I built a torsion box table for my miter saw and general utility, 8FT by 18 inches. I used 1/2 inch plywood and 2 by 2 furring strips from Lowes. Incredibly strong, but it has about an inch of warp in it. I had the plywood resting against a wall for a few weeks, I think that did it. I plan on making a MDF torsion box top to replace it at some point. After using my basic version for a month or so, I’m leaning toward the LVL bench. The torsion box is strong and flat (if you start with flat material….)but if you are hammering something on it, the hammer/work does bounce as Mr. Schwarz mentioned. A solid top of some kind is in my future.
a workbench made to work on???? out of plywood???? For shame!!!!!! You know I love your new bench, Bud, and particularly love the dog leg vise. I feel so shameful for my plans for a maple workbench, now. Like a needlessly decadent indulgence from a wasteful, capitalist culture. I’m gonna go shoot some brads to lessen my elitist guilt. tongue firmly planted in cheek, by the way :)
woodworker, torsion box pioneer, and renaissance man. Bud rocks.
I’m afraid you’ll have to add me to the column of traditionalists. I want my bench to have strength and weight. I also like the looks of a traditional bench.
Nice work, I say. While not exactly the way I would have gone building a workbench (and I didn’t) I can certainly appreciate your resourcefulness. I think if you build a bench that works for you and you like it then you’ve built a great bench. Whether that’s a torsion box plywood bench, a solid hardwood traditional bench or something in between, I think the true measure of it comes in how it serves it’s owner.
Love the bench. I have an el cheapo made of softwood and MDF and though it works well I’m still dreaming of a solid ash roubo. I do have a question however, I notice that you built your plywood bench on top of another bench with a twin screw front vise. I’m trying to decide which vise to add onto my next bench. Right now I have quick release vises at both front and tail positions. I mostly use the tail vise but I hate the fact that the dog hole line has to be so far from the face of the bench. Added to that the chop sags when extended out and it’s a real pain. Good excuse to upgrade to a wagon or shoulder vise. If I do go this route, is a leg or front twin screw better for the front vise?
As any other novice wood worker, I have been trying to figure out how to make my own bench with my limited skills and tools. After watching the torsion box episode I think I can make this and in the process greatly improve the quality of my work.
But I have one question: The dog holes only seem to go into the top. I did not see any exit holes on the bottom. What happens when you get that dog that is just a bit too lose, will it be rolling around on the inside? Am I missing something?
haven’t read the comments, just the highlights of the original posting.
being in the middle of this move, I have to admit, I like this idea. I’ve got this set of metal shelves that can be configured in either of two ways: vertically (five shelves, one spanning the two sets of leg pieces) or horizontally (three shelves on one, two on the other). Height on both of these, when set to horizontally, is about the height of a workbench. Seeing this posting, I’m thinking of doing a torsion box top for this idea.
I’d guess that the top portion of the workbench would need to be thicker if you plan on banging on it. But I like the concept. And for those on a budget, it’s cheaper to get 1/2″ plywood than 8/4 ash.
Kudos for the creativity, kudos for the effort, and Good Job for the workbench in general!
+1 for Aggie33.
Who cares if it is a work of art or a pile of ….wood. If it works, thats the bottom line.
All the rest is Blah Blah Blah !
Great bench! I wish I would’ve seen this design before I built mine. Are there any plans available that I can store away so I can build this bench years from now?