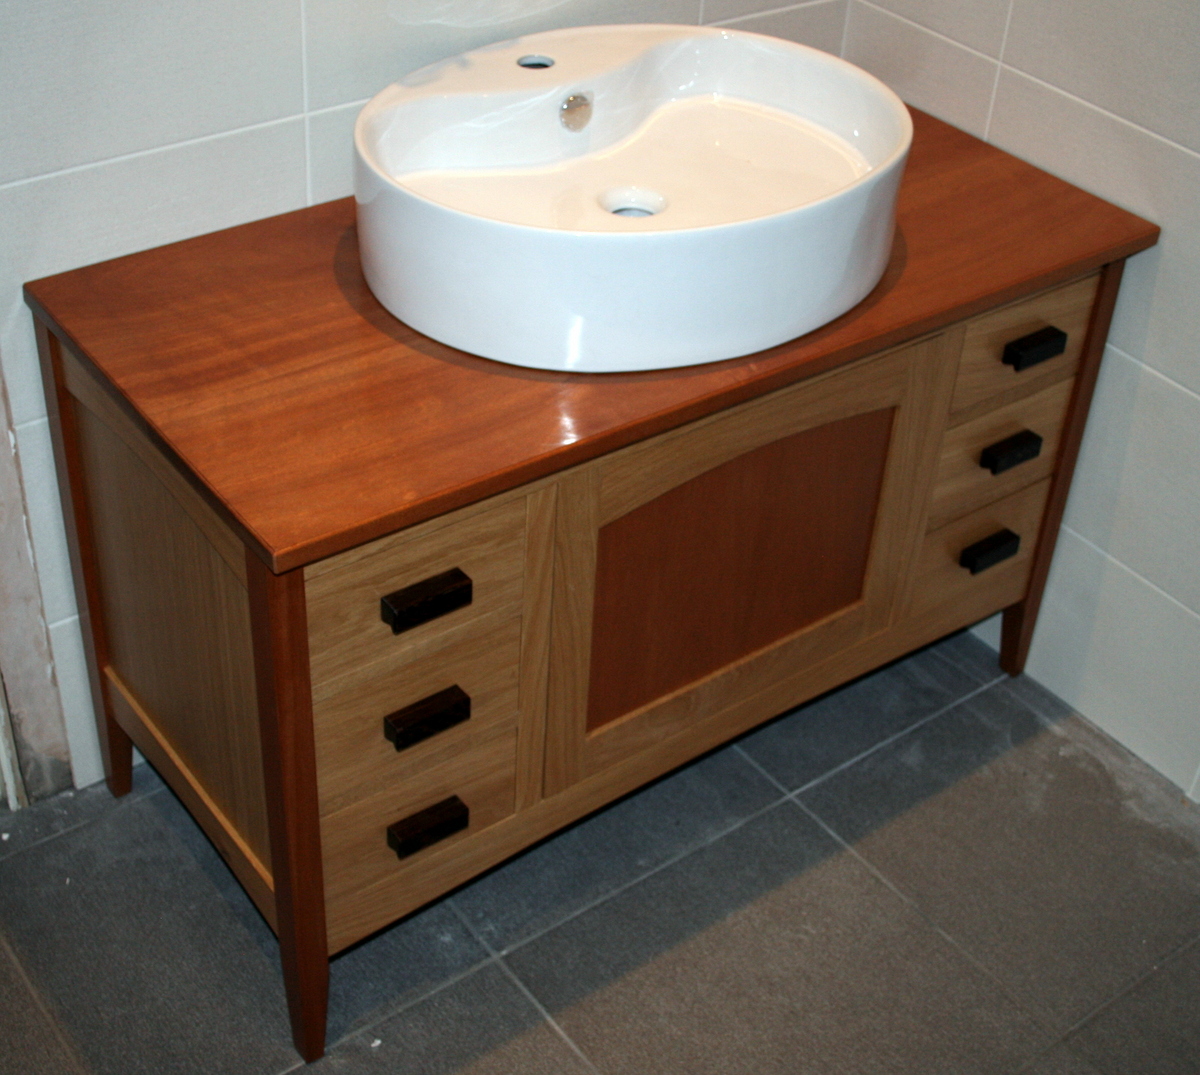
Terry’s Bathroom Vanity
Viewer Project
-
By Terry McKnight from Salford, England, UK
Added on January 28, 2013
In 2011 my wife and I embarked on changing our wet room and bathrooms as they hadn’t been touched for a number of years. We decided to tile them from floor to ceiling and the look we were after was an expensive designer bathroom in a hotel. We did the wet room first and then set about remodeling the bathroom.
In the wet room we mounted the sink directly to the wall but in the bathroom we had decided upon a free standing bowl. I then needed to mount it on something. Then it suddenly occurred to me. I was in the middle of the Chest of Drawers Guild Build from summer 2010 (yes it was a year late!) and I could make something that used a similar frame and panel construction technique. We had already booked the builder for January 2012, three months away so if I was to make it, I needed to put everything on hold including the half built chest of drawers. Normally I would say that was plenty of time but, as always, work got in the way of woodworking and I had to limit my time to occasional weekends and 2 or 3 hours in the evening time when I could.
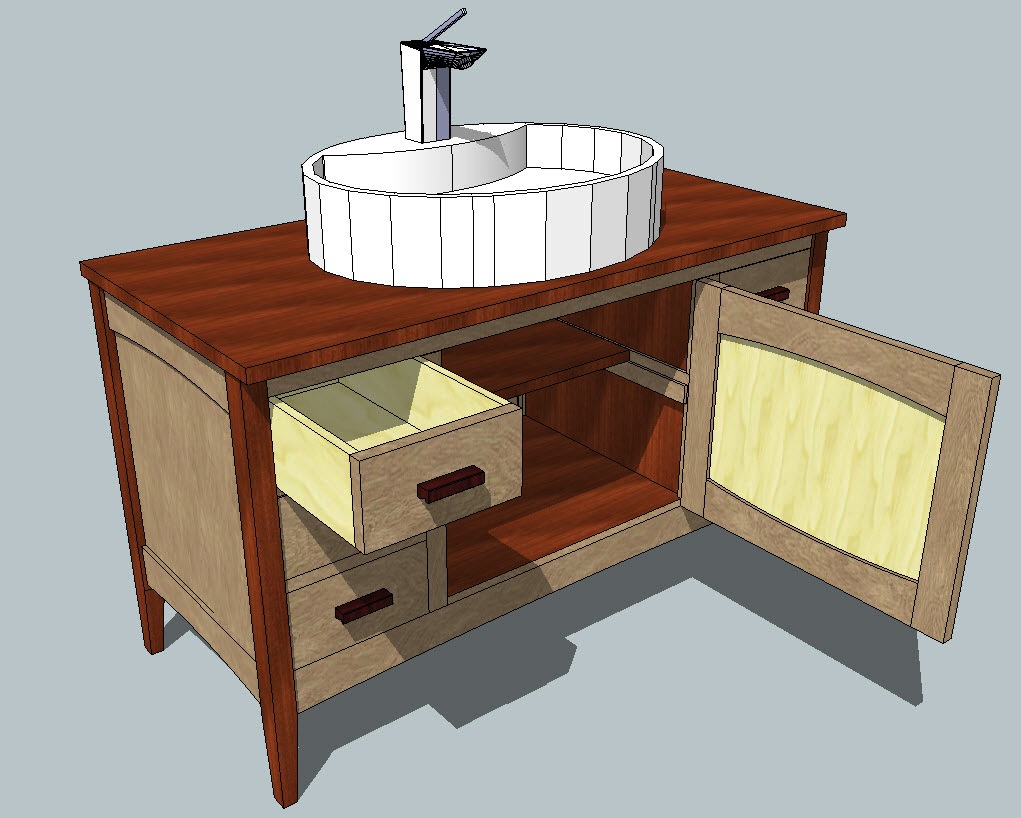
I got out Trimble (ex Google) Sketchup and set about designing a piece that would fit in this location. I intended building it using oak, sapele legs and a nicely figured sapele top. This was the same stock that I was using for the chest of drawers and I had plenty in reserve.
The 2 car garage shop was sharing space with gardening tools, a lot of the bathroom white goods and the half built chest of drawers, including boxes of tiles (to the ceiling), toilets, bidet, radiators, electrics, sinks and a huge tub in it’s shipping container. Fortunately I could use that container (the world’s biggest cardboard box!) as an assembly table of sorts when I put a few sheets of ply on top.
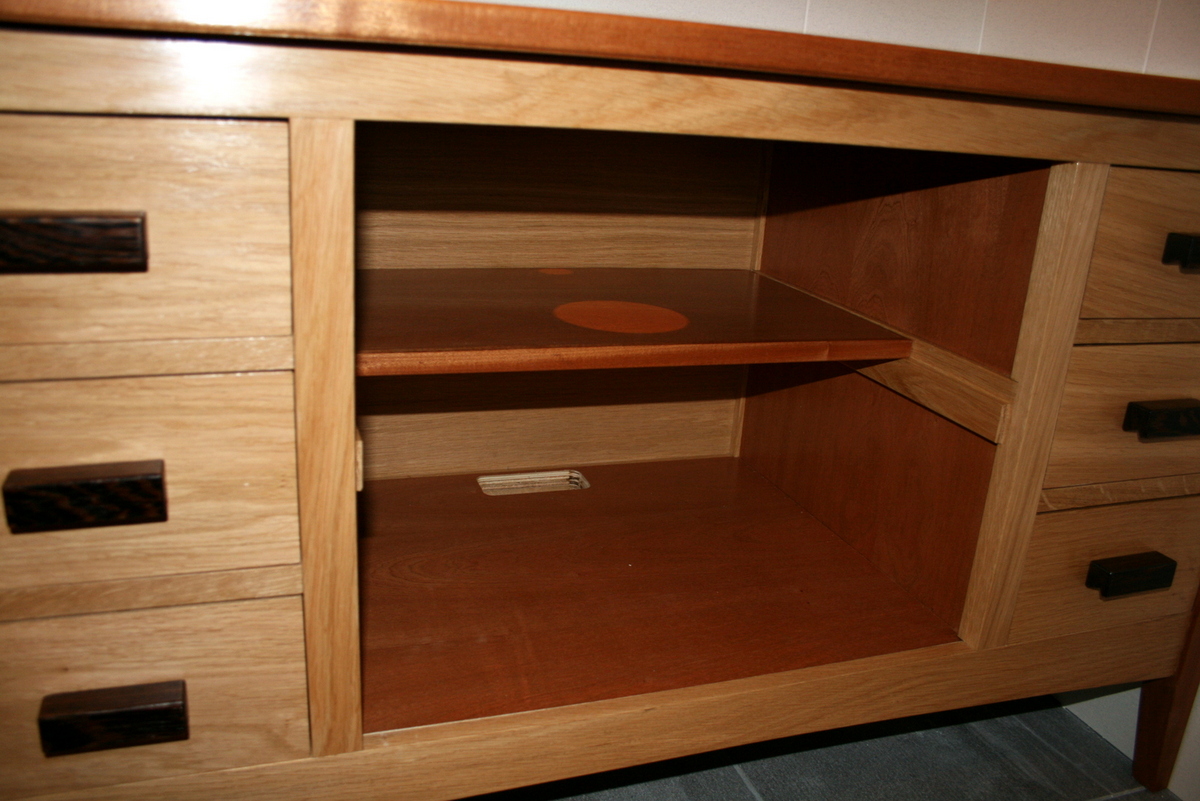
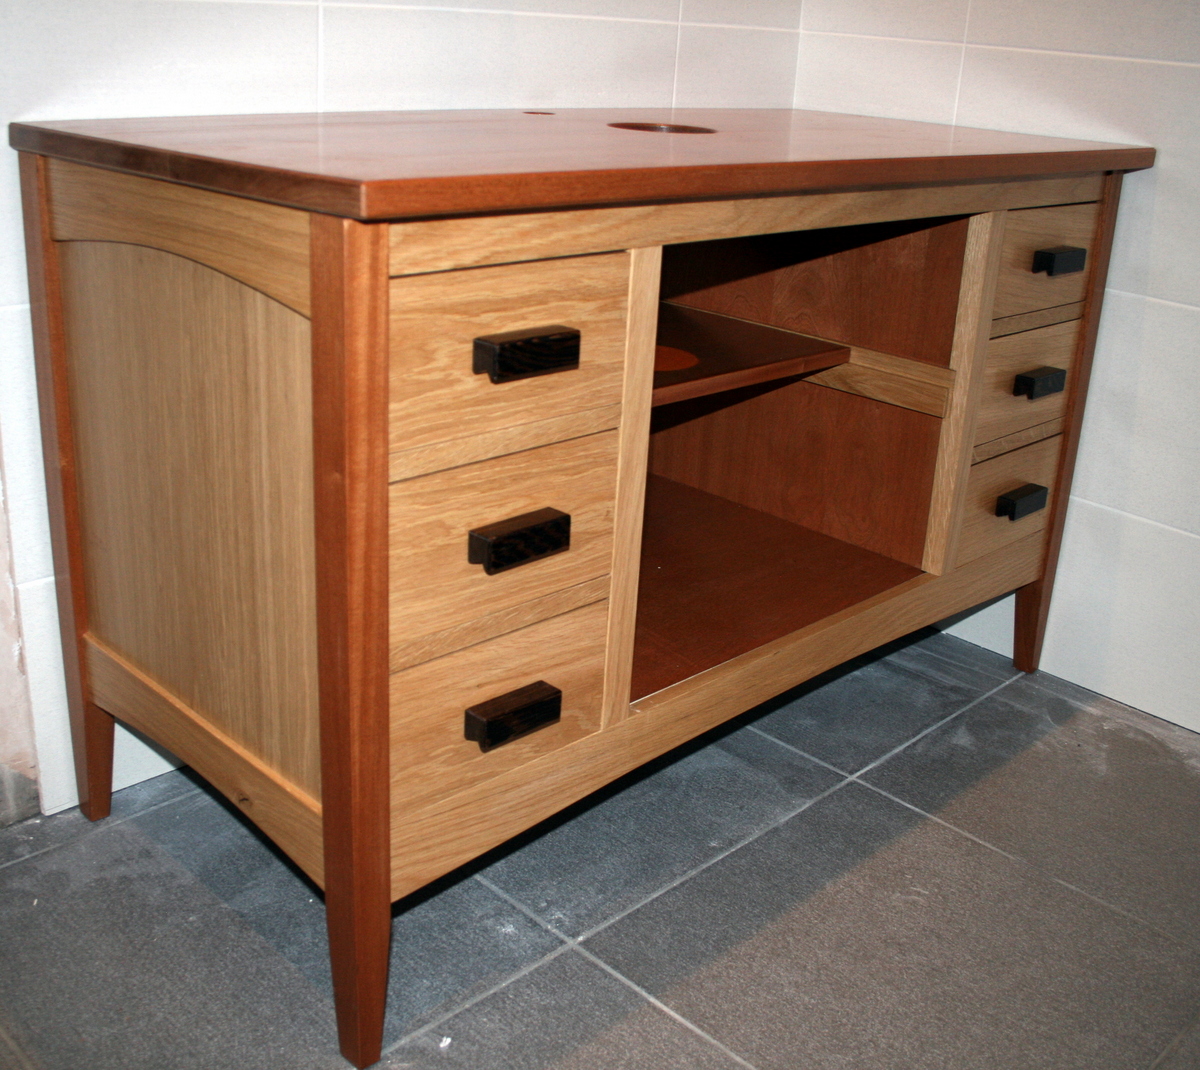
The construction is frame and panel the legs are sapele and web frames. There are two banks of 3 drawers separated by a compartment with a door. The compartment was sized so that it could store toilet paper above and below a shelf. The front area was to be tall enough to take items like bleach bottles, shampoo and the usual containers used in a bathroom. The drawers were to incorporate a centre guide similar to the chest of drawers. However, in practice I found that as the drawers were relatively small in width, they would slide easily between the web frames, making the guides essentially redundant. I kept them in purely as they also worked as end stops to keep the drawers from going in too far.
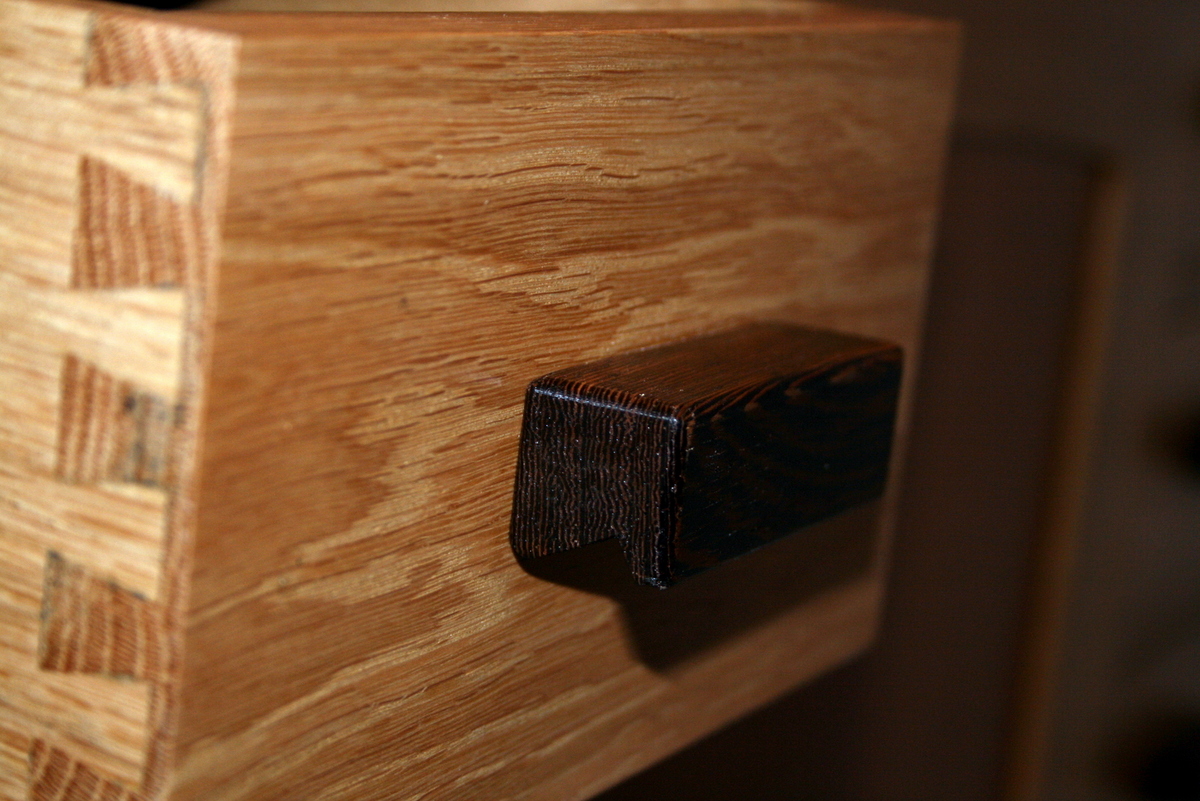
The drawers themselves are conventional hand cut blind dovetails with a ply base. I made the clearances a little wider as they have to cope with high humidity swings in the bathroom.
All the plywood is 1/4″ thick with a thin veneer of oak on just one face.
The top is made from two boards of 10″ wide sapele jointed in the centre. I left the edge square but did route an ogee along two of the edges. The other two faces were intended to be against two walls. The top is fixed on with shop made wooden clips that are free run in slots to account for seasonal variations.
When it came to making the door, I didn’t have any figured wood in stock so I decided just to put a sapele faced piece of plywood in. I plan to make another door with a nice raised panel of solid wood in the near future but the ply door is okay “for now” (so my wife tells me!)
I asked General Finishes’ advice as to which water-based finish they recommend for use in a bathroom. They no longer supply oil based varnishes in Europe due to VOC restrictions. I think that is the same in California. The finish they recommended is called General Finishes Exterior 450. At the time I didn’t have any HVLP equipment so I decided to wipe it on and was really surprised by the results. It was very similar to Arm-R-Seal in viscosity, dried quickly and had the added benefit of being very waterproof. It also has a light amber tint and brought out the grain of all the woods.
I made the drawer-pulls from some 1″ square bubinga with a very simple, but modern design to echo the pattern of some of the wall tiles. I used the table saw blade over on an angle to cut the finger slots. I then ran it over a round over bit in the router table and cut them all to length. I finished the ends again with the round over bit.
The only thing left to do was cut the slot in the base to pass the waste and water supply pipes and I was done. The drawer guides and web frame guides are lubed with wax and I had the piece finished and ready to be installed with 2 weeks to spare. The piece is free standing in the bathroom and is fixed to the wall with a line of flexible sealant. The taps are plumbed in with flexible tube couplings as is the waste pipe.
I now have to make a similar piece to go into the wetroom underneath the wall mounted bowl. I have already designed it but that is for a future post. Hope you like this one!
Advertisers


