Jeff’s Live Edge Dining Table
Viewer Project
-
By Jeff Fore from Argo, AL
Added on November 11, 2012
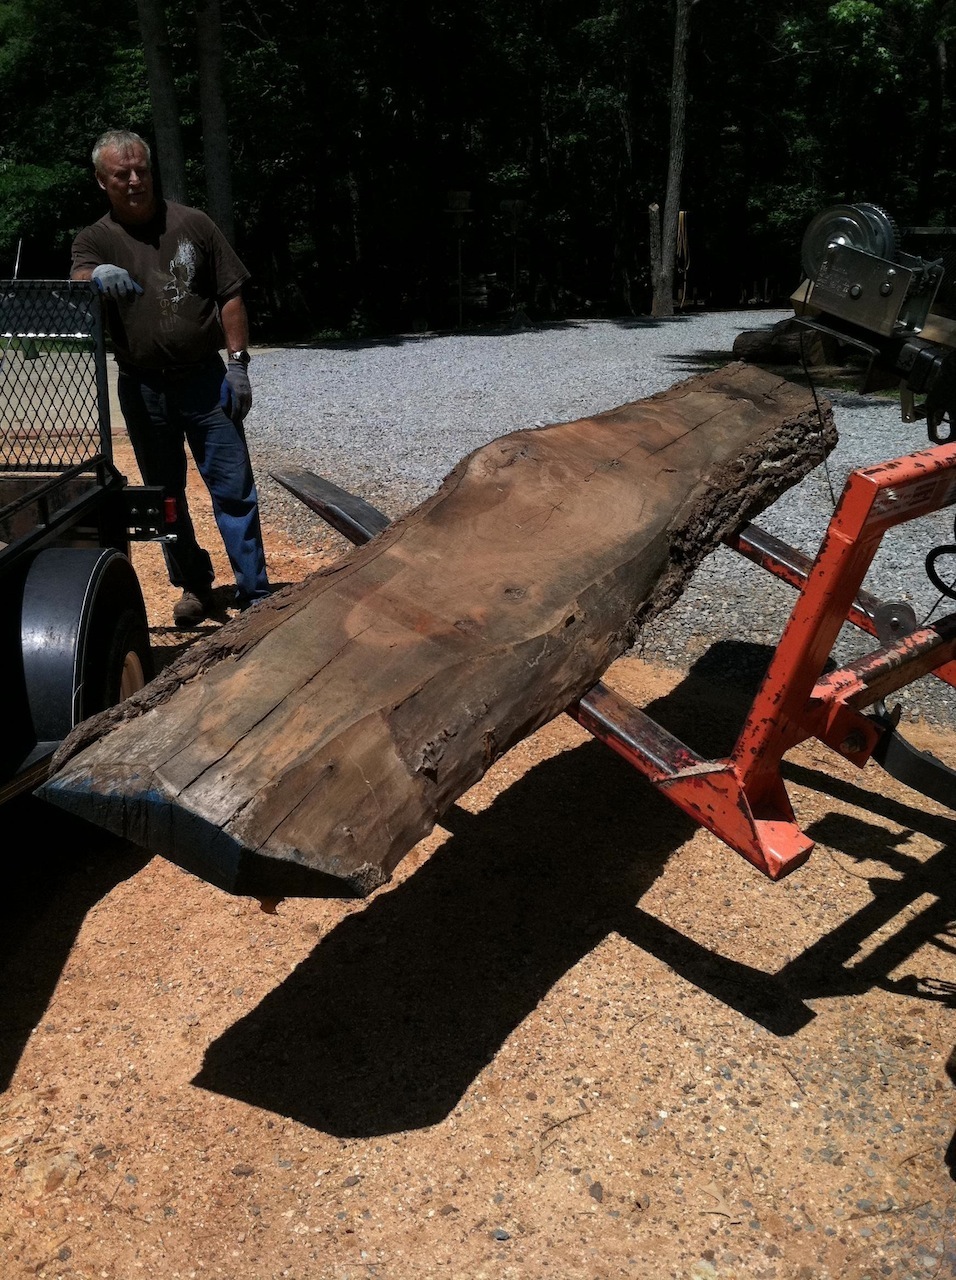
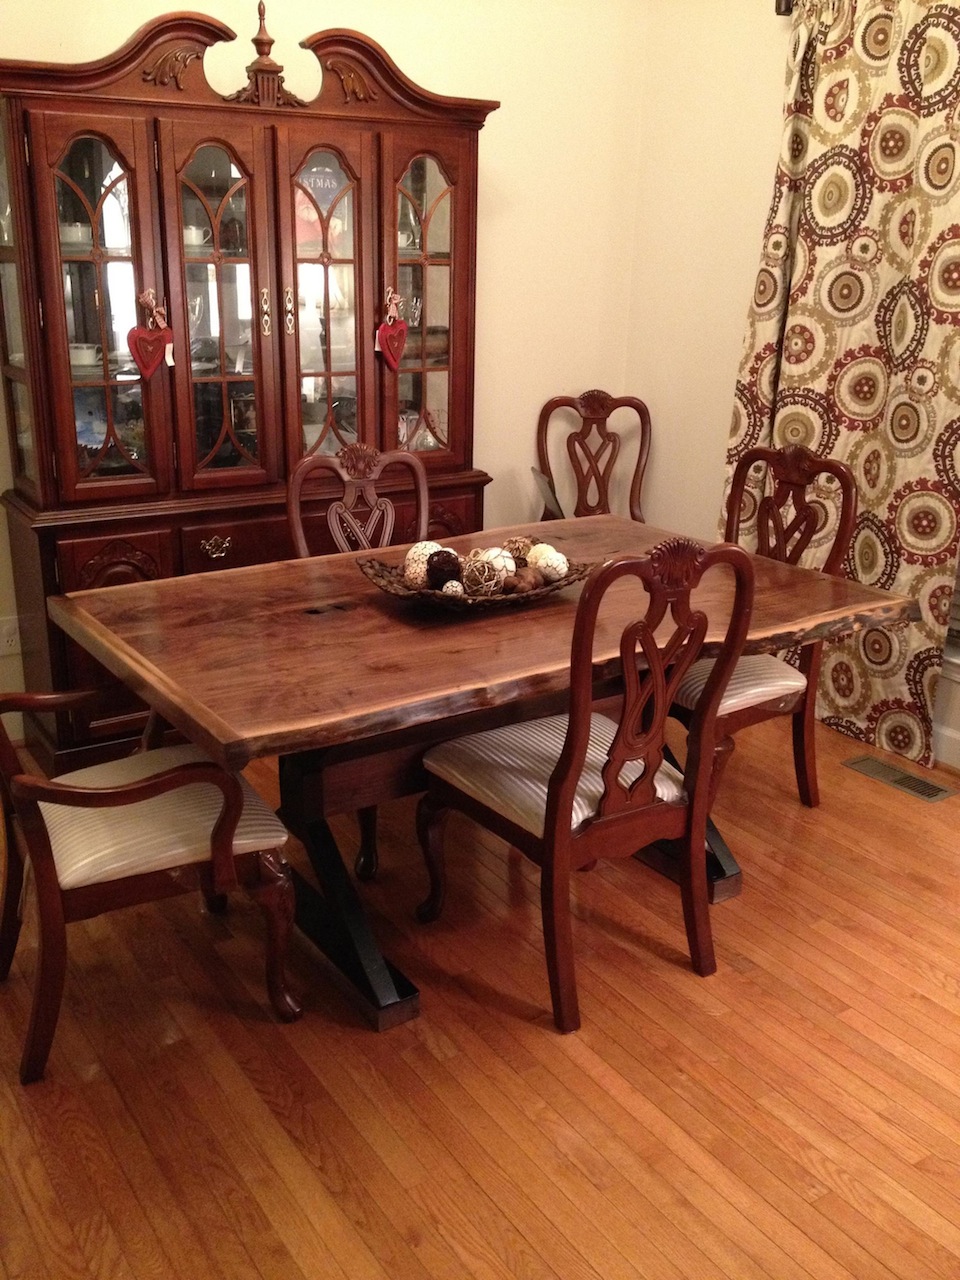
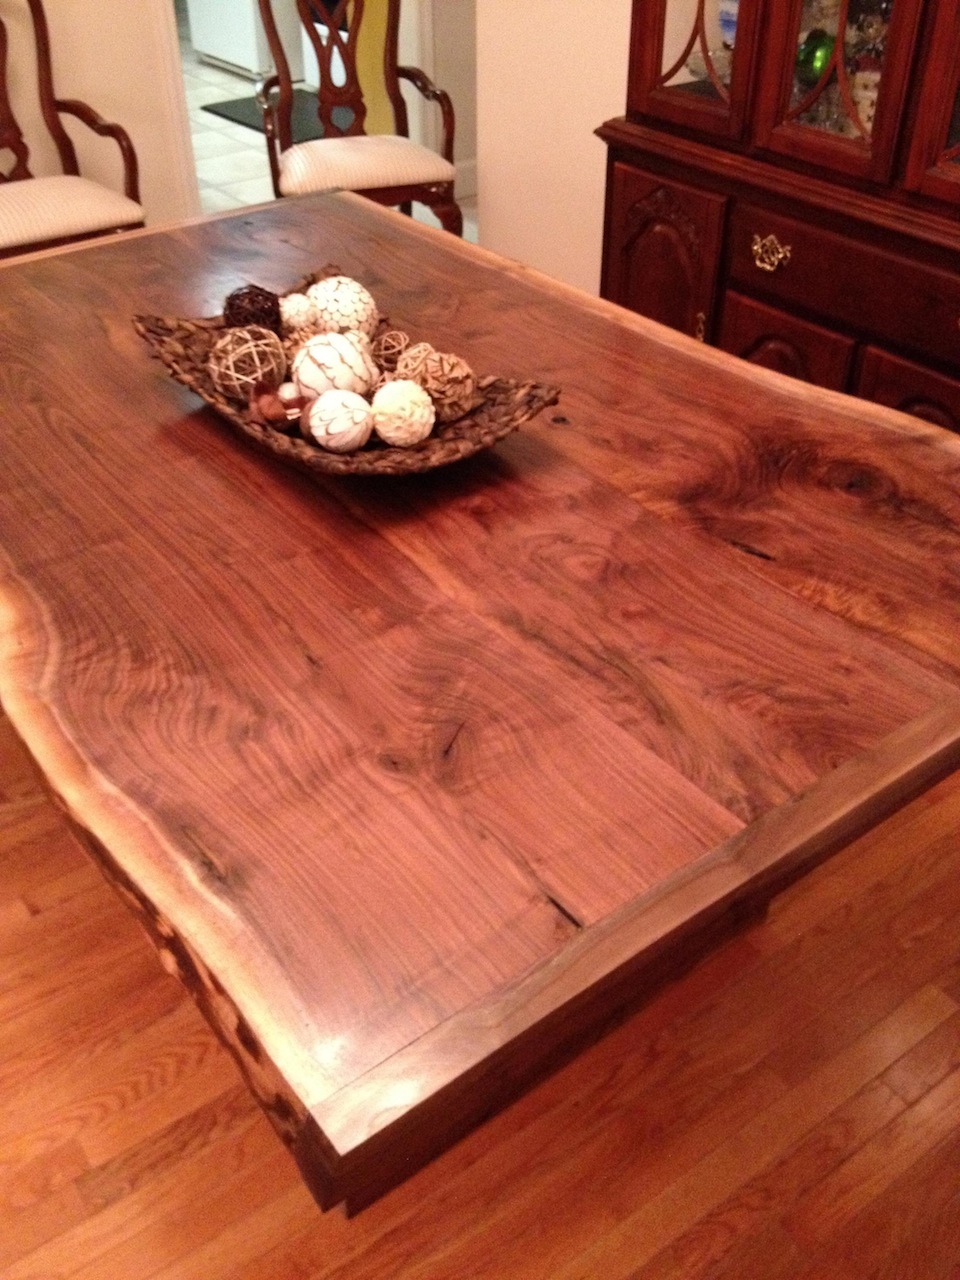
This is a project that I have wanted to do for a very long time. It is a Live Edge dining room table made of Black Walnut. You will notice in some of the pictures that starting from the time of loading the rough cut wood into the trailer, that this was not your ordinary project. I have never worked with pieces of wood that took a tractor to load. Nevertheless, it has been THE project I have always wanted to do.
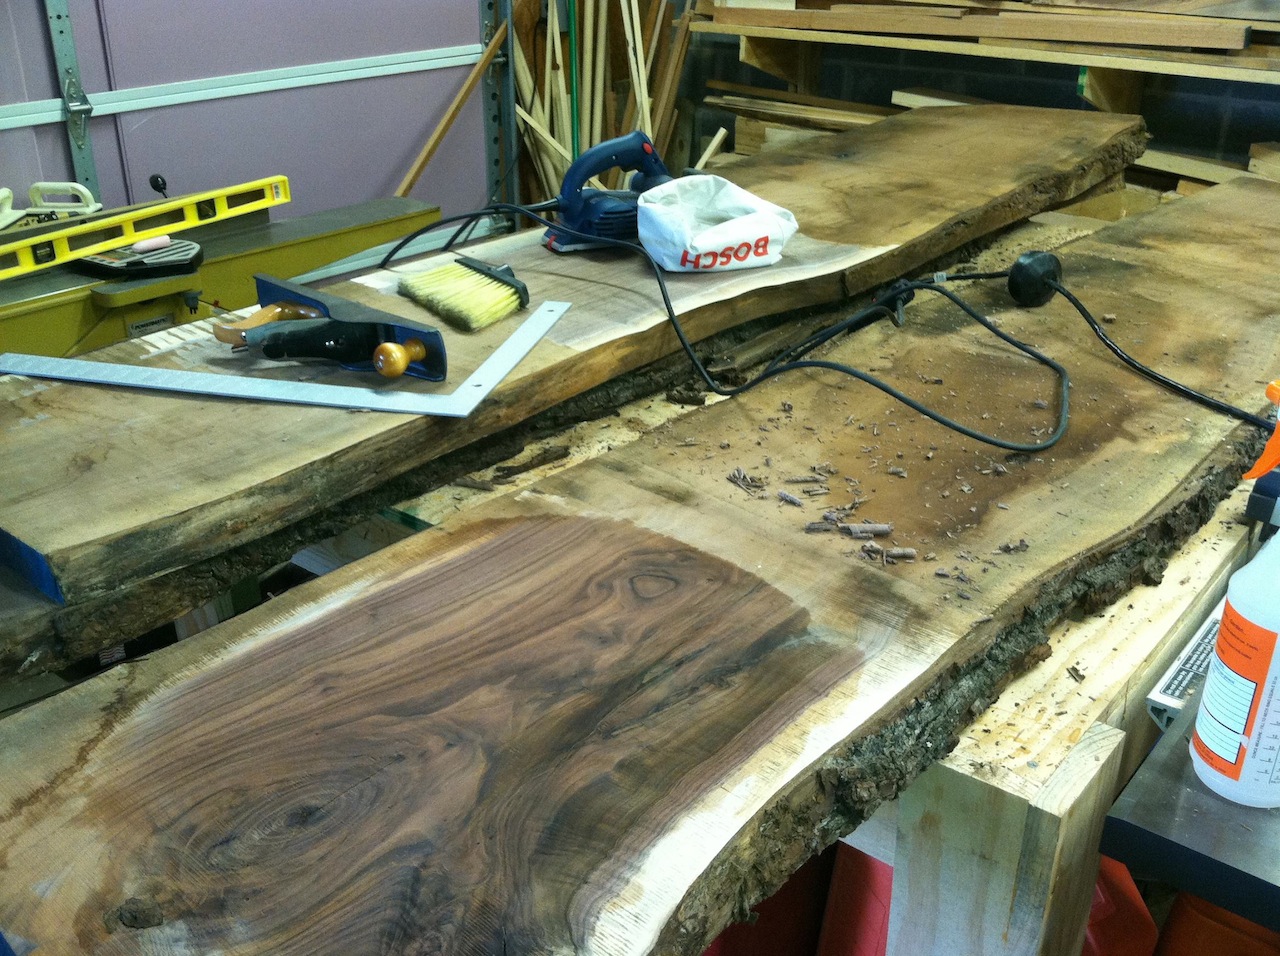
When I first got the load home, it took me and a neighbor (he did not know what he was getting himself into) to move the lumber into my shop. Once there, I found out that it is a lot harder than it looks to joint and plane 18 inch wide boards. I ended up making a router sled for them to lie in. This type of planing is the biggest mess that I have ever had in my shop. The shavings were literally up to my ankles and covered my shop table and sled.
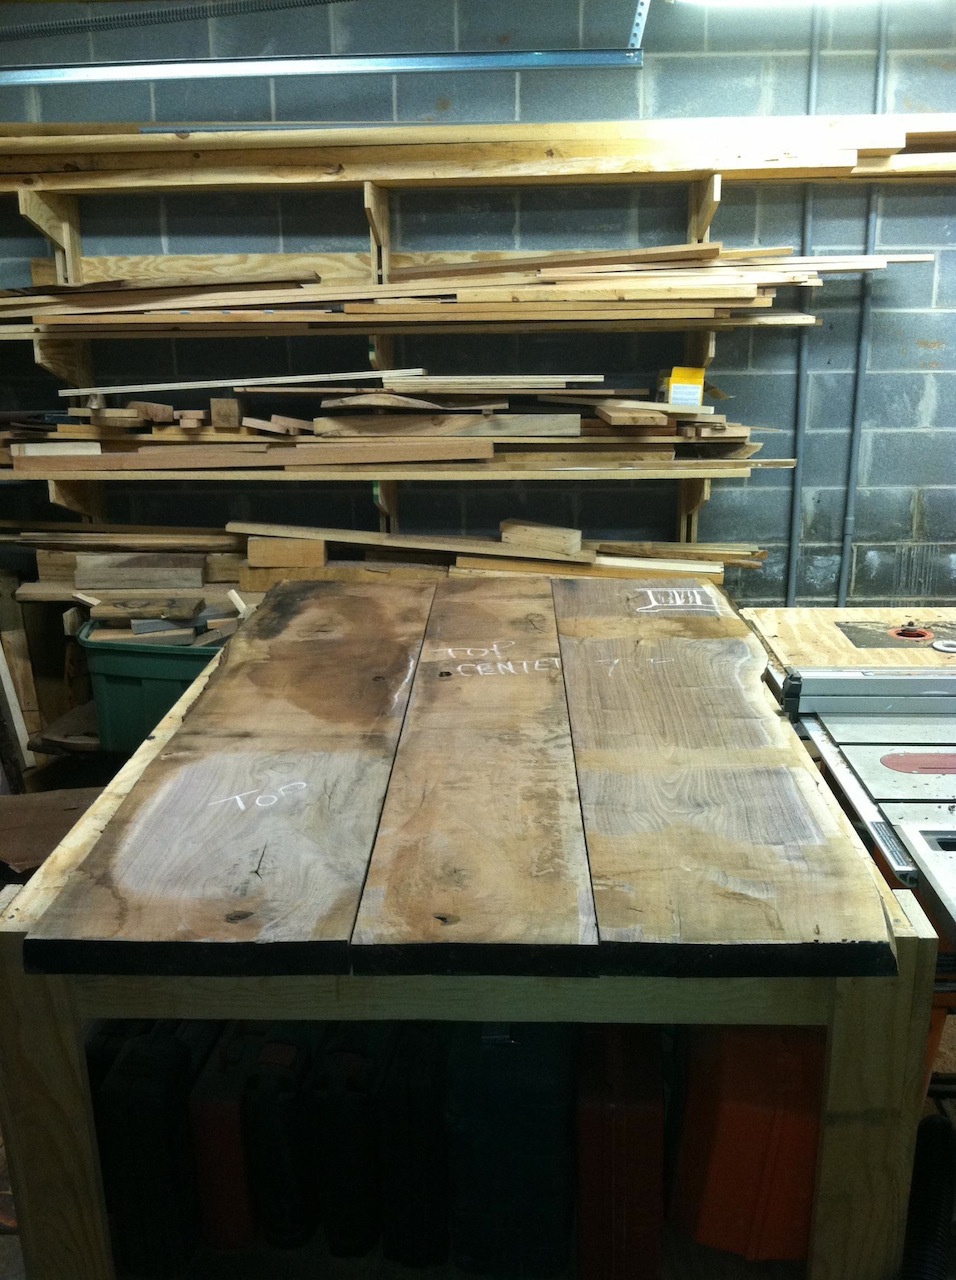
After getting the tops close enough to flat for me, I then had to decide on how to put them together. Note that the slab in the center is a lot narrower that the outer pieces. This is because the outside 2-3 inches of the slabs is the whitish sap wood. I did not want the sap wood in the center, I wanted the same dark wood all the way to the edge. The center slab is 12” wide. This allowed me to send it through the planer and gave me a good flat reference for the two sides.
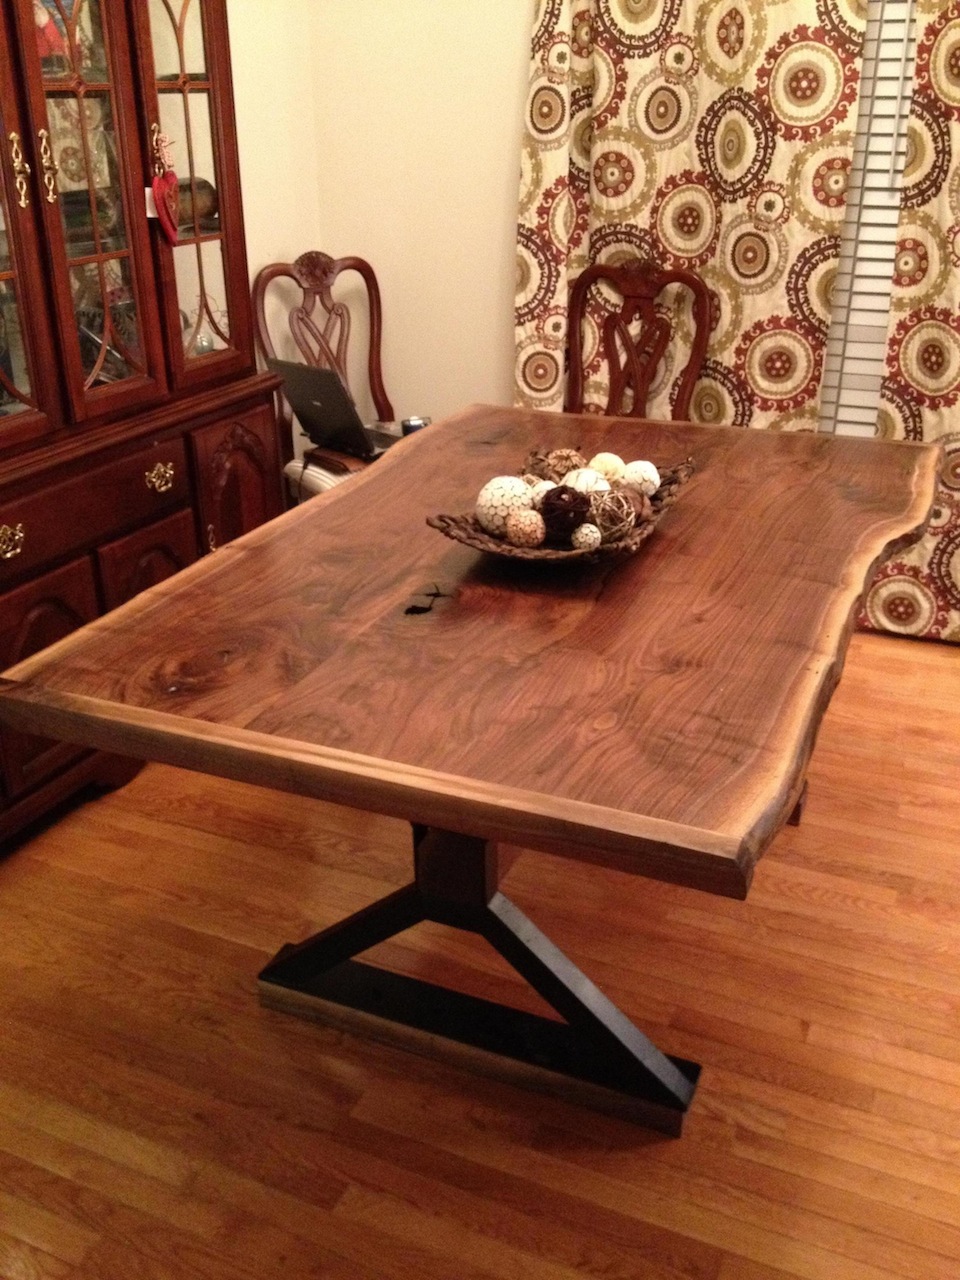
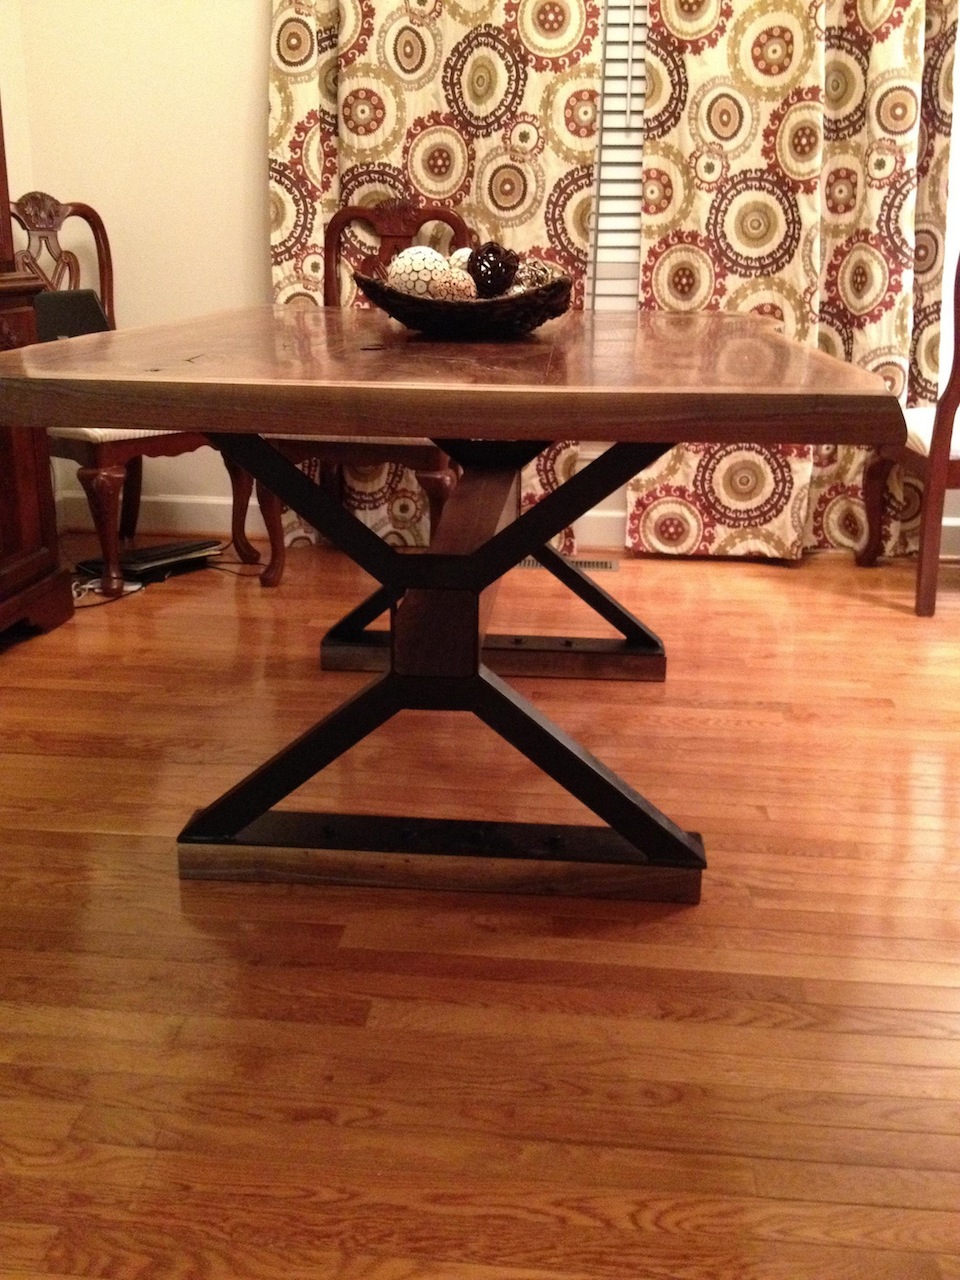
I had the hardest time deciding on the base. Of course I wanted to make it 100% out of wood; however my wife had an idea to combine the wood and steel. After spending a lot of time on Sketch-up, trying to figure out a design that worked for both of us, I came up with this design. The base is made up of 2”x2”x1/4” angle iron. I cut the steel at the predetermined 41 degrees and welded it together. Once I had the entire frame completely welded up, I got my dad to take it to his work and he had some “real” welders go over my work. They were not very impressed with my welding, but what can I say, I’m a woodworker!
Once I had it all complete and assembled, I began to finish it. I first applied about five good coats of General Finishes Seal-A-Cell to the top with a sponge brush. I then covered it with about five coats of General Finishes Arm-R-Coat. After applying so much to the top, I sort of lost track of how many times I did it. In between each coat I buffed the top with #0000 steel wool, except after the final coat.
After everything was finished, I had to invite my family over to help me move it. It weights in somewhere around the 300-400lb mark (just a guess). I do plan on getting a scale under it one day.
Anyway, I started working on this project in June of 2011 and finished it January of 2012. Of course I started and completed several other projects in that same time, so it was not continuous, but it stayed in the shop for a long time. The final dimensions are 46” wide (at the widest end), 69” long, and 30.5” tall (to the top).
I hope you enjoy this project as much as I enjoyed making it. Although, I don’t think I’ll make another one…Happy Woodworking!
Advertisers


