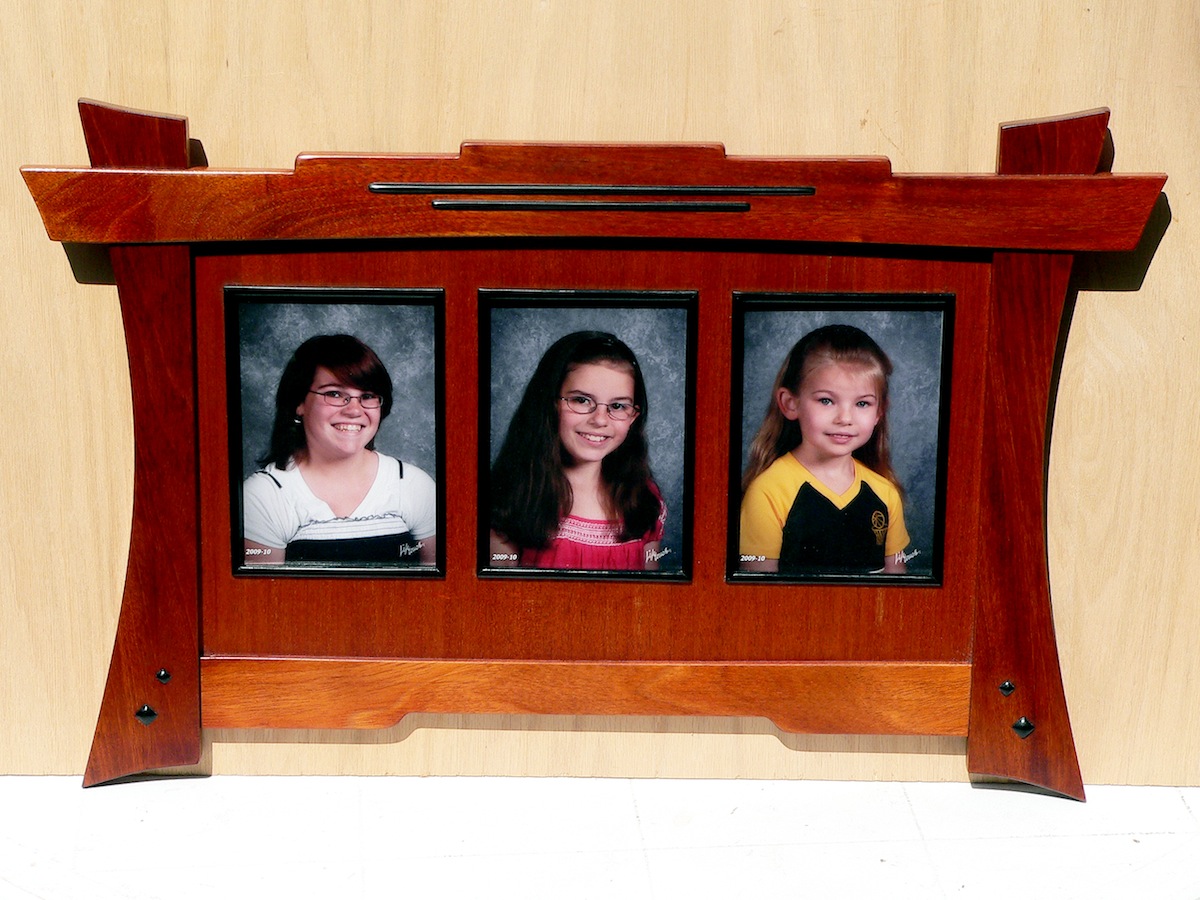
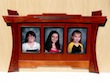
 The idea for this project started when I received my Granddaughter’s school pictures. I saw Marc’s Greene and Greene mirror project, and really liked the design. It took several months of mulling the idea around in my mind on how do I approach the modifications to the design, and how am I going to do it. My background in woodworking has always been square edged projects such as cabinets, boxes, ent. centers, etc. I have never tried to do something like this. This project used 3 different templates. I ordered Marc’s mirror templates to see what I really need to do to create my own set. The main difference between them is the proportions. I came up with the idea to use Adobe Illustrator to design the project.
 First I laid out the spacing for the 5×7 pictures. Next I grabbed a video clip from Marc’s video and imported that into my file. I stretched and squashed that image to fit my layout and made that a background image. I then followed that image to create the line drawings I used for my templates. I adjusted those line drawings to be of pleasing proportions. I then printed the whole project on my laser printer. Since my laser printer only prints 8 1/2 x 11, I had to print it out in multiple sheets and tape them together for a full size set of plans, which I used to create templates.
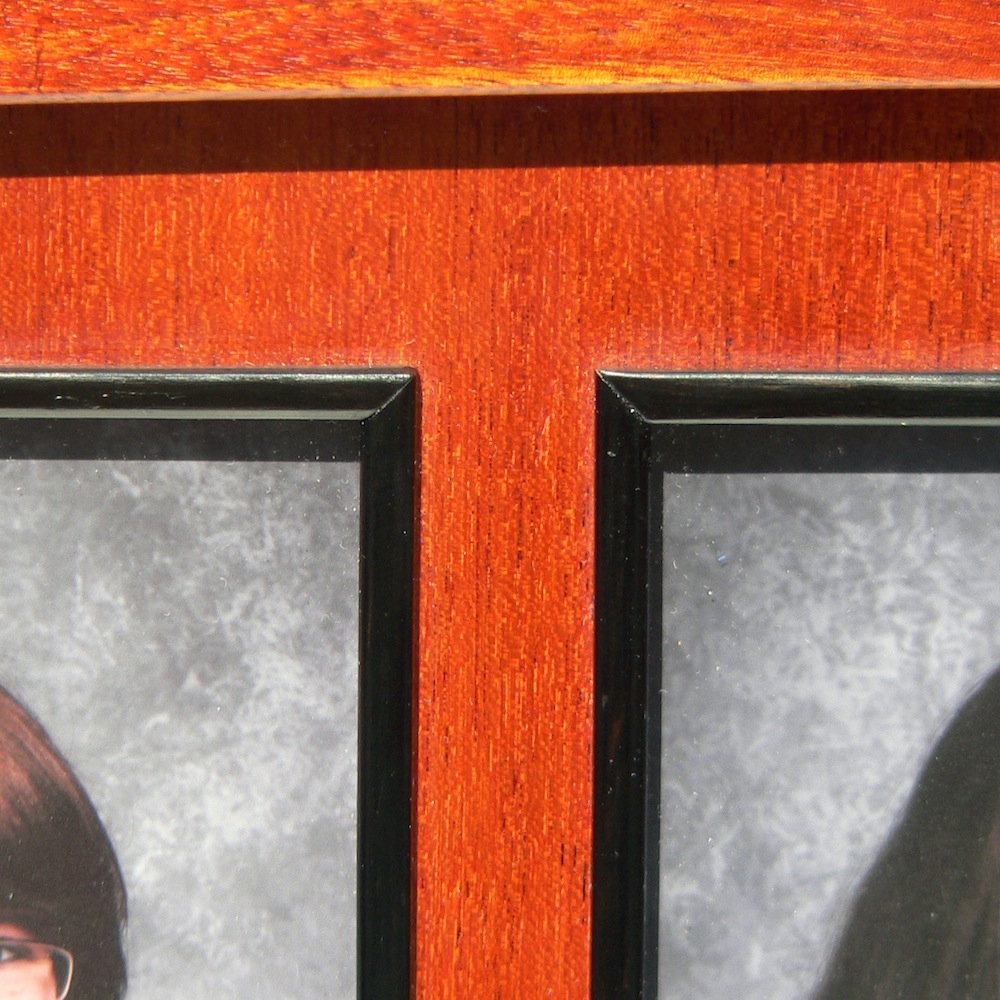
Selecting lumber was next. I wanted the bottom piece and center sections to be lighter in color so I found a piece of light colored mahogany for the bottom, and veneered plywood for the center section. 1/4″ ply is not thick enough to allow for the glass, picture, and cardboard backer, so I added 1/16″ to that. I wanted the top and sides to be darker because they were to create the visual interest and weight of the project. The top needed to be fairly straight grain so it wouldn’t interfere with the straight lines of the 3/16″ and 1/8″ ebony bars. I wanted the sides to have some grain interest, and I found a board the served that purpose.
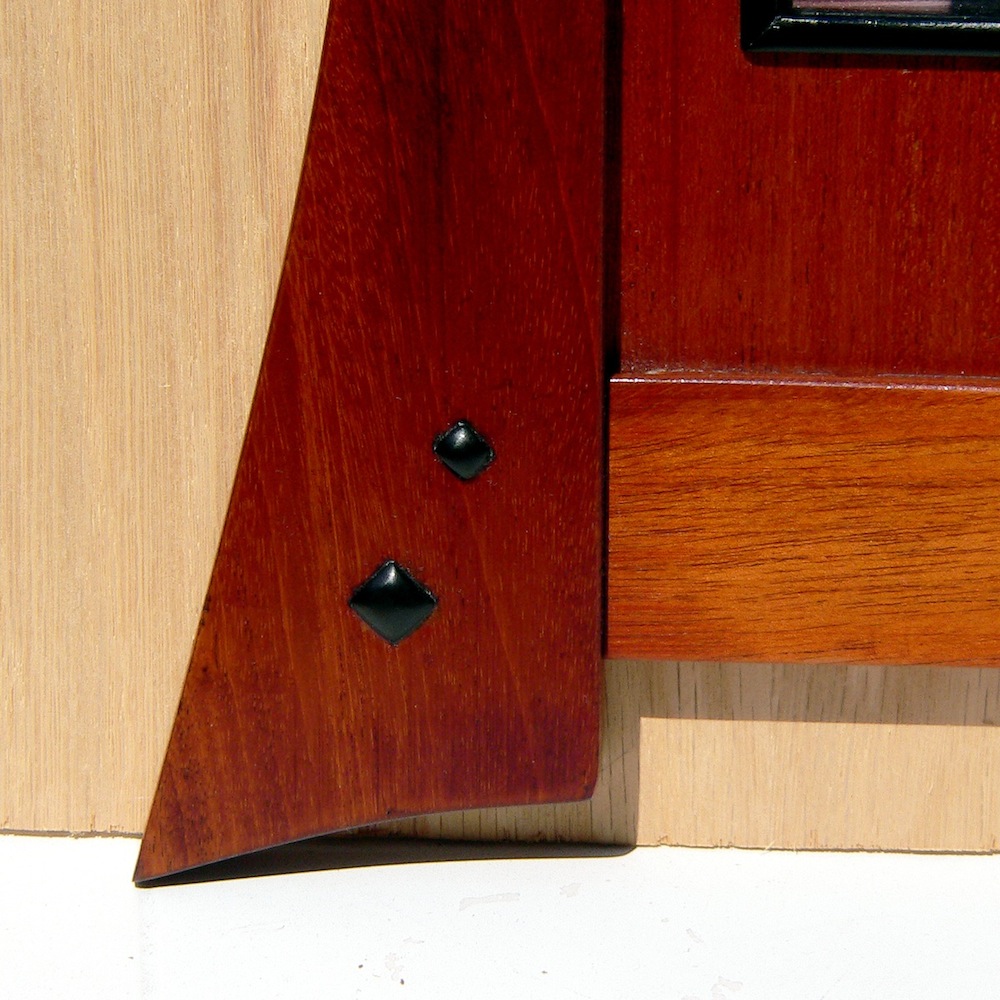
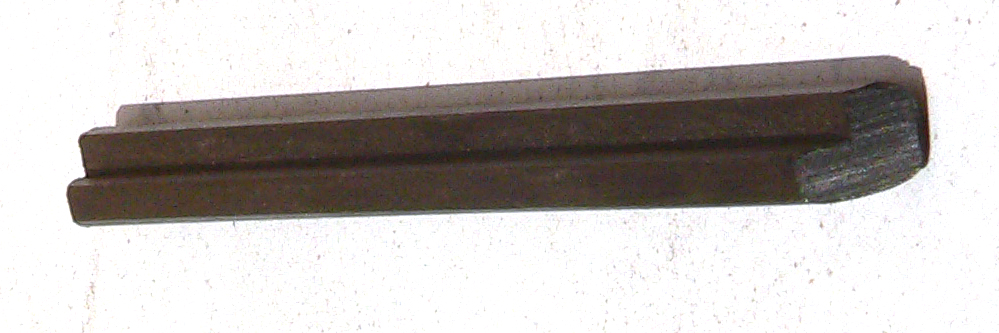
 Once I had the lumber selected, I needed to step back and figure out how I was going to cut things. The grooves in the top for the ebony were cut on the router table. I laid everything out and cut them by dropping the board down onto my bit. I also laid out and cut the rabbets that the plywood would set in. These were done on the router table as well. Next was to attach the templates and cut the pieces out. That was all pretty straight forward. Once the holes were cut in the plywood for the pictures, the corners needed to be squared up. Now for the tricky part. I cut the bars for the top and used a scraper to finesse them to where they fit the groove nice and tight. After rounding them over and smoothing them up, they fit like a glove. The same goes for the ebony plugs. Marc covered this in his video. Now what to do with the center holes? I wanted an ebony surround, but it had to be strong and cover any edges, this took me a while to come up with a plan. I first cut an 1/8″ groove on the edge of my ebony stock, then flipped it around, and then cleaned out the center. Next was to cut it off at 1/4″ and create a U shaped channel. Now laying the channel on it face U is up. Once cut, you end up with trim that is a 1/4″ square with an 1/8″ groove down one side. The groove is placed over the edge of the plywood so part is glued to the face of the plywood and the other face is glued to the side of the hole cut in the plywood. This creates a shoulder for the glass and picture assembly butts up against. Doing this adds another level of interest to the center of the frame, instead of just being flat.
Finishing up with 2 coats of Watco natural oil (I think this adds depth of the wood), then 4 coats of a wiping varnish. I like to use 50-50 mineral spirits, and polyurethane. Sand between coats with 320 grit, last coat gets a sanding with 600 grit using watco oil as a lubricant. Then after cleaning that up I use a good quality wax and buff. This makes the wood feel soft to the touch.
Things I learned along the way were. I had never used a shooting board. So I made one of those. Designed and created templates, I have done half laps before, but not like these. There several challenges to overcome with this project, and it was fun trying to figure out all the gotchas before I got started. And the biggest thing was I had never heard of Greene and Greene prior to seeing Marc’s mirror project, and maybe someday I will build his mirror frame as well.
P.S I would love for my 8th grade shop teacher to see this project, because he flunked me in woodworking class.


