Homemade 36″ Drum Sander
Viewer Project
-
By Matt Armstrong
Added on October 19, 2010
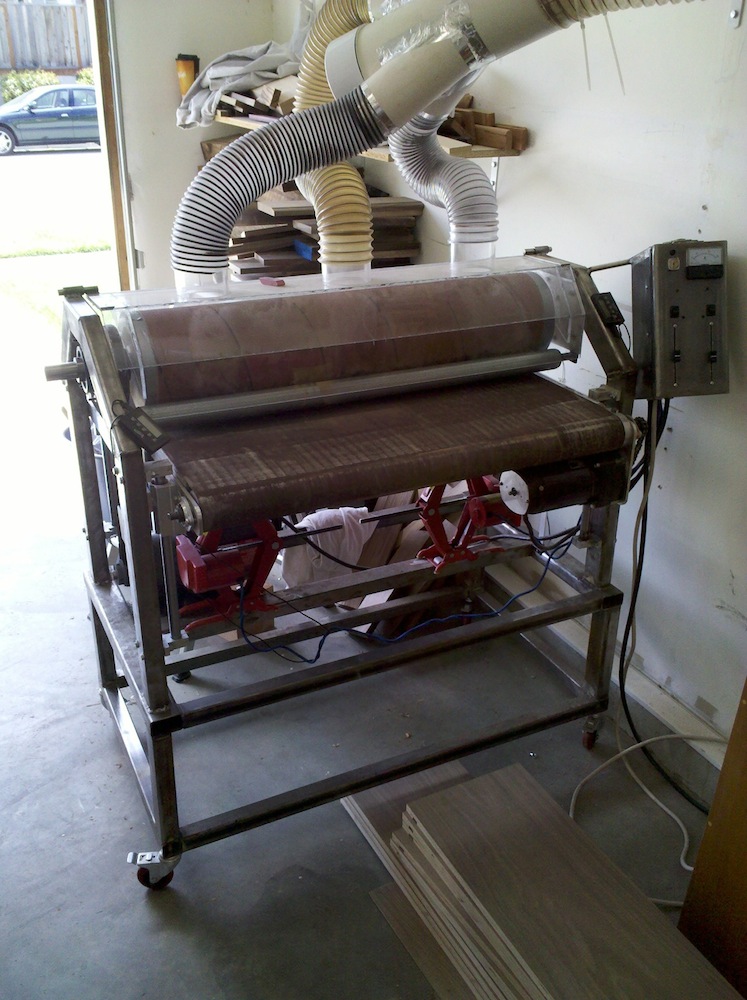
I have been working on designing and building this one for some time. It’s 90% complete and in full production now, just needs paint and some wire looms which I probably will never get, so I figured pics are worth showing. I built this drum sander for three reasons:
1) Sick of using a hand sanders to smooth my end-grain cutting boards.
2) Needed to get consistent thicknesses on cabinet doors and face-frames.
3) I don’t really have a planer to speak of.
The 3rd will probably generate the most controversy, but my design allows me to bite into about 0.040-0.050 inches of wood with each pass without burning the paper. The primary ways I accomplish this is through a lot of power, a variable speed DC gear motor which allows me to creep the wood under the drum at a fixed rate, a large sanding drum to provide more abrasive surface area, and dust collection that prevents material from adhering to the drum. Although I am still considering buying a new lunchbox planer just to save some time and effort, I can feed through 4 or 5 boards at a time. The capacity makes up for the slower speed of sanding something down to size.
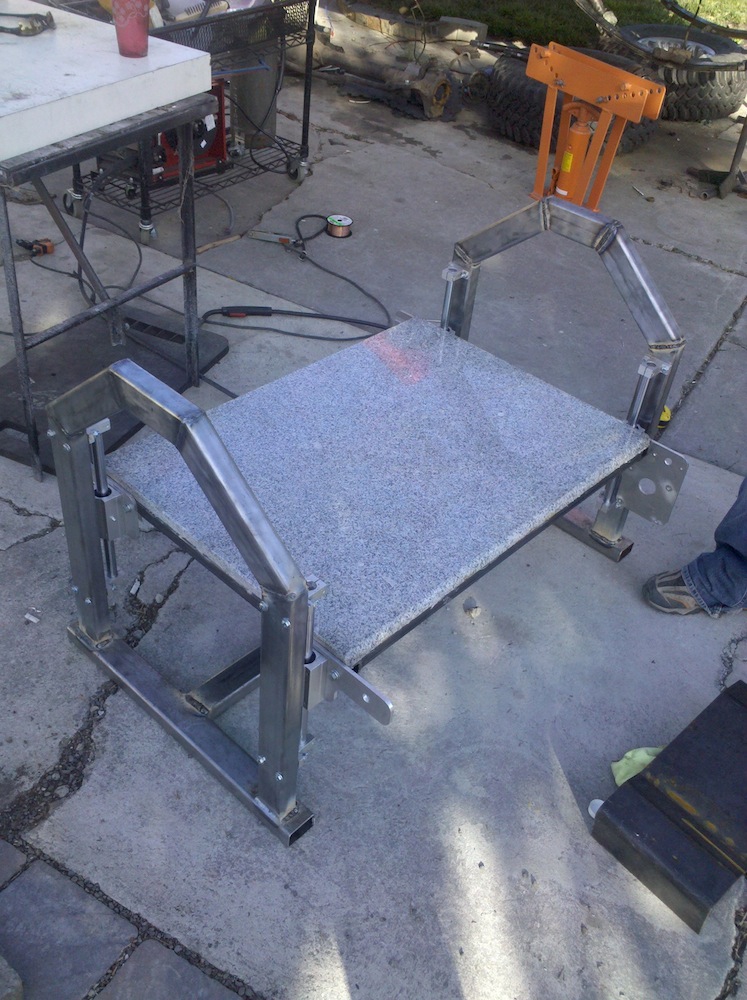
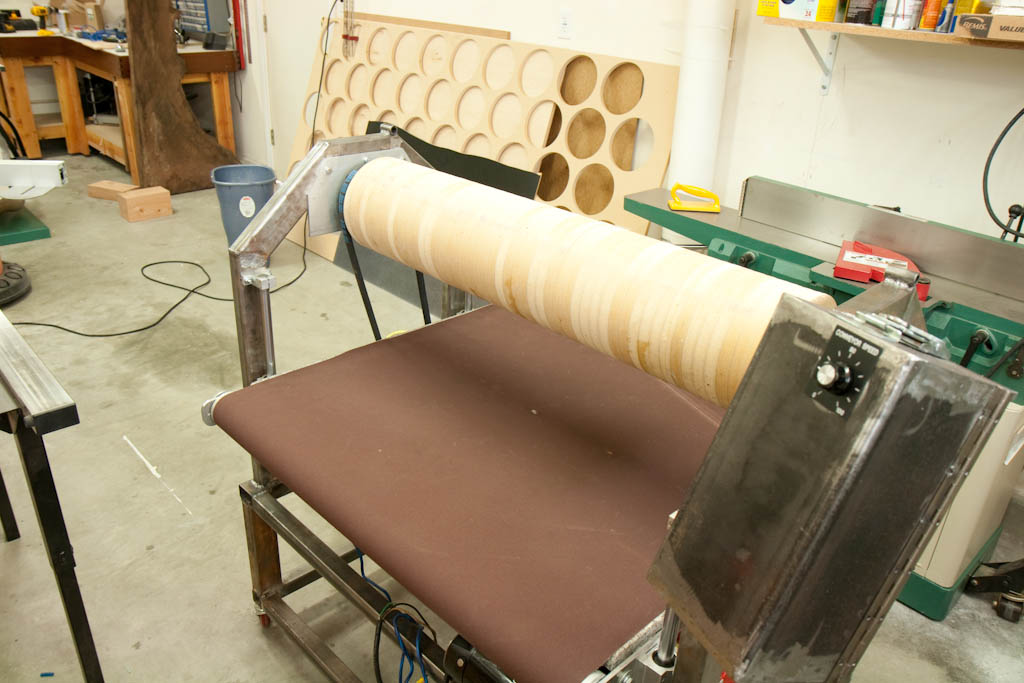
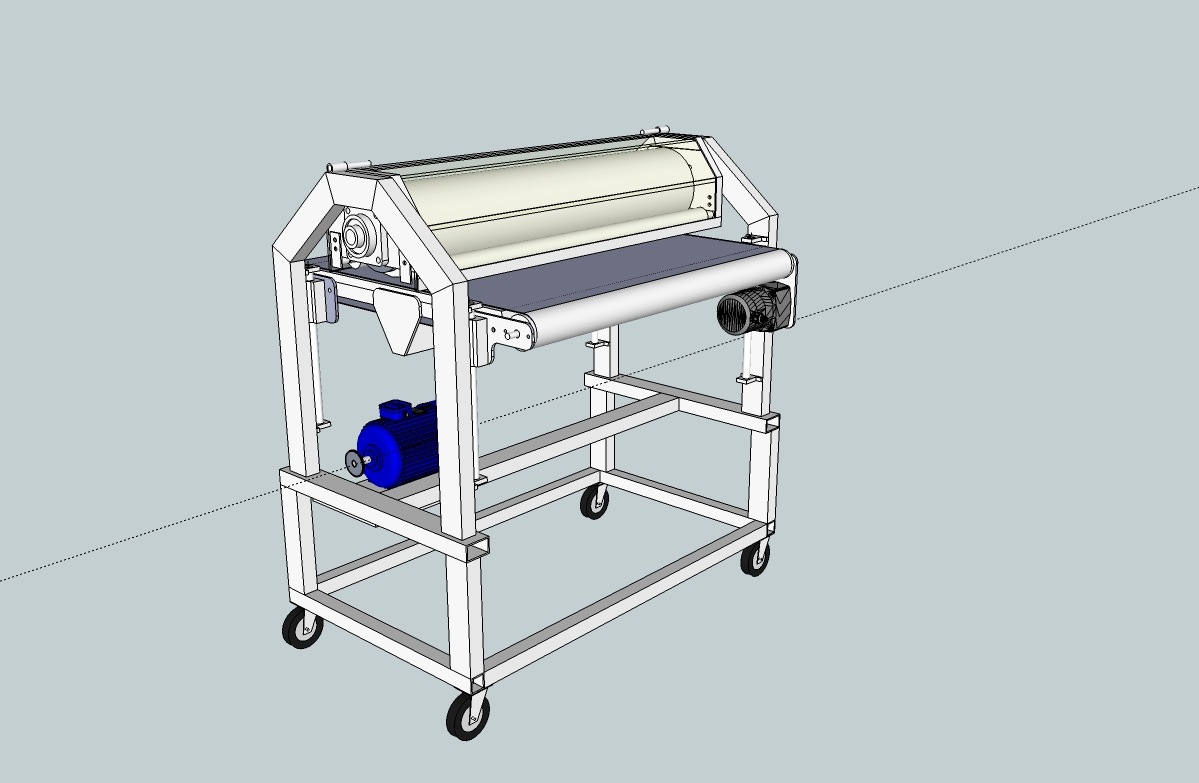
The basic design is an 8″ single drum suspended over a granite counter top. I went with a slab of granite that was broken in half at the local home store and talked the manager into letting it go for $20. I then chucked up a diamond wheel in my trusty 4.5″ angle grinder, clamped a steel straight edge to the granite where I wanted to cut it, ran the hose on it, and cut away. This was probably horribly unsafe, but it worked just fine for me. The granite then sits on a grid of 1.25″x1.25″x.1875″ steel square tubing that was welded and ground (relatively) flat.
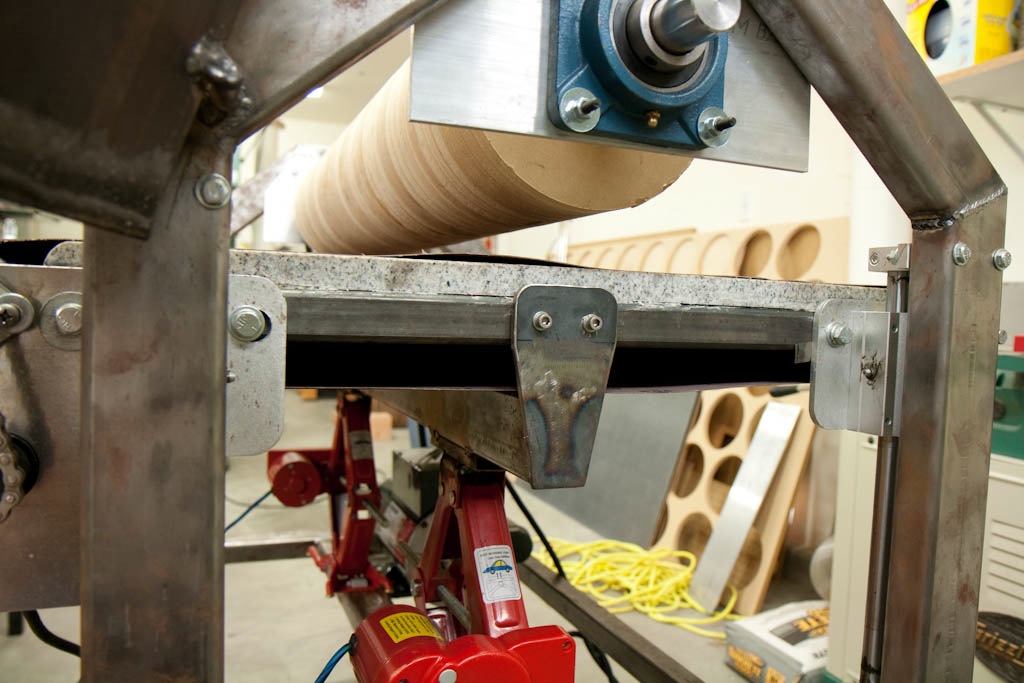
The table itself is supported in the center by two 12v scissor jacks for motorized lift/lowering. I get about 10″ of travel, which allows me to throw larger things on the table (such as a completed drawer box, for example) and sand the edges all flush for edge banding or whatever. The table moves on 4 linear bearing rails (like you’d find in a CNC machine) to allow for very smooth adjustments up and down. In the end, I think a chained system with lead screws would have been better, even with a hand crank instead of a motorized lift mechanism, but if I ever built a second version, I’d design those in from the start. Anyway, this doesn’t have any specific disadvantages over a geared lead screw system, it’s just more expensive for no good reason. I designed in two digital readouts for the height so I can see where the table is relative to a previous sanding run. While one could get away with only one of them, they were relatively cheap and this allows me to see if the table is raising linearly or whether some micro adjustments are needed to bring it into the same plane as the drum.
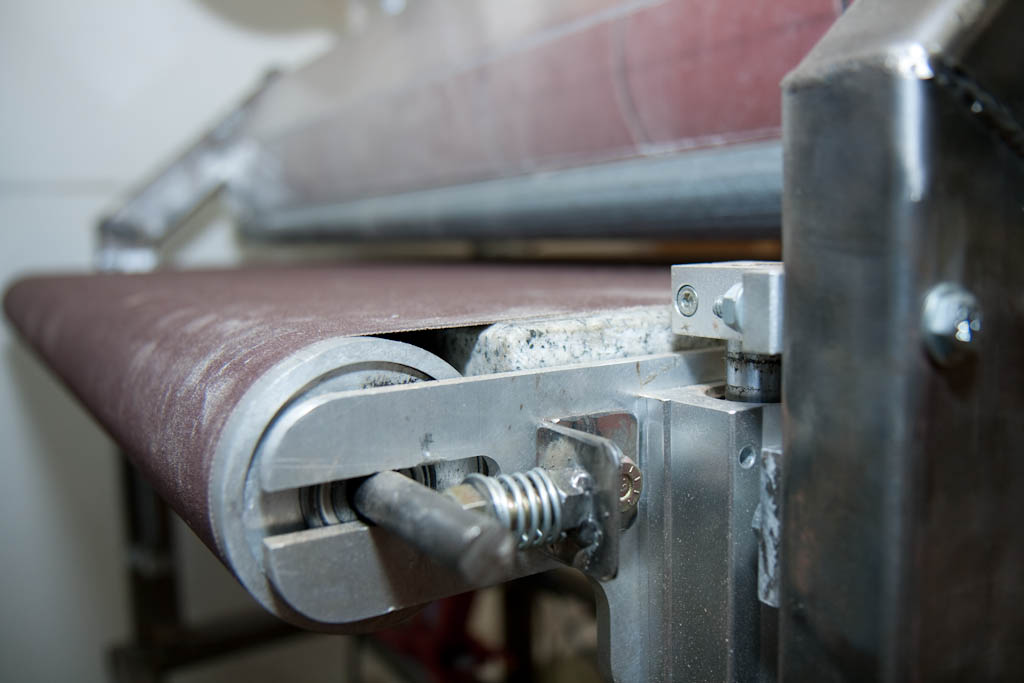
The conveyor is a large sanding belt powered by a bodine DC gear motor hooked up to a minarik speed controller. It can move the wood anywhere from 0-20fpm. I frequently use intermediate speeds, depending on how much material I’m sanding off. The quick speed is nice because it allows me to just lightly scuff sand multiple boards in rapid succession. The slow speed is obviously nice because I can leave the table at a fixed distance from the drum and hog off more material by simply feeding the workpiece at a crawl. The belt has tracking adjustments welded to the non-drive side which are simply bolts that tension each side of the shaft. The mounting plates were CNC’d from aluminum to ensure a precise system.
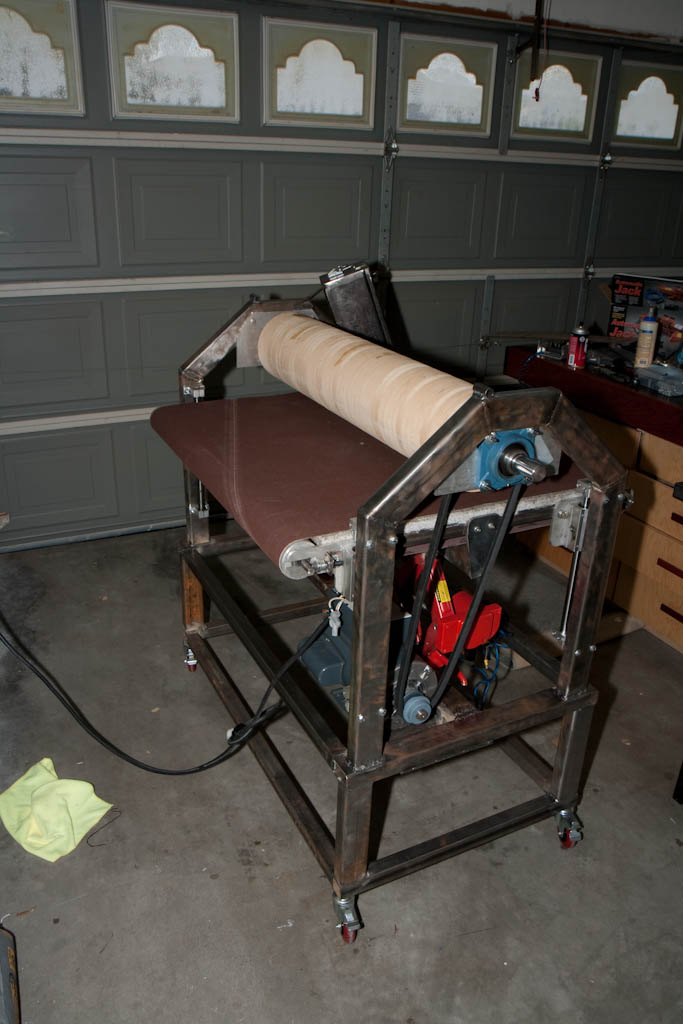
The frame itself was built with recycled steel. I learned to weld on this thing, but my brother-in-law graciously welded most of the critical components since my welds were “too ugly” he said. The wheels are locking casters and definitely undersized now that I’ve added all the steel and granite. They work but I wouldn’t off-road with it.
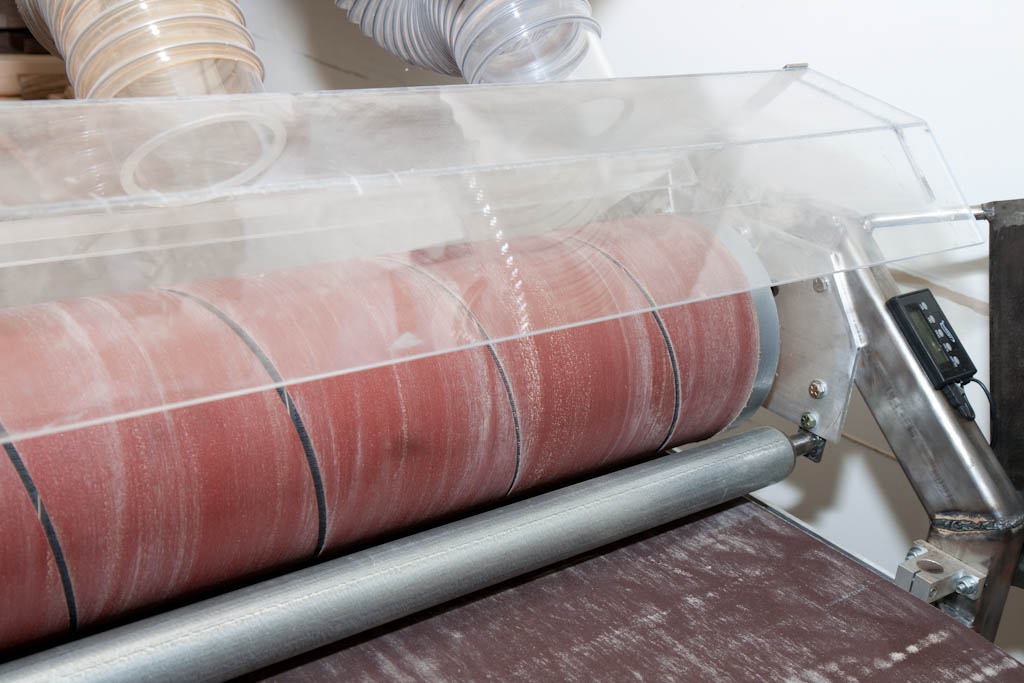
The drum is a 1.25″ precision shaft. NOTE: if you’re thinking of building your own drum sander, don’t skimp on this part. A round rod will NOT be precise enough to minimize vibration. Get a precision ground rod. If you watch other videos on the internet of home-made drum sanders, a lot of the chattering noises are coming from the out-of-roundness of the drum, which even if you correct through truing the drum, you still have a weight imbalance that imparts vibration into the system). The MDF discs (over 50 of them) were cut with a router (ugh) and epoxied onto the shaft. The drum was then trued by simply raising the moving conveyor belt under the drum before applying the hook side of the Velcro material. The drum was shellac’d to provide better adhesion of the hook side of the Velcro material, then spirally wrapped with 120 grit paper.
The dust “hood” is designed to maximize air velocity through the various entry points. It was made with acrylic (Plexiglas) that was glued together. A scoop on the back comes within a few mils of the drum itself to ensure that all air is pulled from the front side of the drum. It rotates on an axis through the use of a round stainless steel shaft and a piece of DOM tubing welded to the top of the frame. It is easily removed to gain access to the drum bearing mounting plates or the drum itself.
The pressure rollers are indispensable. I got these for $3 each at a local metal recycler. They are conveyor rollers (ironically) and are held in place by a piece of 1/2″ tube welded to a tab. They can be adjusted and they hold the material onto the granite as it passes under the drum. I am thinking of adding a few more on the infeed and outfeed sides. Snipe is non-existent, but I’m sure misalignment might introduce it into the system if I’m not careful. My hope is that more pressure rollers will prevent this.
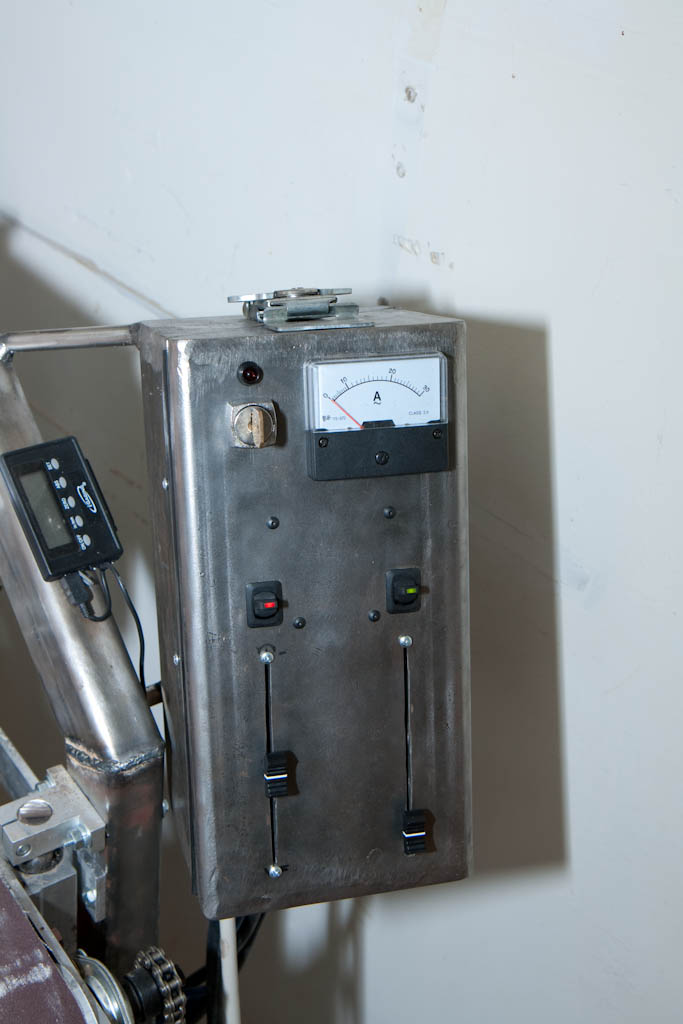
The motor is a 6.5 HP compressor duty motor. I picked it up at the tractor supply house for just under $200. I was a little suspicious of the power rating but the ammeter confirms (assuming a reasonable efficiency) of up to 25 amp current draw at 220v when under full load. Even if it’s only 4 or 5 hp, it does the trick. I don’t run the sander long enough to need a continuous duty motor, or a TEFC. Originally, I was going to use a 2hp Taiwanese dust collector motor and I’m glad I didn’t. It takes a LOT of power to thickness sand, so more is better.
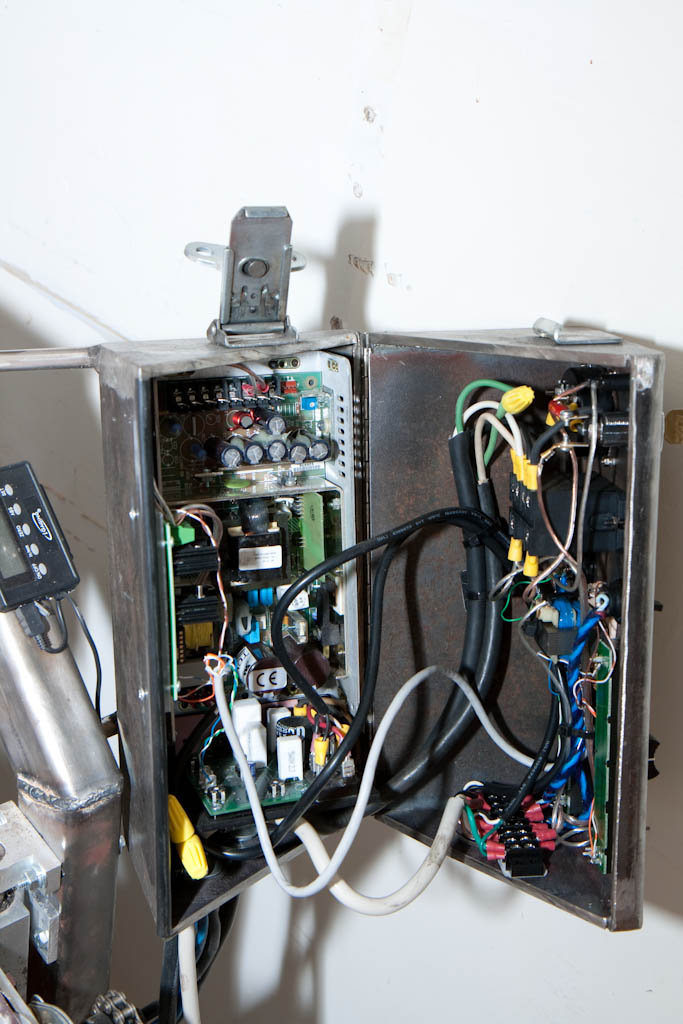
The “electronics box” is somewhat of a joke. It’s a 6″x6″x0.25″thick, 14″ long square tube with 1/4″ steel plate welded to the tops and bottom. It weighs, by itself, probably 25 lbs. It sort of tops off the whole design with a ridiculous overkill clamshell opening system, and a shipping container latch designed for aerospace. At any rate, it contains the power supplies, ammeter for determining the load on the motor, potentiometers for controlling the speed of the table’s up/down movement as well as the conveyor belt speed, some speed controller boards I soldered up, some switches, and some extraneous touches like power supplies to drive LEDs inside the switches (so I can tell if the motors are on or not).
Anyway, being able to build a full sized raised panel cabinet door or face frame and feed it through is amazing. The dust collection works perfectly when hooked up to a large enough cyclone and the time savings is incredible. I gave it a full commission of work and it didn’t even blink. I don’t know how I ever lived without it at this point. Oh, and for those wondering, my materials cost was just over $1000. The linear bearings and table lift jacks were almost $400 themselves, though, so I’m still convinced it could be done for cheaper. Either way, it’s not an easy undertaking for the non-metal-inclined (though I wouldn’t consider myself much of a metal worker). But if the shop-made wooden drum sanders have you thinking you could do better, I would agree. Enjoy!
Advertisers


