Greg’s Appliance Cabinet
Viewer Project
-
By Greg Fox from Sacramento, CA
Added on September 15, 2012
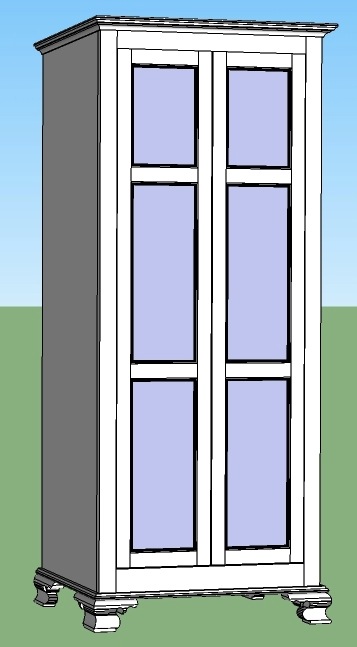
Well over two years ago my lovely wife asked me to build a cabinet to store kitchen appliances and excess stuff. It took me awhile to get this done since most of my previous projects are of the Mission/Craftsman genre and I wanted to do something with a new challenge for me personally. This 74” X 30” X 18” cabinet was the result.
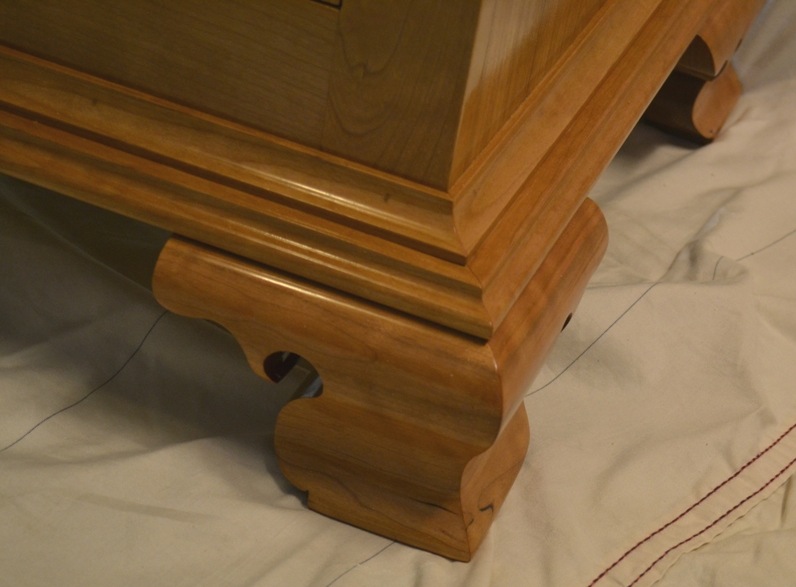
The main challenge was the mitered bracket feet with an ogee curve. All my previous projects have generally been straight sided or with simple legs tapered on the table saw. The bracket feet are my favorite feature of this project and I’m pleased with how they turned out. They allow the cabinet to be something other than my usual carcass with doors.
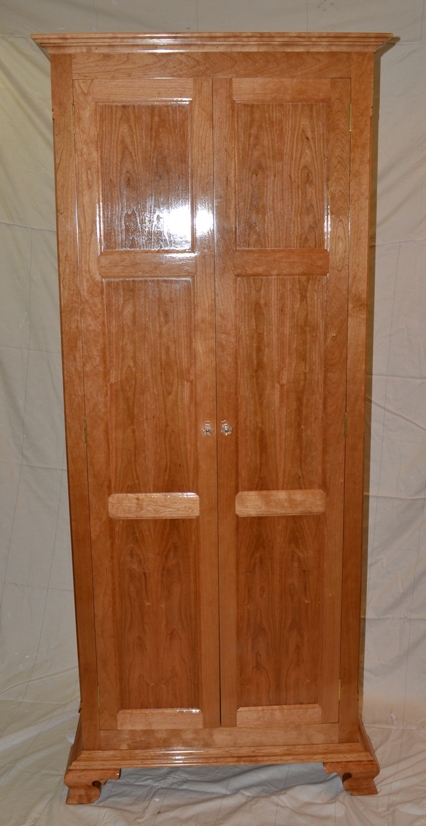
This project also had a lot of personal “firsts.” Besides the previously mentioned bracket feet, it is the first time I have used a cabinet door bit set for constructing doors. It’s also the first time I have used veneer (paperbacked) material on a project. The veneer materials made it very easy to book match the door panels. I gave pocket screw technology a try when I built the face frame and for attaching it to the carcass. This is also the first project I designed myself rather than using someone else’s or from a magazine. I used SketchUp to visualize my design ideas and needs.
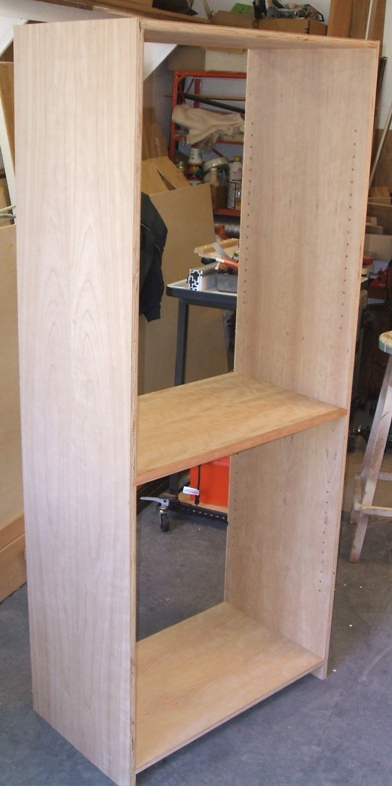
The carcass and shelves are cherry veneered plywood. The face frame, door frames, bracket feet and moldings are solid cherry and the door panels are paperbacked cherry veneer on ½” birch plywood. Four of the shelves are adjustable. The center shelf is stationary to add integrity to the structure.
The finish is oil based poly. I wiped on four thin coats using the method described in Marc’s, “A Simple Varnish Finish” DVD. I have yet to build a perfect project but this is certainly the best finish I have ever applied.
Advertisers


