


Viewer Project
-
By Brian Kooshian from Zeeland, MI
Added on August 25, 2012
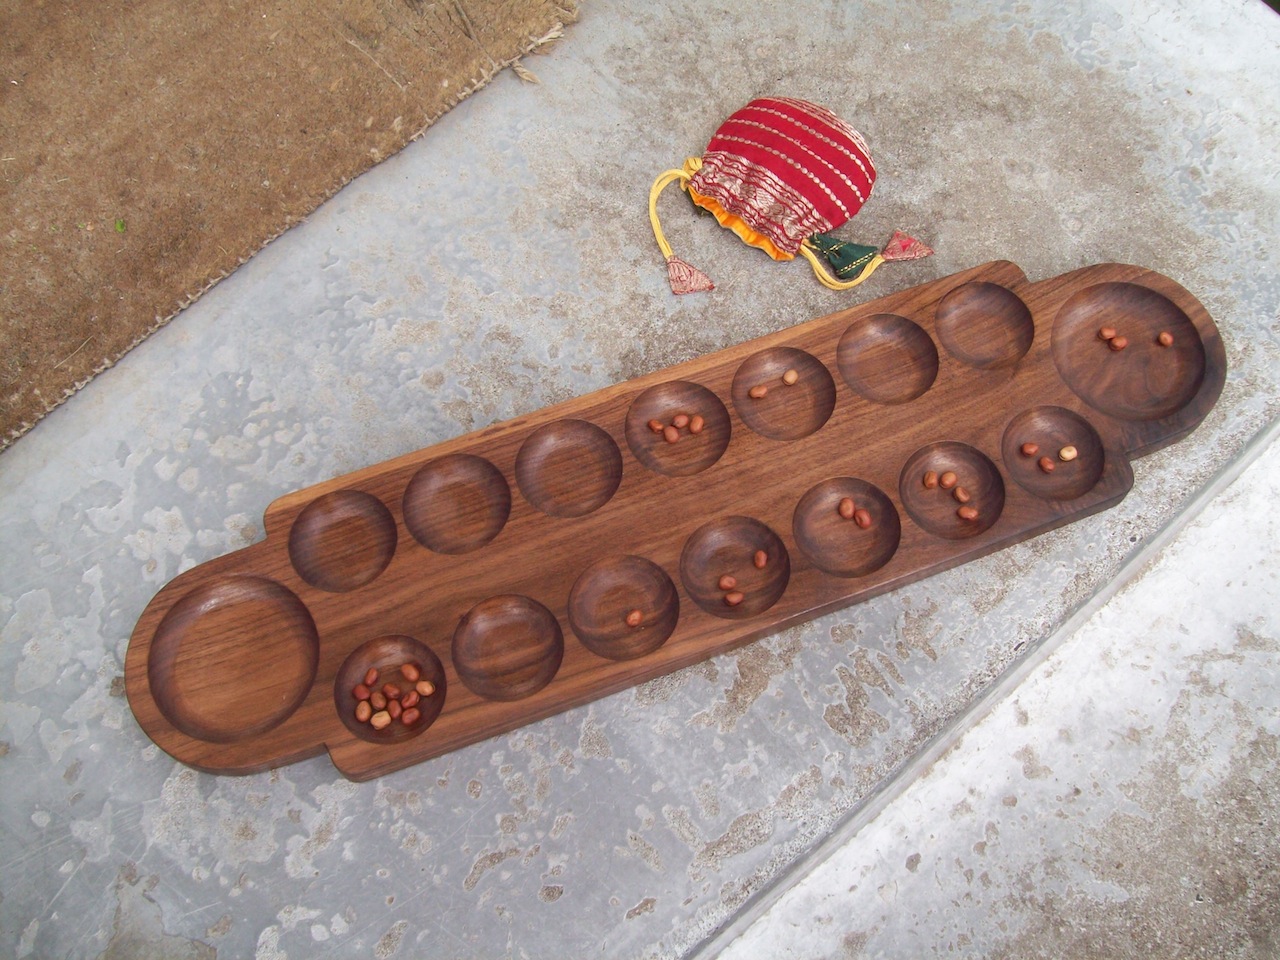
My niece had been begging me for a mancala board for years, so I decided to make her one for her high school graduation.
After drawing the board out full size on several pieces of printer paper taped together, I transferred the design to a story stick and then transferred it to the work piece. I had a slab of Michigan black walnut that a friend had given me, and I thought that the color variations in the piece would make for an interesting game board.
I routed out the dishes with a 1-1/4″ round nose bit with a bearing, using a jig that I made out of an old piece of 2×12 pine that I had laying around.
The difficult part was sanding inside the dishes, and I had to make a mini sanding disk for my drill to smooth out the bottoms. There was also a lot of hand sanding involved. I sanded to 120 grit, then applied 2 coats of Danish oil, and three coats of wipe-on polyurethane.
It was a fun project and I learned a lot, especially about the importance of a router speed control with heavier bits. My niece was thrilled, and wanted to play it all weekend!
Copyright © 2006-2023 The Wood Whisperer Inc. The Wood Whisperer, The Wood Whisperer Guild, TWW, and TWW Guild are trademarks of The Wood Whisperer Inc. All rights reserved.
This site uses affiliate links. Given this, please assume that any links leading you to products or services are affiliate links that we will receive compensation from. However, there are millions of products and services on the web, and I only promote those products or services that I would use personally. The Wood Whisperer abides by word of mouth marketing standards and holds integrity in the highest regard. Should I ever be compensated to write, I will make full disclosure. I always give honest opinions, findings, and experiences on products. The views and opinions expressed on this blog are purely our own. Any product claim, statistic, quote or other representation about a product or service should be verified with the manufacturer, provider or party in question. All content on The Wood Whisperer is copyrighted, and may not be reprinted in full form without my written consent.
| Cookie | Duration | Description |
|---|---|---|
| cookielawinfo-checbox-analytics | 11 months | This cookie is set by GDPR Cookie Consent plugin. The cookie is used to store the user consent for the cookies in the category "Analytics". |
| cookielawinfo-checbox-functional | 11 months | The cookie is set by GDPR cookie consent to record the user consent for the cookies in the category "Functional". |
| cookielawinfo-checbox-others | 11 months | This cookie is set by GDPR Cookie Consent plugin. The cookie is used to store the user consent for the cookies in the category "Other. |
| cookielawinfo-checkbox-necessary | 11 months | This cookie is set by GDPR Cookie Consent plugin. The cookies is used to store the user consent for the cookies in the category "Necessary". |
| cookielawinfo-checkbox-performance | 11 months | This cookie is set by GDPR Cookie Consent plugin. The cookie is used to store the user consent for the cookies in the category "Performance". |
| viewed_cookie_policy | 11 months | The cookie is set by the GDPR Cookie Consent plugin and is used to store whether or not user has consented to the use of cookies. It does not store any personal data. |