Brian’s Computer Desk
Viewer Project
-
By Brian Van Ness from Dickinson, TX
Added on July 3, 2012
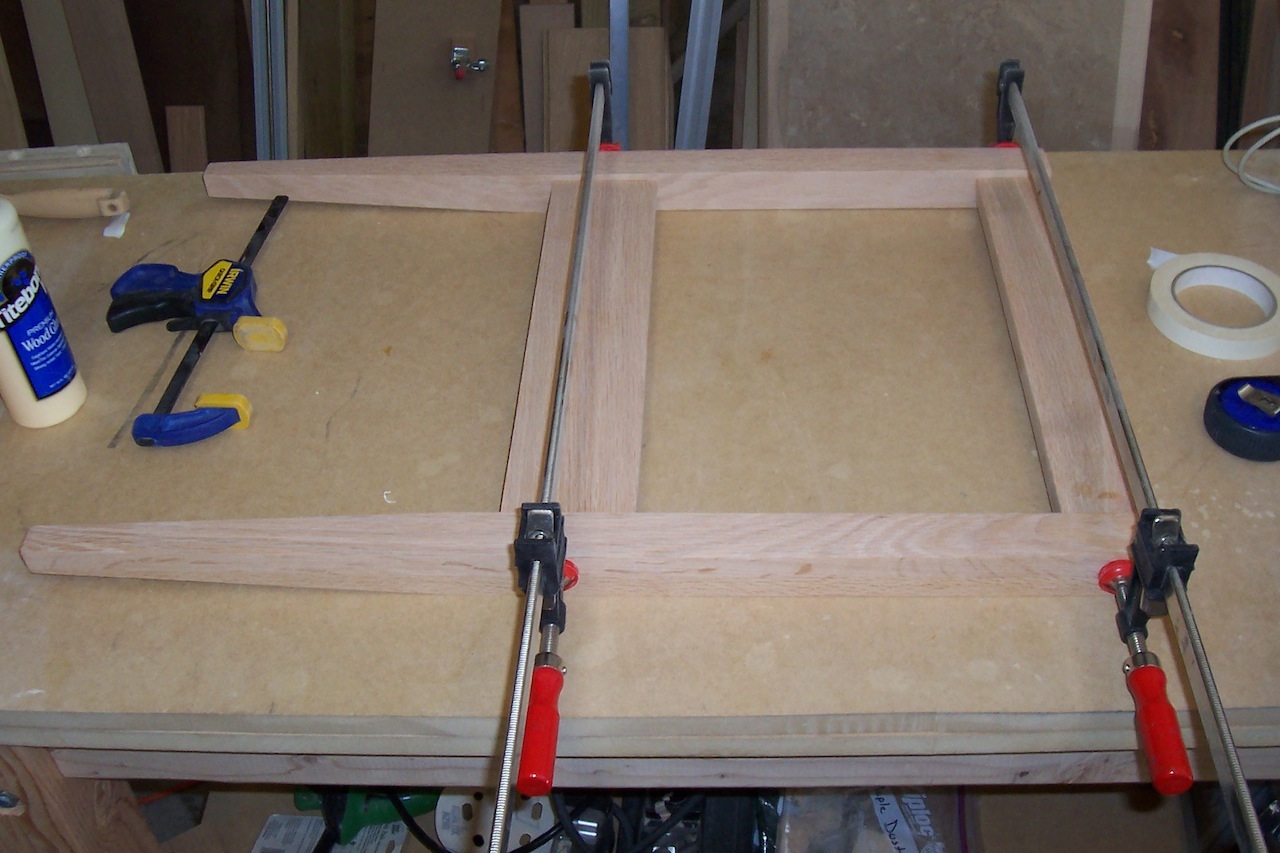
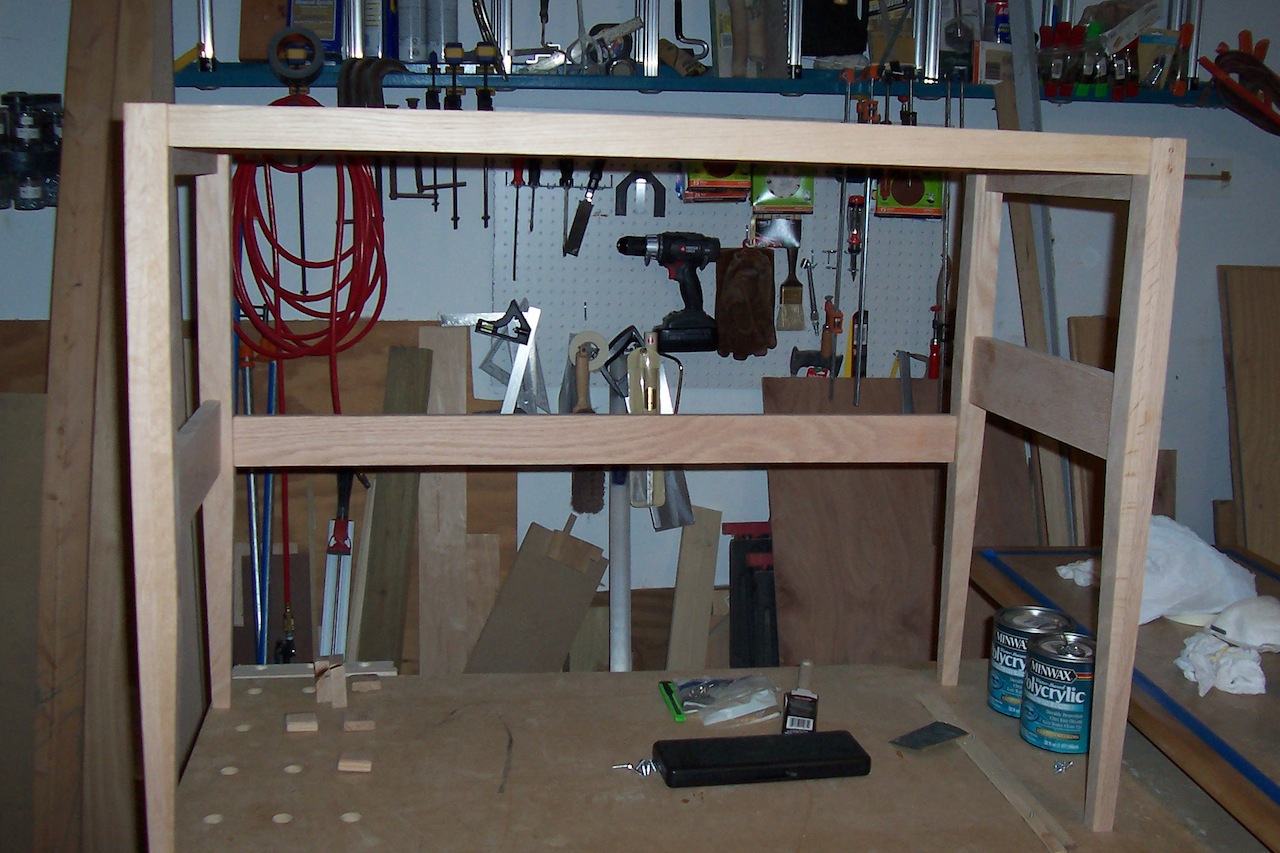
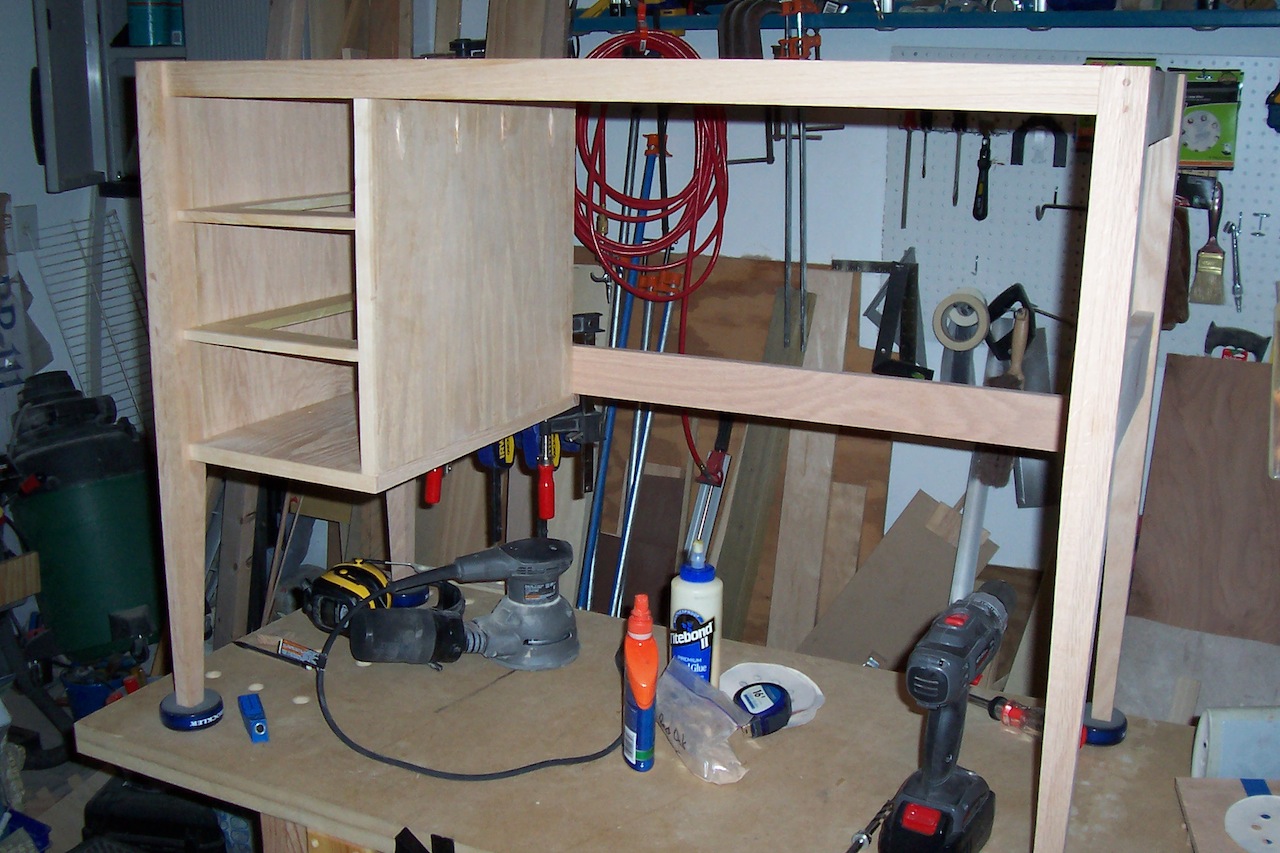
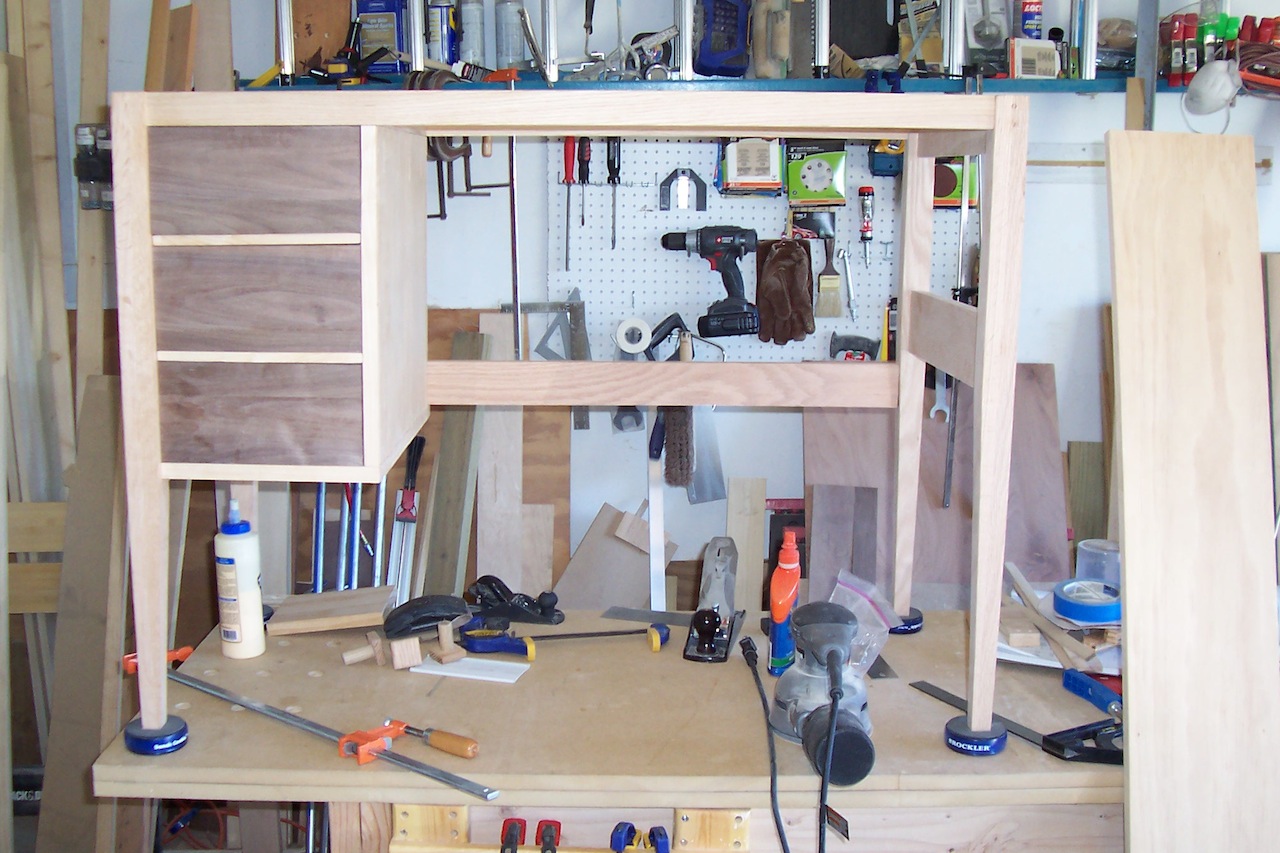
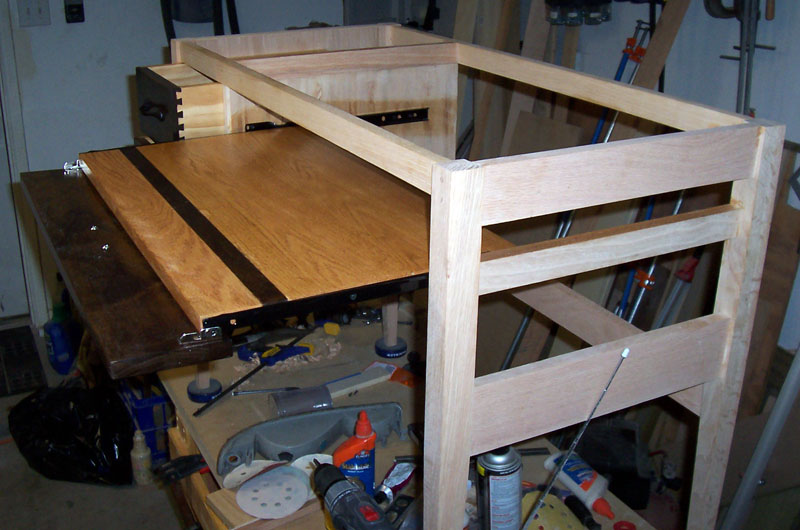
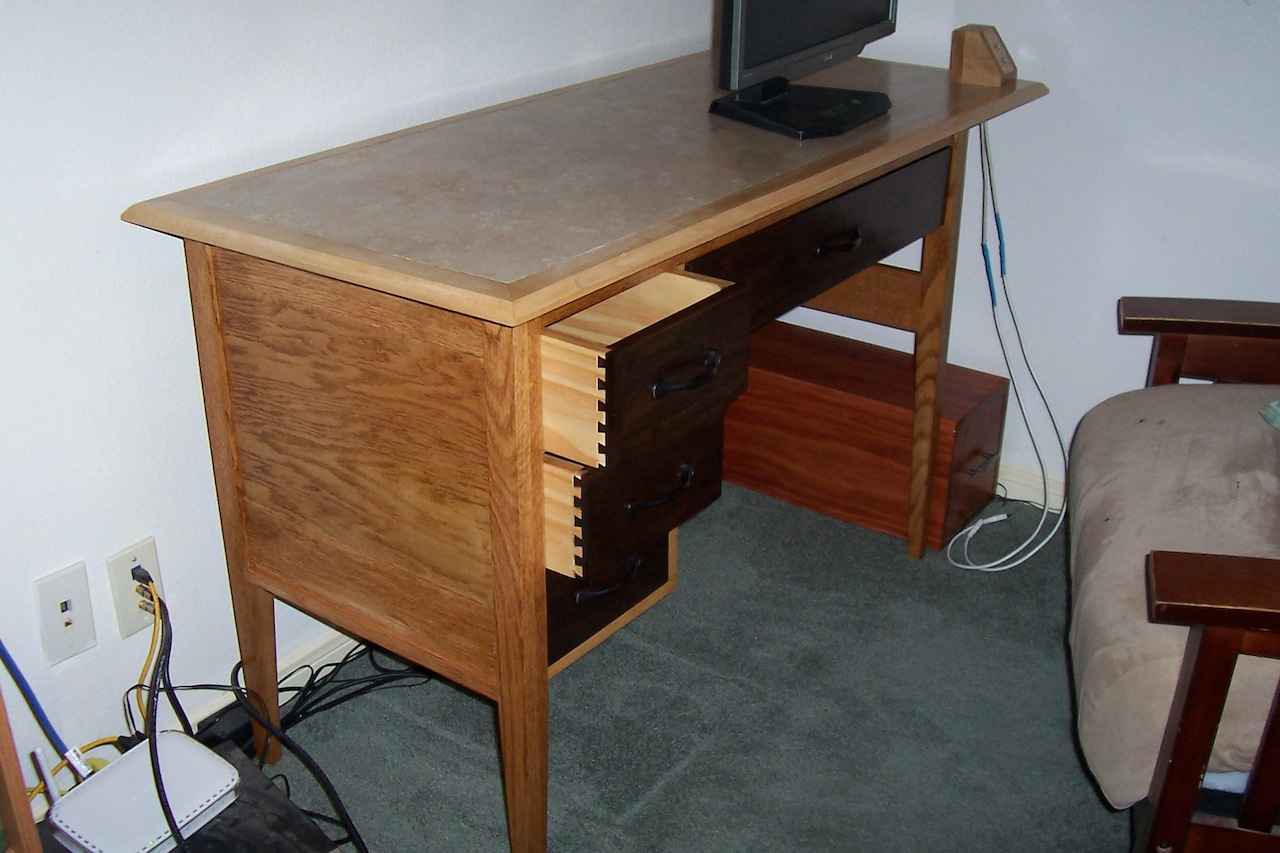
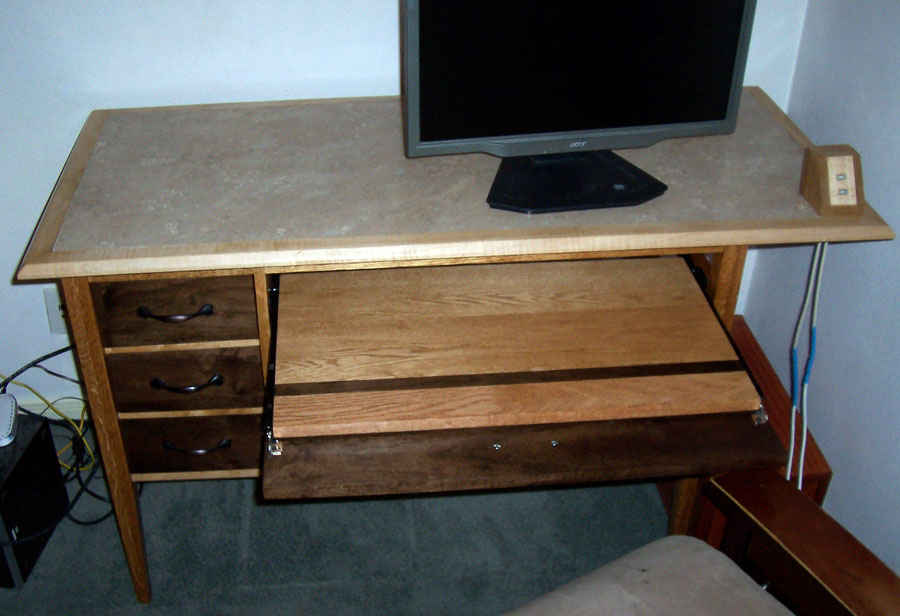
I started working on this desk with a goal as a budding woodworker, to replace my entire bedroom with new homemade furniture. I decided my new desk needed three smaller drawers. The top was simple 3/4″ plywood laminated with plastic trimmed by router with a flush trim bit. The edge banding is maple mitered treated with a 45 degree bevel on the top edges and 1/8″ roundover on the bottom edges. The bottom of the table top was sealed off only with dewaxed shellac. The legs are tapered on two sides, long tapers on one side of the desk and short tapers for where the drawers where planned. Most of the carcass is joined using dowels and pocket screws cleaning up the pockets with oak plugs. The top was mounted using metal clips that look like the number 8. The body is all oak, the legs are two face glued 1.5″ x 3/4″ to make the 1.5″x1.5″ legs. The legs were connected to make the leg assemblies first then those came together using 1.5″x 3/4″ stretchers to make the basic frame. The basic draw up gave me the width of my drawers so I made an L shaped piece to glue and screw into the left side with the short tapers. Once in place, it made the space where the drawers would be placed. I made wooden slides out of poplar and cut walnut to the dimensions of the three drawer openings. With that I made three identical pieces of poplar for the drawer backs. Less 1.5″ the length of the drawer space used a half-blind dovetail jig to join the drawer fronts to the sides. I wanted to do something different with the keyboard tray, so instead of edge gluing an extra piece of oak, so I added a strip of walnut then edge glued a narrower piece of oak to fill out the dimensions of the tray. To finish off the keyboard tray, I used a pair of drawer slides from Rockler that have tilt able brackets on the end so I could attach a piece of walnut to act as a false front for the tray.
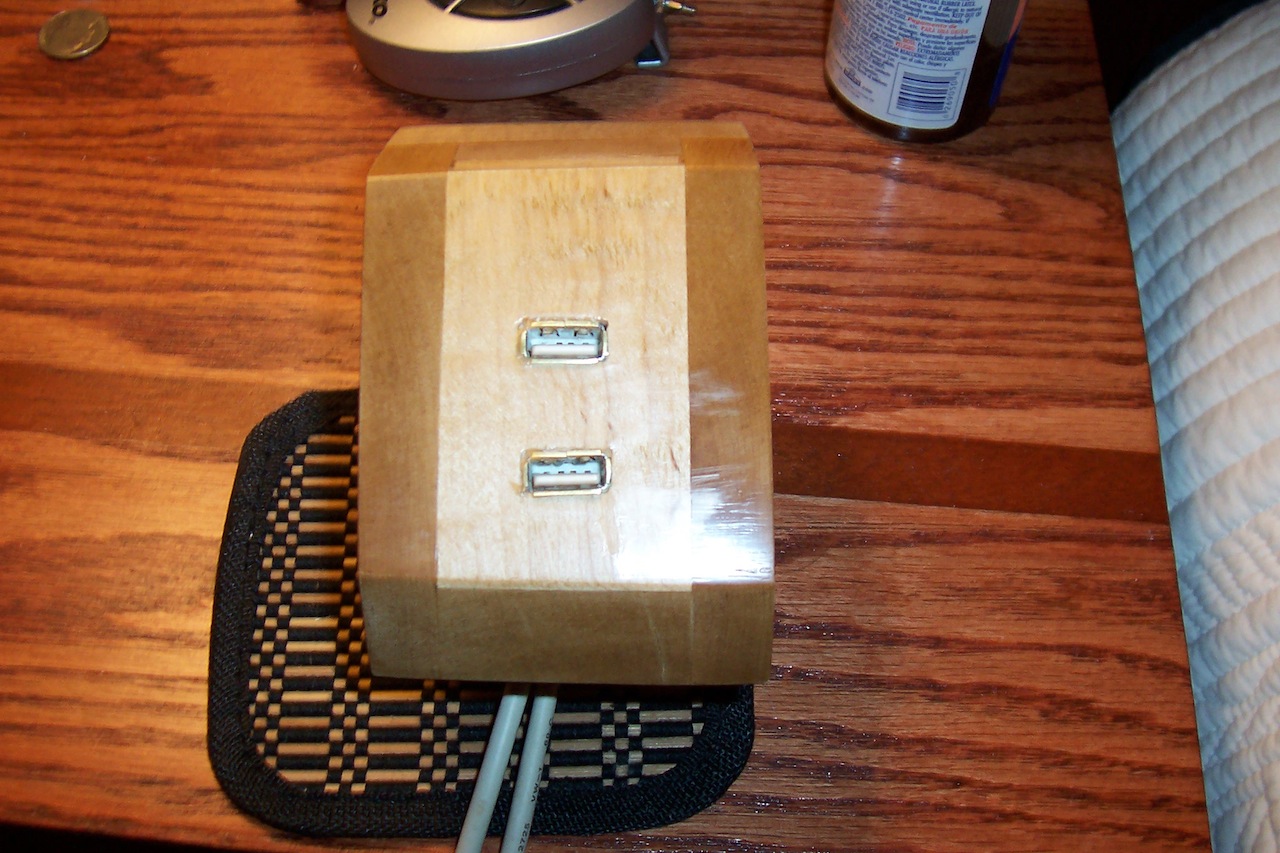
My computer sits on a box I made (my very first project). So my desk’s top was set during the draw up at the height of the box and computer case so that the bottom of the desk’s top will clear the case by 2+ inches. The tower’s extra USB ports are located on top of the case, so I need a way to hook up my USB devices to the computer through the desk.
The one feature I didn’t find in any desk is the maple USB box I made for the corner of the desk. I didn’t want to reach behind the computer to connect any thumb drives, cameras, or even to recharge my wireless mouse. The holes were measured for the USB female connectors and drilled a little undersized then filed to final size before epoxying the connectors in place. The box has an open bottom so I used a spade bit to open a channel for the cables, then screwed the box in place flush with the desk’s top.
The oak and maple were stained with Minwax’s Golden Oak; the walnut was stained Minwax’s Dark Walnut. The entire desk was finished with Minwax’s water based semi-gloss poly.
Advertisers


