Interested in my new Hybrid Woodworking book? Sign up and be the first to know when pre-orders are open!

Andy’s Curly Walnut TV Console

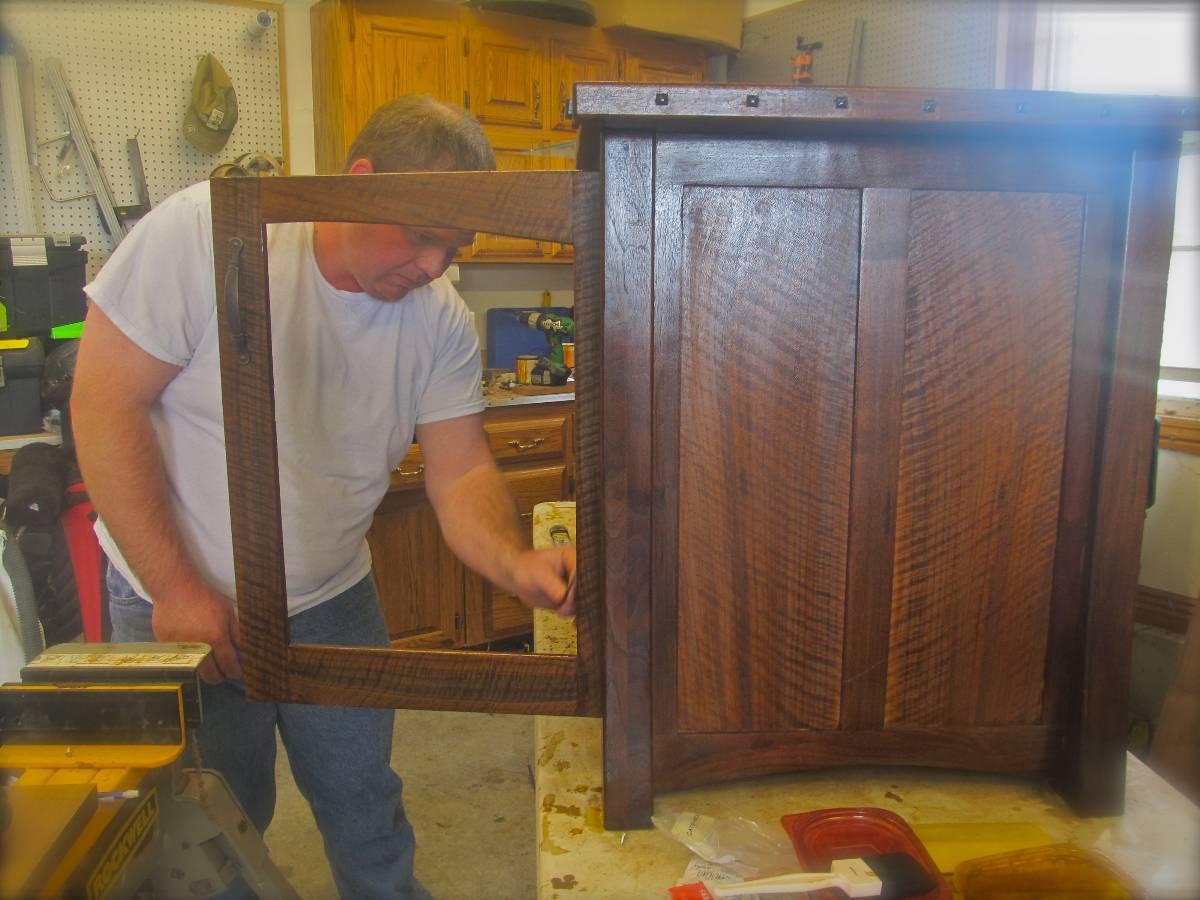
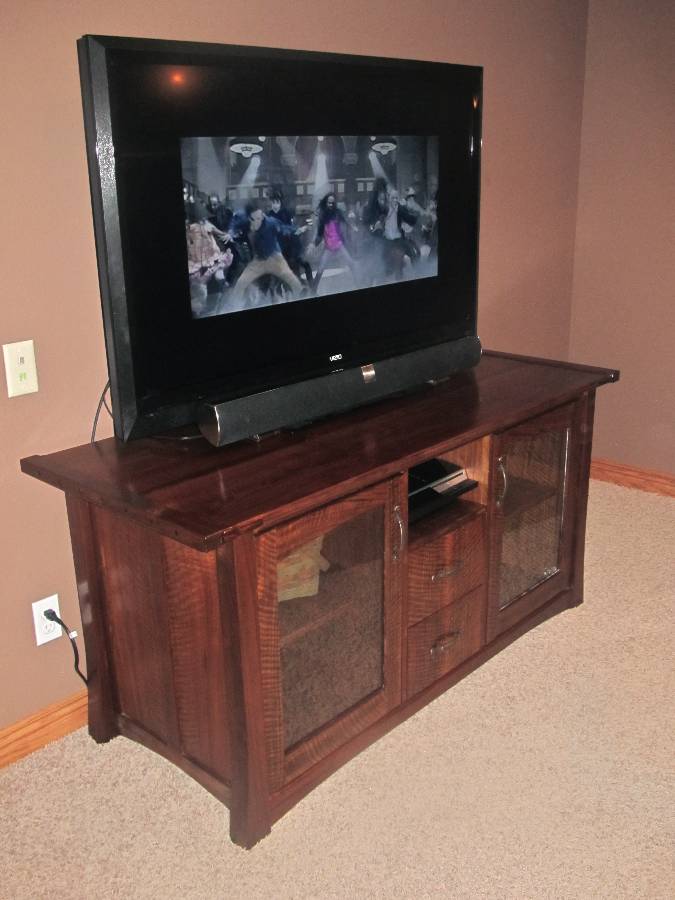
First off, thank you Marc for your videos and website. Everything I know about woodworking, I have learned from your videos and website. This is a walnut entertainment console for my ginormous TV in the basement. This project is the most complex I have built to date, and a culmination of skills I have developed from the previous five serious woodworking projects I attempted. The start of the process was sitting in front of my Mac and creating the project on sketch up. I had found a picture of a similar console in a Fine Woodworking issue and wanted to create the project for myself. I knew many of the skills I had learned would come to good use, but had to try some new things. Honestly, the day that I stop trying new things will be the day I stop woodworking.

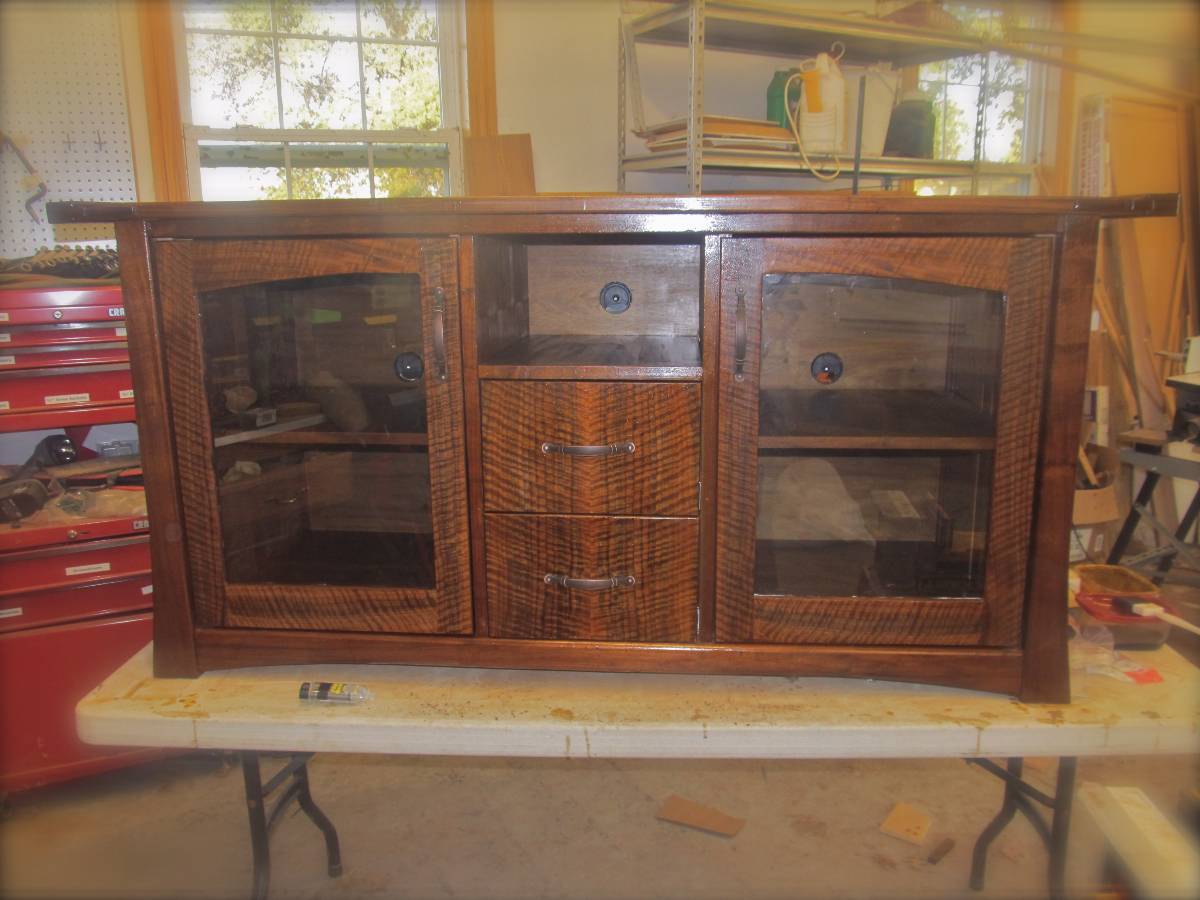
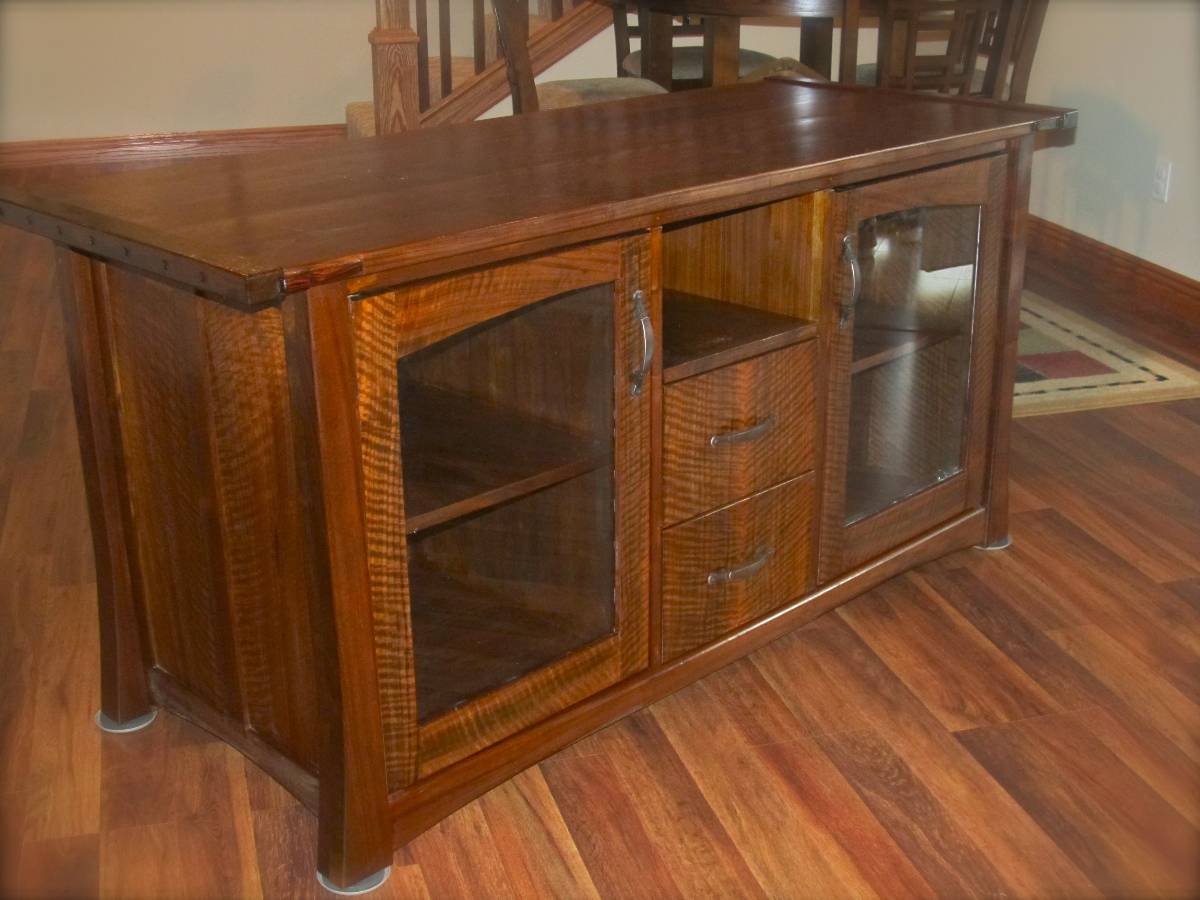
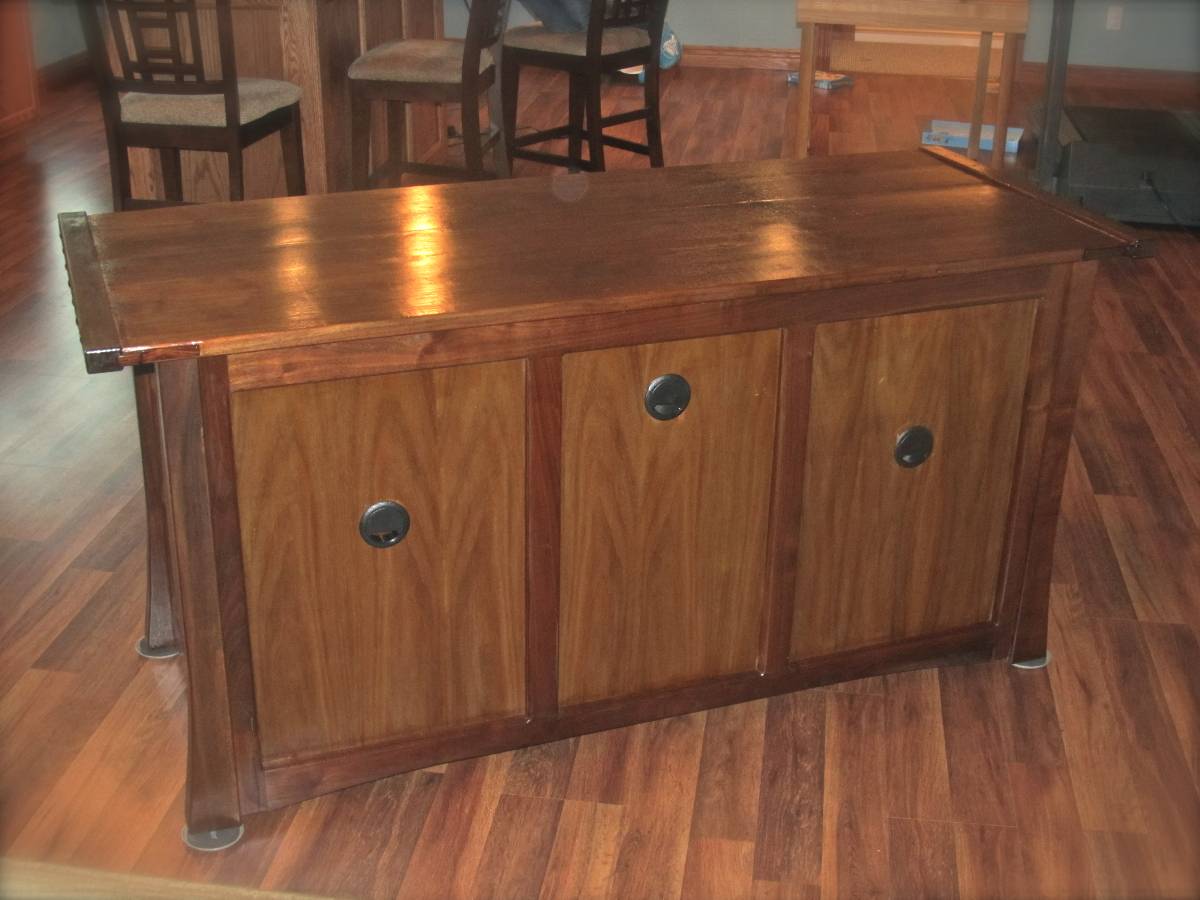
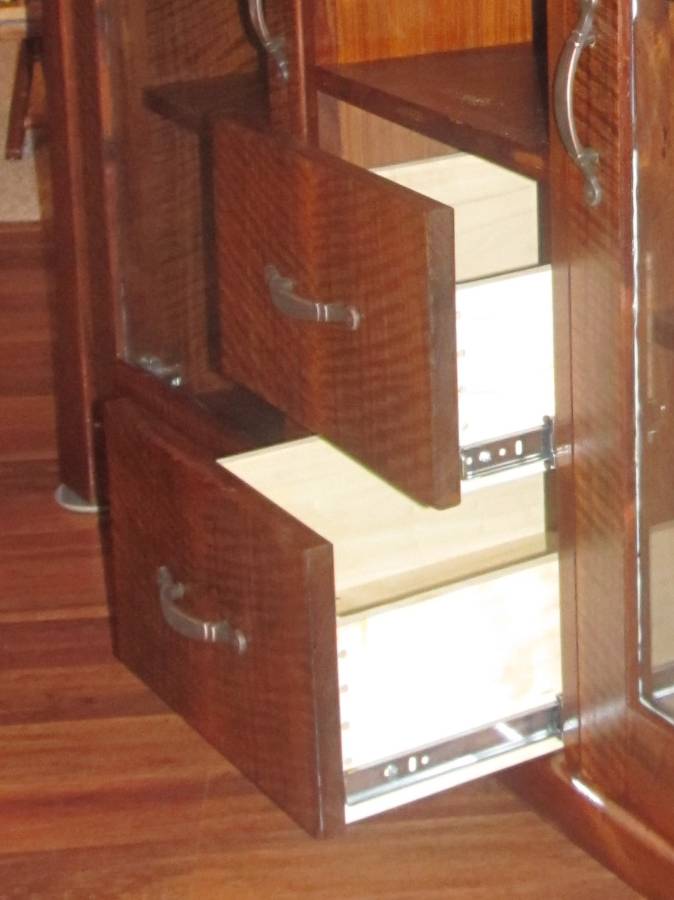
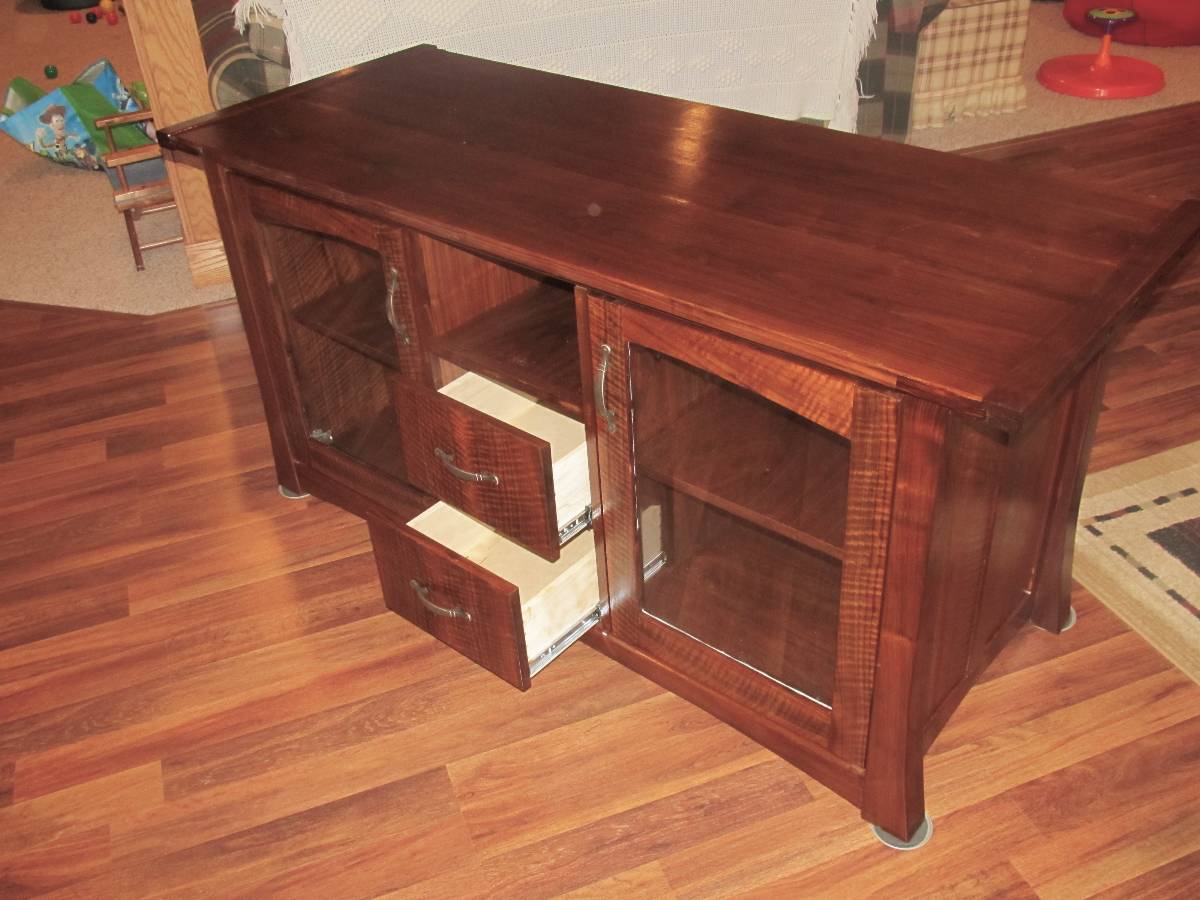
There was a lot of veneering with this project. This gave me the opportunity to book-match and control the direction of the grain to maximize visual appeal which was one of my original goals of the project. I wanted the flow of the grain to be smooth and move naturally through the project. I used heavily figured bees-wing walnut. I made sure all the figure curved up, as if the project was smiling at me. Sure it sounds lame, but it looks nice! This was the first time I made full sized templates for project parts. I would seriously recommend to anyone,take the time to make templates. I was able to use a flush trim router bit in combination with the templates to make perfectly proportioned parts that were consistent throughout the project. All of the curves match and flow evenly in the console. The style is Greene and Greene inspired. It’s not totally authentic, because I didn’t think the real thing would match the rest of my furnishings, but the contemporary hybrid works very nice.

Finishing proved to be trickier than I expected. Because this was a combination of solid wood, sheet goods and veneer, I had various different shades of color to work with and even out. I wanted the walnut to be dark in color, so I used Watco walnut colored Danish Oil. Depending on the color of the the wood, I used medium walnut color and dark walnut color to make sure the sheet material matched the darker solid wood components. Some parts required one coat while others needed two. The process took time, but eventually the color was even enough to my satisfaction. The original plan was to top coat with my tried and true Arm-R-Seal wiping oil varnish blend, but I thought the color was still a little too bland. In a last minute finish change, I went with 3 coats of amber shellac. The amber gave the walnut the warm glow I wanted to achieve. I am very happy with the results.

Comments

  1. Mike_M September 20, 2012

    Veeeery nicely done. Being a fan of the Greene & Greene style (thanks to Marc’s recommendation to William NG’s school) I really like the influences you’ve included. The meticulous detail of the grain flow was also nicely done. Time consuming I’m sure, but well worth it in the end. Excellent job!

  2. Wood worker Wes September 15, 2012

    The design is beautiful and i love the wire routing holes in the back.I built an entertainment center last year and just used a holesaw for the wire routing.I may have to steal your idea:)

  3. Sean O September 14, 2012

    I love the curly walnut. This is an impressive project and displays some sharp skills.Bravo

  4. Seth Hoover September 14, 2012

    I like your smile effect! I don’t think it’s “lame” as you say. Marc always says that anything looks better when you start thinking about grain direction, and you certainly did!
    Great job!

  5. Joel September 14, 2012

    Great Job Veneering .

  6. Dave Ray September 13, 2012

    Andy, you put everything together beautifully, the choice of wood, the design, the build. I really like your finished product. Looking FWD to your next design/build.

  7. Chuck Mielkie September 13, 2012

    Andy,

    Great design and execution of the curly walnut on this project. You definitely did a great job with the grain on the veneer!

  8. Chris H September 13, 2012

    I don’t know the technical word for that grain pattern. I see a few folks calling it “Curly” but it almost looks more “Quilted” to me. Either way that is absolutley beautiful. Where did you get the lumber?

  9. I don’t know if I should watch the TV or look at the cabinet.
    Great job.
    I love curly Walnut. One of my favorite woods.

  10. Bob September 13, 2012

    Very nice work Andy. This piece seems to be very robust (I mean strong and solid) and the details as the curve on the legs, the G&G style and the grain patern give a beautiful elegance.

  11. Lobro4 September 12, 2012

    Just read the poll on how much it would take to give up woodworking. You should hold out for the the-million dollar payday. Job well done.

  12. azsteve September 12, 2012

    Way to go Andy! I can see the G&G, the tapered legs similar to the chest of drawer project, and really like the symmetry of the doors (cloud lifts or whatever they call that feature).

  13. Patrick Schupbach September 12, 2012

    Crazy curly walnut… Love the design and very well executed!!!

  14. Byrdie September 12, 2012

    Very nicely done. Nice blending of woods, form and color. I’m sure you’ll continue to be pleased with the outcome for years to come.

  15. Shawn September 12, 2012

    I love the grain pattern, that is beautiful.

  16. Dr. Ron September 12, 2012

    Outstanding! I love the “smiles” on the front. The piece has a look of classic, solid furniture and the smiles kind of lighten it up a bit. Thank you for sharing this with us; it is inspiring for those of us who want to move forward with the craft.

  17. Andrew September 12, 2012

    That is a great looking cabinet, my friend! Well done, you can enjoy that forever with a sense of pride. Bravo!

  18. runningwood September 12, 2012

    I really like this and love the extra “design elements” you added. This is one reason we build our own furniture. Very nicely well done.

  19. Riley Rasmussen September 12, 2012

    Great looking piece- may I suggest one thing- Instead of using side mount drawer slides I highly recommend using under mount slides. My favorite are the Blum Tandem soft closing undermount slides. They do not hide you beautiful dovetails.

    It looks great.

    • Rick W September 13, 2012

      Plus 1 on the Blum. Everything else looks amazing. Great Job!

  20. Claude Stewart September 12, 2012

    Nice!

  21. Ty September 12, 2012

    Fantastic job, love the design! I also love the dedicated spot for the PS3.

  22. justin September 12, 2012

    That is beautiful. I have been looking at doing something like this. I am a beginner at woodworking and a little intimidated about these kind of projects. Any idea where I could get some plans and try to attempt something like this. Thank you and once again it looks beautiful.

  23. Robert J September 12, 2012

    Nice selection of wood Andy. I personally like the effect you chose. Great job overall!

  24. Steve Kinkead September 12, 2012

    Very nice cabinet! First time I’ve seen curly walnut, I like it a lot.

    You are smart to pay attention to the grain orientation and it is greatly a matter of personal preference. I prefer “mountains” vs “smiles”. The panels on the back of your cabinet are a good example of orienting the grain as mountains. Mountains help direct the eyes upward toward the top of the cabinet which is certainly better then towards the floor.

  25. Macster September 12, 2012

    I like the “smile”…its different…in a good way. Nice job.

Leave a reply

XHTML: You can use these tags: <a href="" title=""> <abbr title=""> <acronym title=""> <b> <blockquote cite=""> <cite> <code> <del datetime=""> <em> <i> <q cite=""> <strike> <strong>

*

Online project based woodworking education.

3 Membership types

  • A la Carte
    Starting at $25/project
  • Subscription
    $129/year
  • Superfan Subscription
    $299/year
Learn more →

Simple Varnish Finish DVD

Coming Up


  • Thorsen House Tour w/ Darrell Peart

    May 21, 2013
  • Live Guild Session

    May 21, 2013 - 3:00 pm MT
  • Turning the Post Pt. 2

    May 24, 2013
  • The Router Jig and Dovetail Slots

    May 31, 2013
  • The Legs

    June 7, 2013
  • The Top & Pivot Block

    June 14, 2013
  • Assembly & Finish

    June 21, 2013
  • Spiral Alternative

    June 28, 2013
  • Baseball Bat Alternative

    July 5, 2013
clearvue-200x200
TWW_v6_200x200

Pressure Treated Wood Utility Poles for building structures, distribution or transmission.

bellforest200x200-tww10