Rabbets are a fundamental woodworking joint and we use them extensively in frame and panel construction, case construction, and drawer construction. Knowing how to execute rabbets quickly and effectively is an essential woodworking skill. To learn more about cutting various joints using “hybrid” methodology, check out my book Hybrid Woodworking.
What Are Rabbets
You might already be familiar with the terms dado and groove which are simple recessed channels cut into a board. If the dado or groove is cut at the edge, effectively making it open-sided, you have what is known as a rabbet or a rebate for those of you on the other side of the pond.
Table Saw First
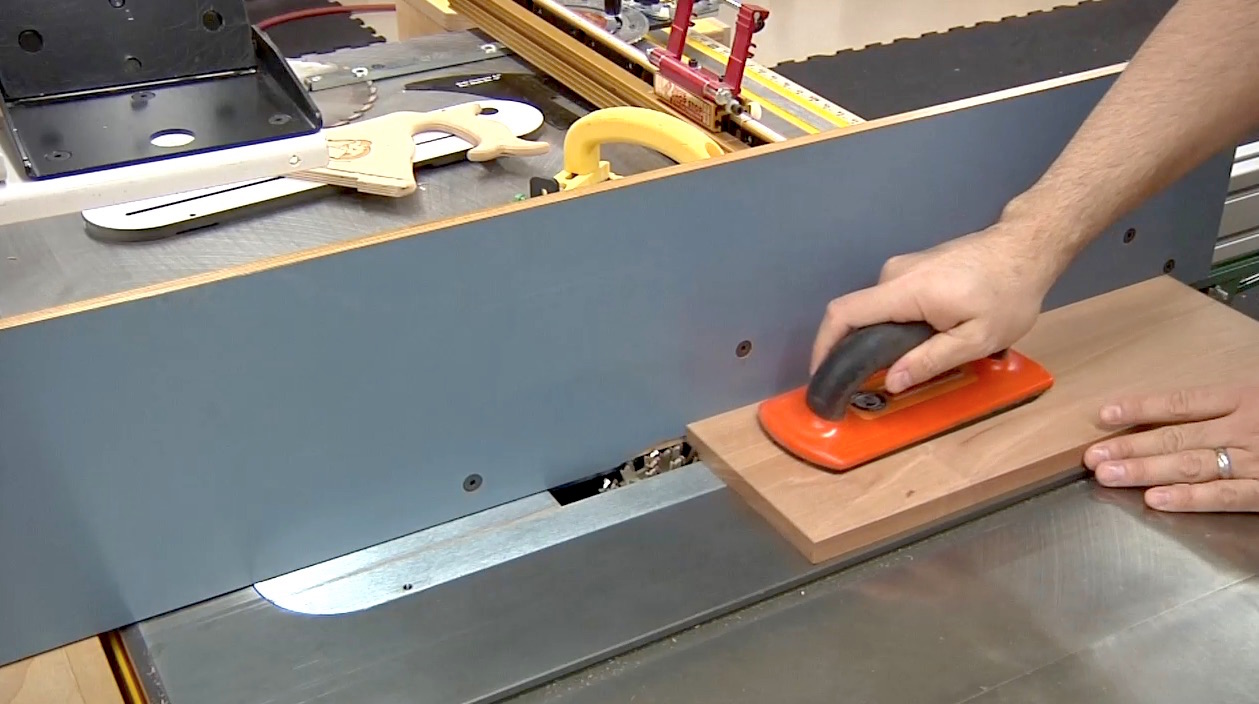 There are lots of ways to cut a rabbet, but I find the table saw to be the fastest. I use a dado stack that’s about 1/8″ wider than the desired width of the rabbet. That extra 1/8″ gets buried into a sacrificial fence that’s attached to the regular fence. Once setup, you can batch out rabbet after rabbet in a matter of seconds.
Unfortunately, this method can sometimes result in rabbets of an inconsistent dimension. This is primarily due to variances in downward pressure as well as boards that aren’t completely flat. Using a push block or some form of hold-down rollers can certainly help with this but you still might have some finessing to do for a perfect fit. That’s why I generally aim for my rabbets to be just a little bit heavy. I can then dial in the perfect fit at the workbench.
Finesse with Hand Tools
First things first: the goal here is NOT to waste time and effort. You should make your table saw cuts much like you would if you were bidding on the showcase showdown: closest without going over. This way, natural variances will cause your rabbet to range from perfect to just a bit too thick instead of perfect to just a bit too thin. So in the ideal world, this hand tool process would take no more than one or two passes and about 10 seconds per joint. A small price to pay for perfection!
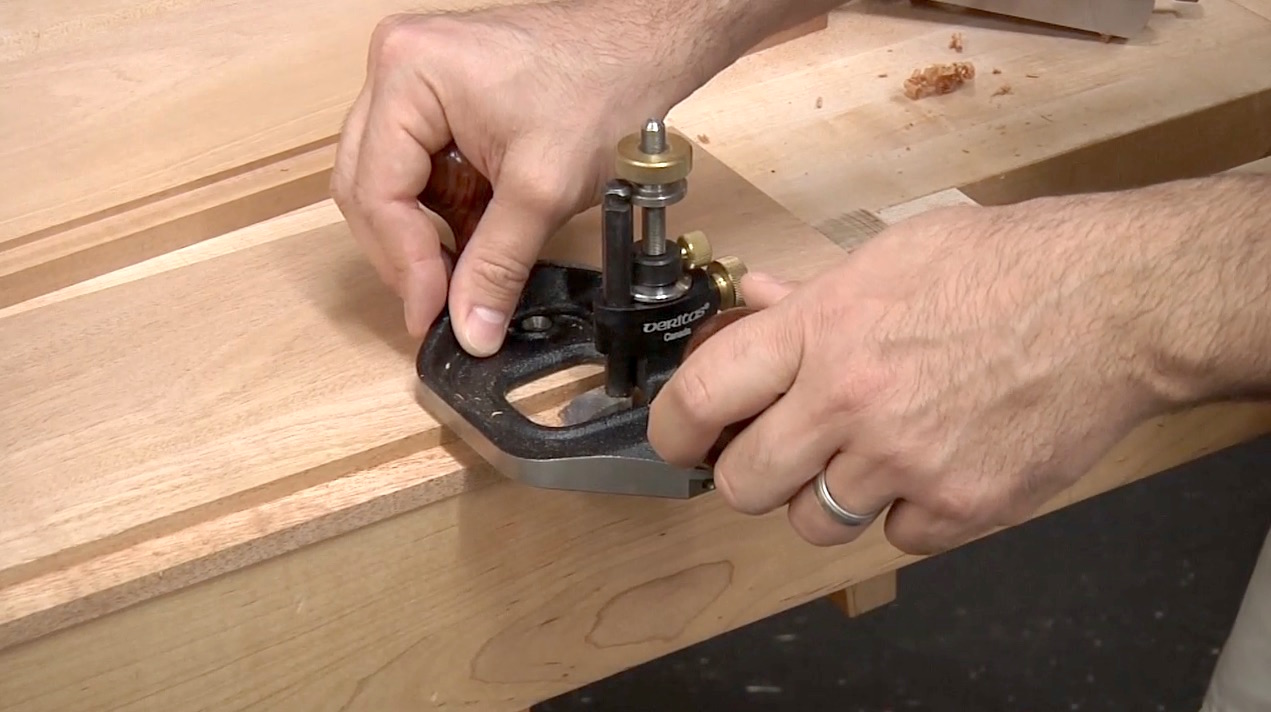 There are two tools that I recommend using and you don’t necessarily need both. The first is the Router Plane. This bad boy is incredibly handy and very easy to understand for the new hand tool woodworker. The blade sits at a fixed depth below the body much like a powered router and it’s perfect for making sure your rabbet is at a consistent depth. Simply set it at the lowest point on the rabbet and remove everything that’s higher than that.
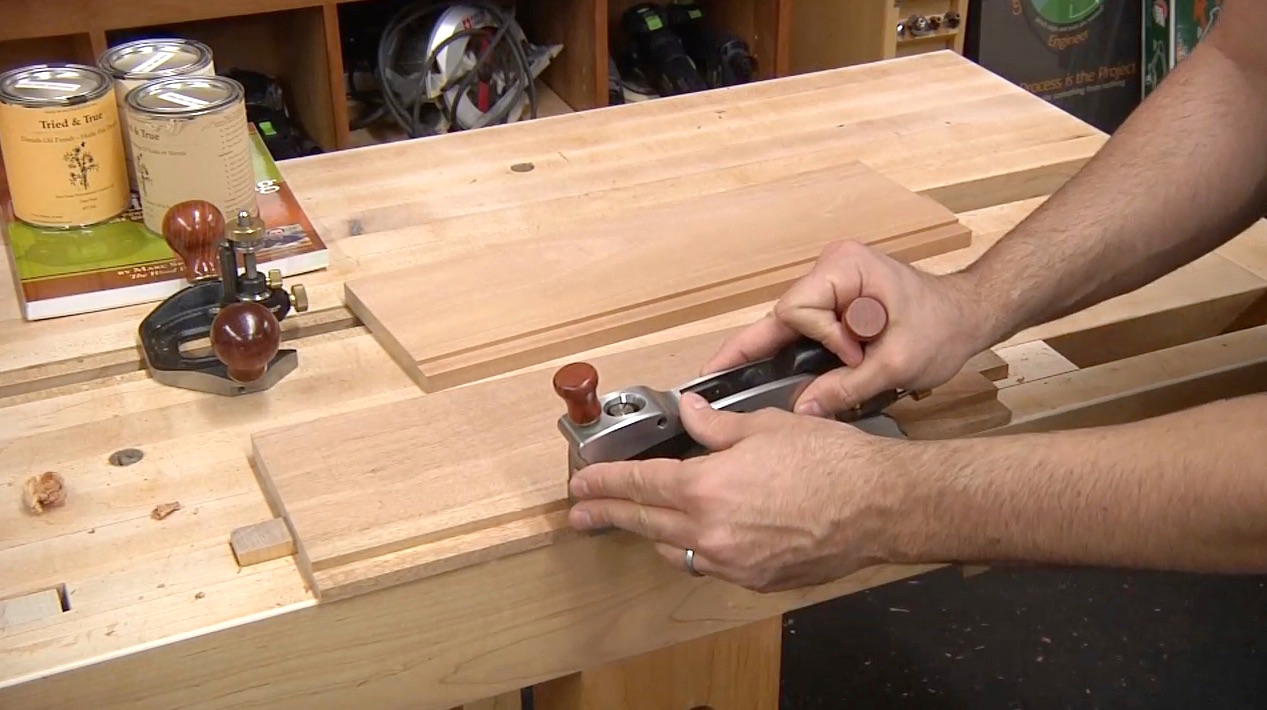 The second tool is the Shoulder Plane. The shoulder plane operates like any other plane, only it’s tall narrow body and full-width blade make it perfect for trimming rabbets. It tends to leave a smoother cut than the router plane but doesn’t have the same no-brainer depth adjustment. So I like to use the shoulder plane in conjunction with a test groove to find the high spots and quickly remove them. You could also use both of these planes in conjunction with one another, leveling the rabbet with the router plane and doing a cleanup pass with the shoulder plane.
The end result should be a slip-fit rabbet that drops into the groove like buttah!
 For more woodworking tips that incorporate both power tools and hand tools, pick up a copy of my book, Hybrid Woodworking!


