Whether we like to admit it or not, mistakes will happen. Knowing how to repair them may make the difference between a nerve-wracking build and a relaxed one. So in this demo (recorded live), I’ll show you some of the most common mistakes and errors I encounter and the various ways I like to fix them.
What You’ll Need
CA Glue – Cyanoacrylate is a quick-drying adhesive that makes it easy to re-attach small bits of wood. Used with a quick-set activator, it’s an incredibly ally in the battle of repairs.
Wood Filler – While many folks poo poo wood filler, there are just some flaws that call for the stuff. Getting the right color is the key and knowing a few tricks to give the appearnce of real wood is also a big help. The stuff I like to use is Timbermate Wood Filler.
Clothes Iron – Sometimes the best solution is a little heat and moisture. A household iron will help us steam out dents and scratches.
Repairing Tearout With Filler
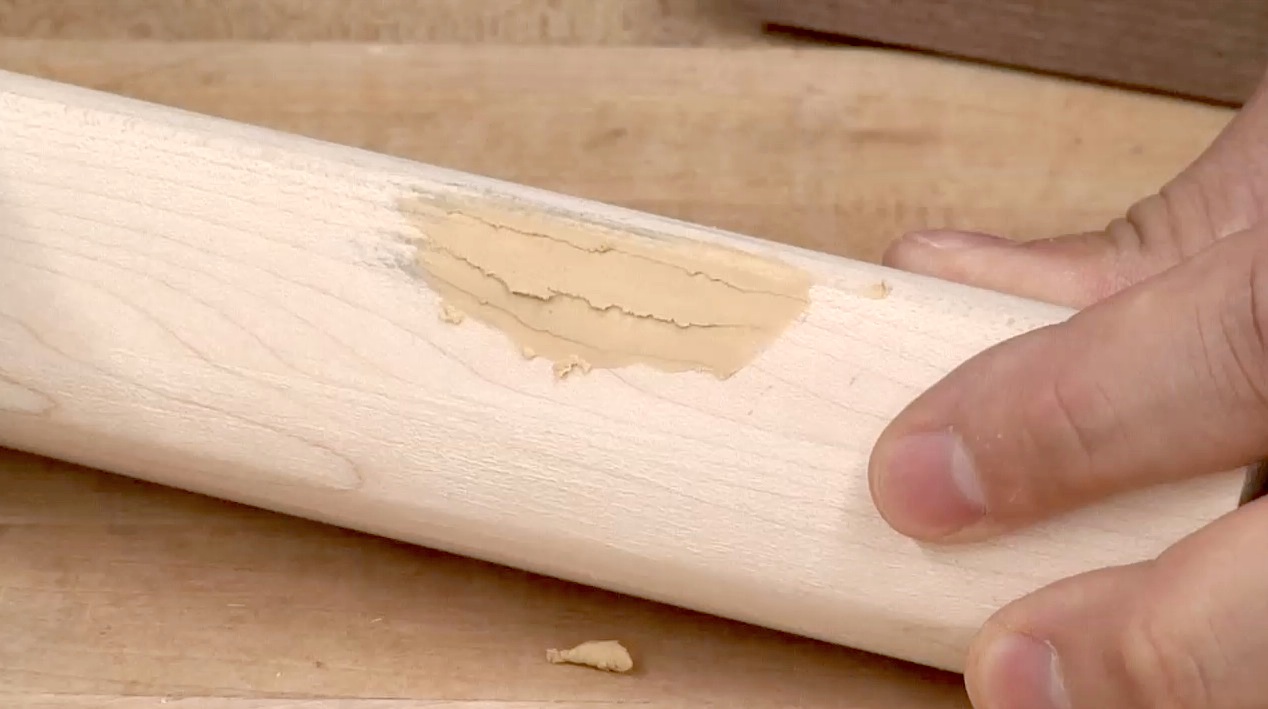 In some cases, a gnarly bit of tearout is best repaired with filler. A good quality filler that won’t shrink and accepts stain will give you the best chance of a good match. Since fillers are typically colored to match the primary background color of the wood, it can sometimes help to use a colored pencil to draw in the missing wood grain. Though I only resort to that for large/obvious repairs where the missing grain would be an eyesore.
Misplaced Mortise
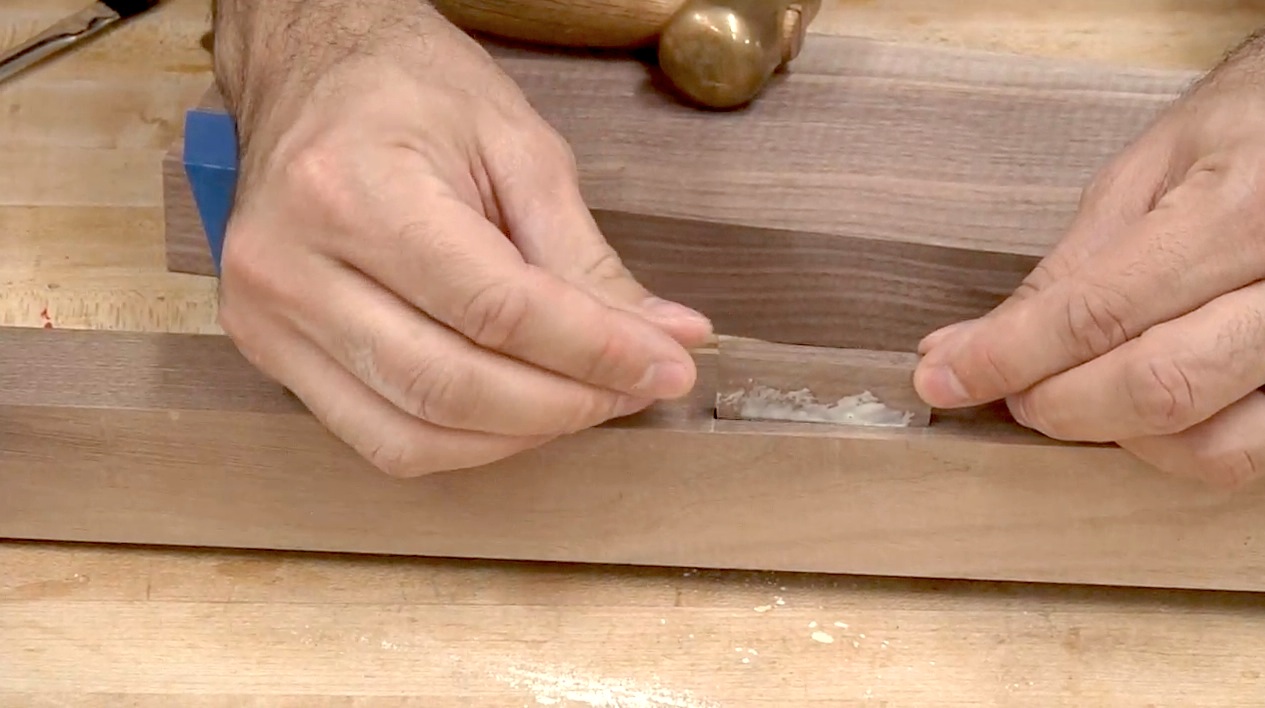 A mortise is nothing more than a big hole, so filling it with wood is usually the best and most reliable fix. Be sure to orient the grain so that the repair is in line with the grain of the workpiece. This provides the best visual match and in many cases makes the repair all but invisible. Cut the repair piece a little bit longer than the size of the hole and use sandpaper to create a slight taper at each end. This ensures a nice tight fit at each end where the repair is likely to be most visible.
Repairing Chipout with Recovered Piece
 On occasion, fortune smiles upon you and a chipped out piece of wood is recovered. This is a good thing since the piece will most likely nest right back into position without any visible gaps. So all you need to do is use a little CA glue and re-attach the piece. Once the glue cures, sand the area thoroughly and you should have a nearly flawless fix.
Repairing Chipout with a Patch
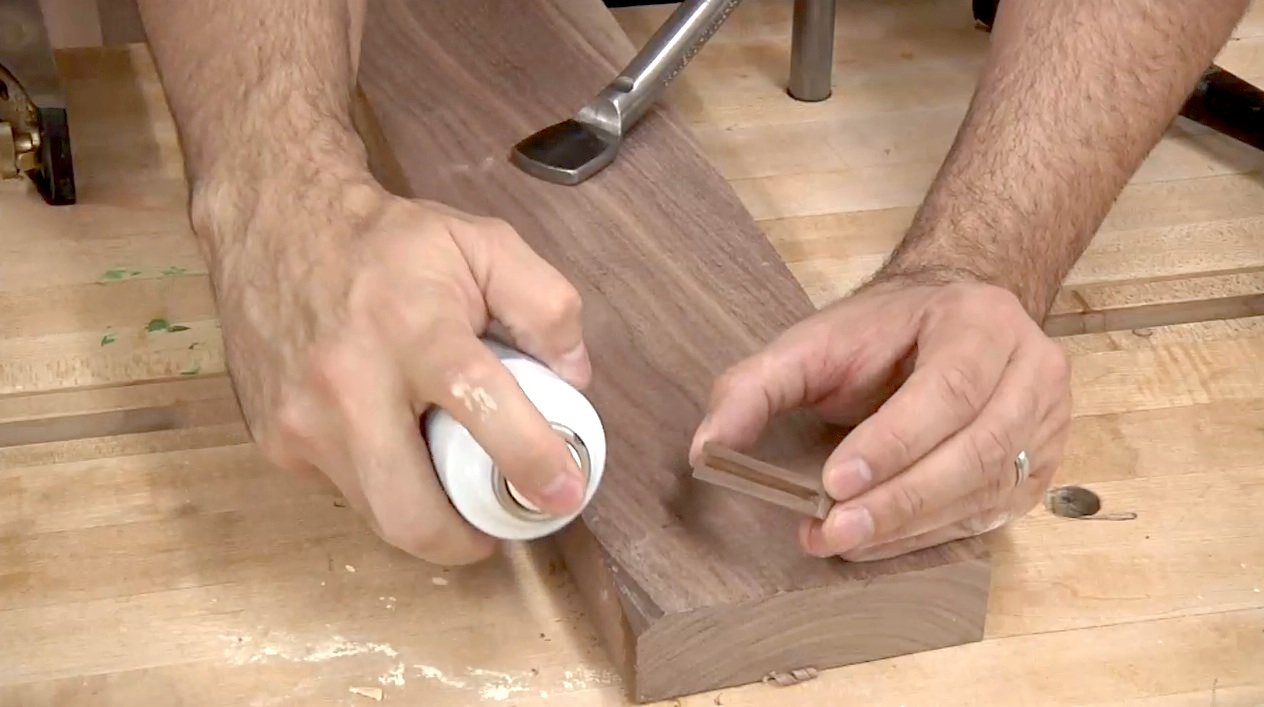 When you can’t find the chipped out piece (or it has been disintegrated by the Woodworking Gods) and you don’t want to use filler, a patch is often the most appropriate course of action. Since chipout/tearout is never a pretty sight, you’ll need to work the affected area with a plan or chisel to create a flat area for the repair. This is one case where you actually need to make the flaw bigger for the greater good. Once a nice flat area is established, simply glue in a small scrap of wood using CA glue. Plane, saw, scrape, or chisel away the excess stock and sand smooth.
Steaming Dents & Scratches
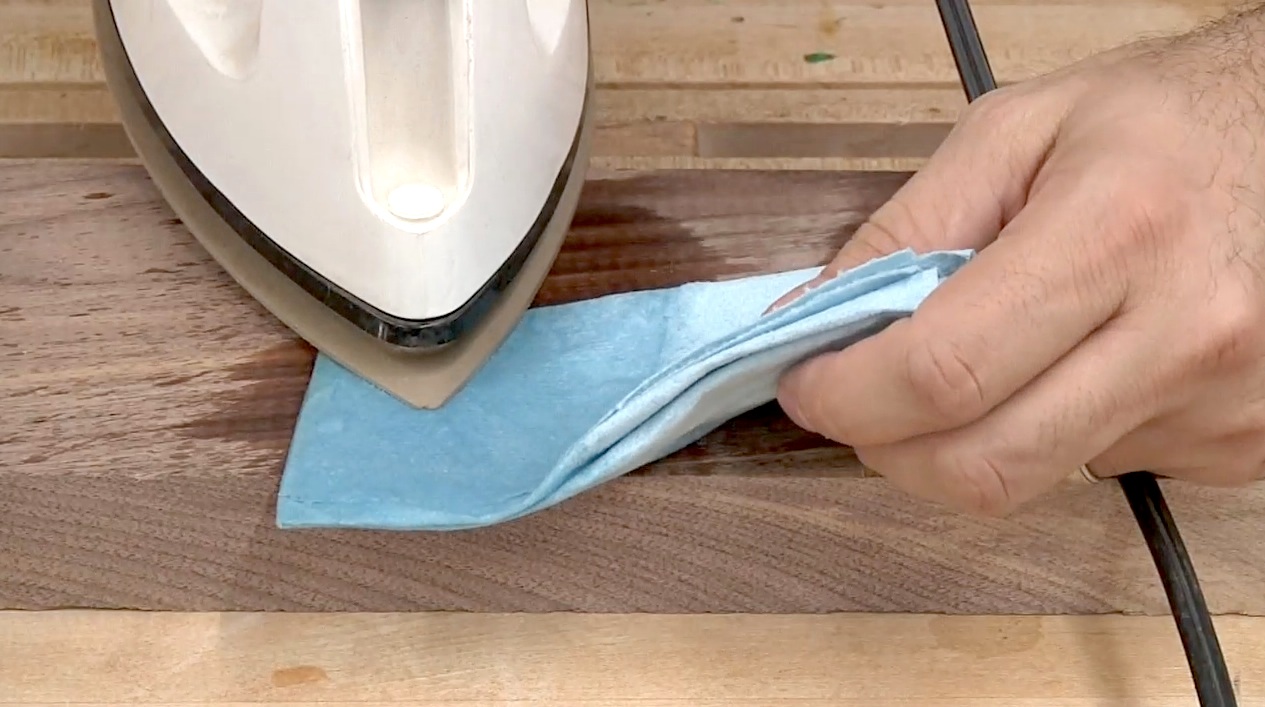 Blunt force trauma is a common occurrence in the wood shop. Whether you drop a workpiece on the floor or something drops onto the workpiece, you’ll often be confronted with dents that are too deep to just sand away. Fortunately, dents are nothing more than aggressively compressed fibers. Since wood fibers expand with moisture, we can steam the dents using a wet towel and a household clothes iron. With a few seconds of treatment, the wood fibers expand to fill the dented areas. Of course this will only work on shallow dents but it can still be used to lessen the impact of deeper dents. The same theory applies to scratches in solid wood and plywood.
Products Used


